How do I configure my personal blacklist/whitelist?
With a blacklist or whitelist, you can specify how incoming emails from certain senders or domains are handled.
- Whitelist: Emails from these senders are preferentially allowed.
- Blacklist: Emails from these senders are blocked or filtered more strictly.
Table of Contents
Manage blacklist and whitelist in CloudPit
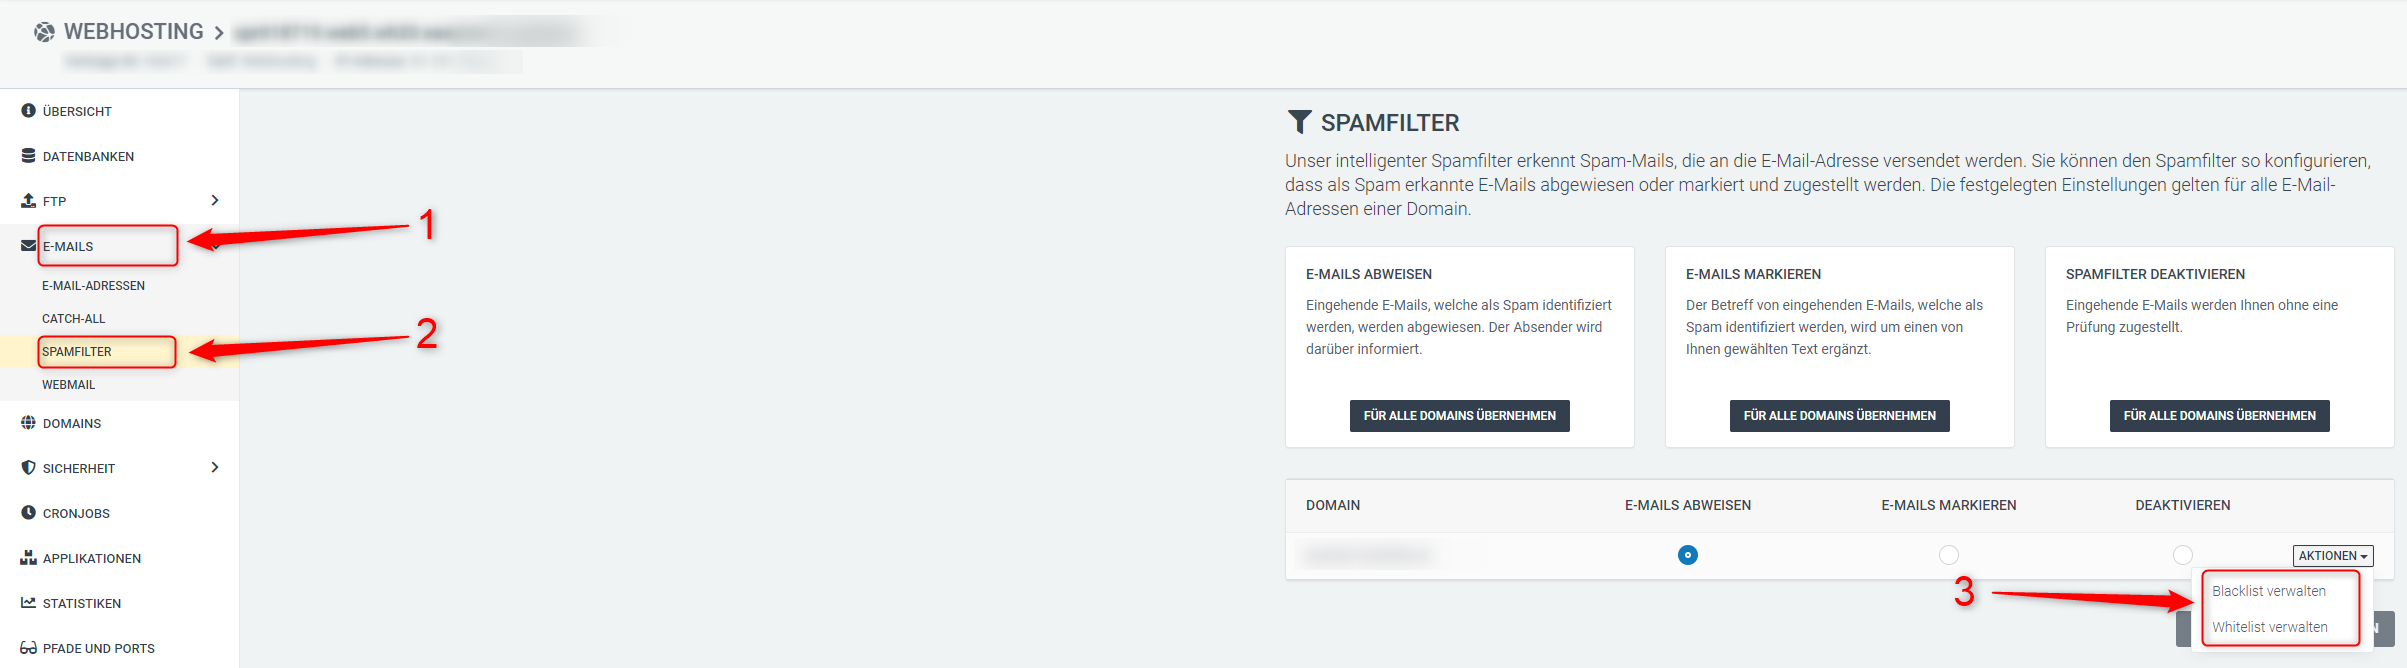
Log in to the CloudPit and open the desired web hosting package.
On the left, open the Email section and then Spam Filter.
There you will see all domains that use the easyname mail server.
Click on Actions for the desired domain to manage the blacklist or whitelist.
Enter either a single email address or an entire domain.
For an entire domain, use the following format:
*@easyname.com
This rule then applies to all email addresses of that domain.
Manage blacklist and whitelist in Controlpanel
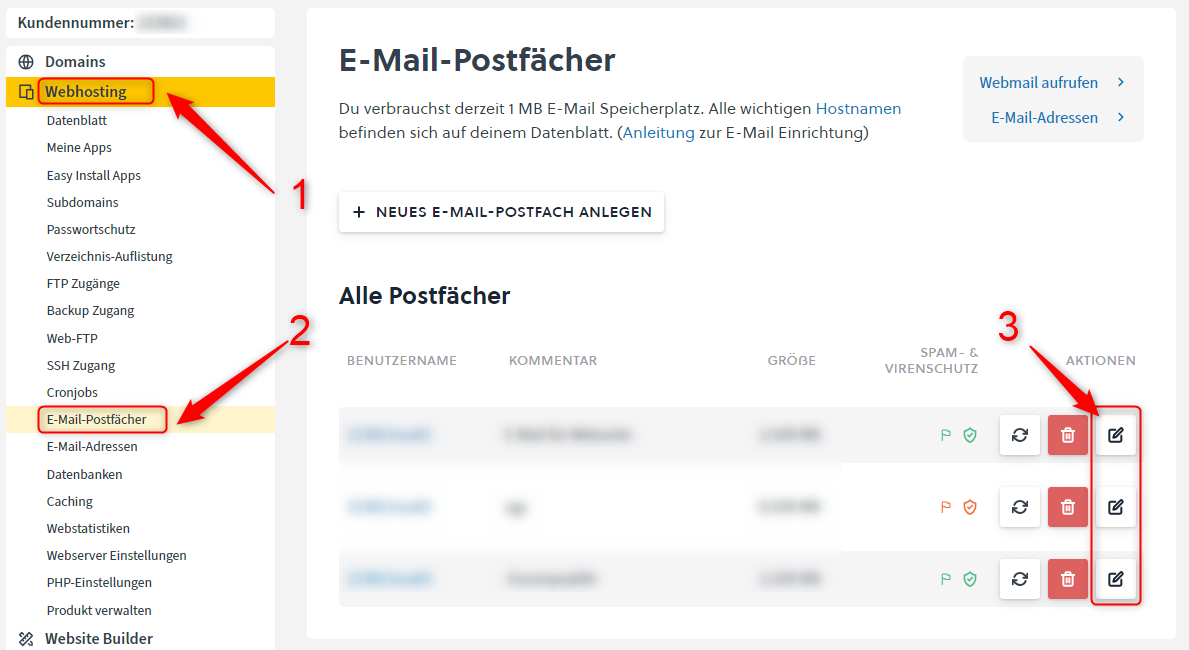
Log in to the Controlpanel and open Web Hosting → Email Mailboxes.
Click Manage on the desired mailbox.
Open the tab Black- and Whitelist.
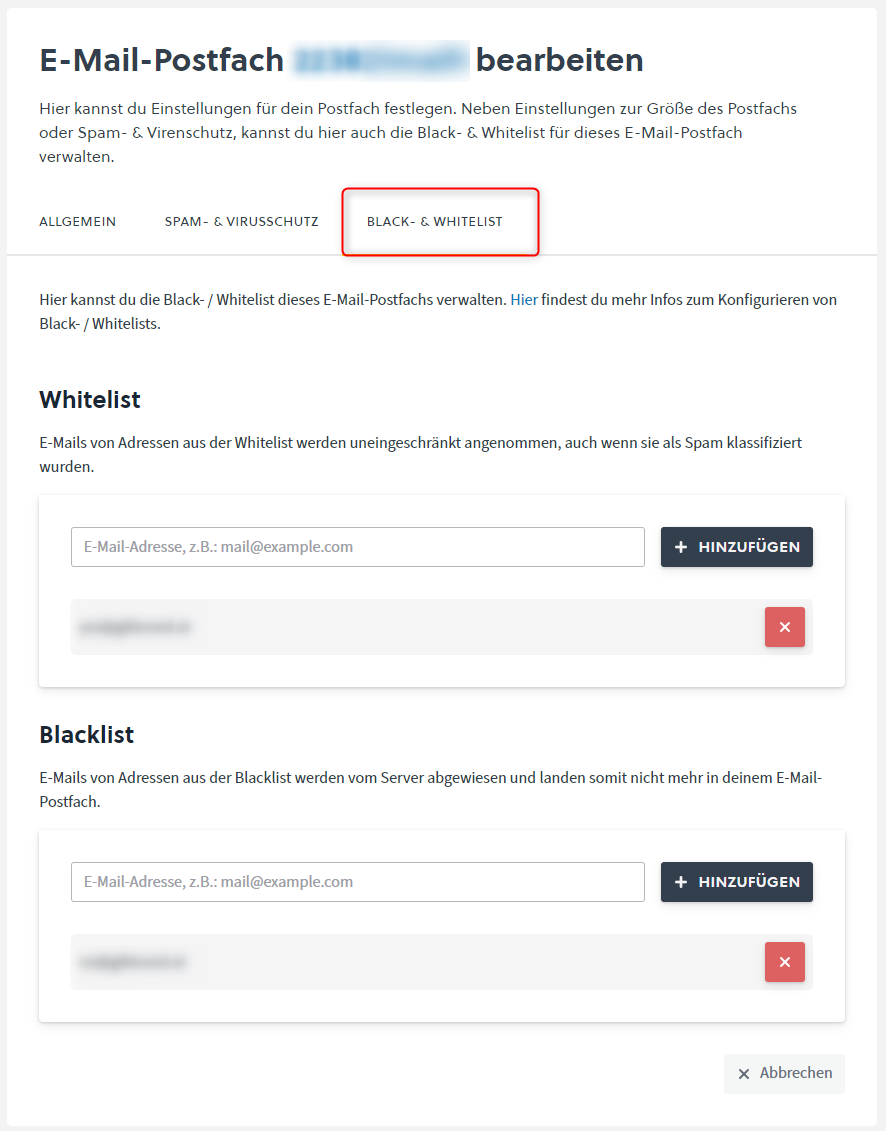
Enter either a single email address or an entire domain.
For an entire domain, use the following format:
*@easyname.com
This rule then applies to all email addresses of that domain.