Change Mailbox Size
You can adjust the size of your email mailbox at any time. This is useful if your mailbox is almost full or if you permanently need more storage space for your emails.
Table of Contents
Change Mailbox Size in CloudPit
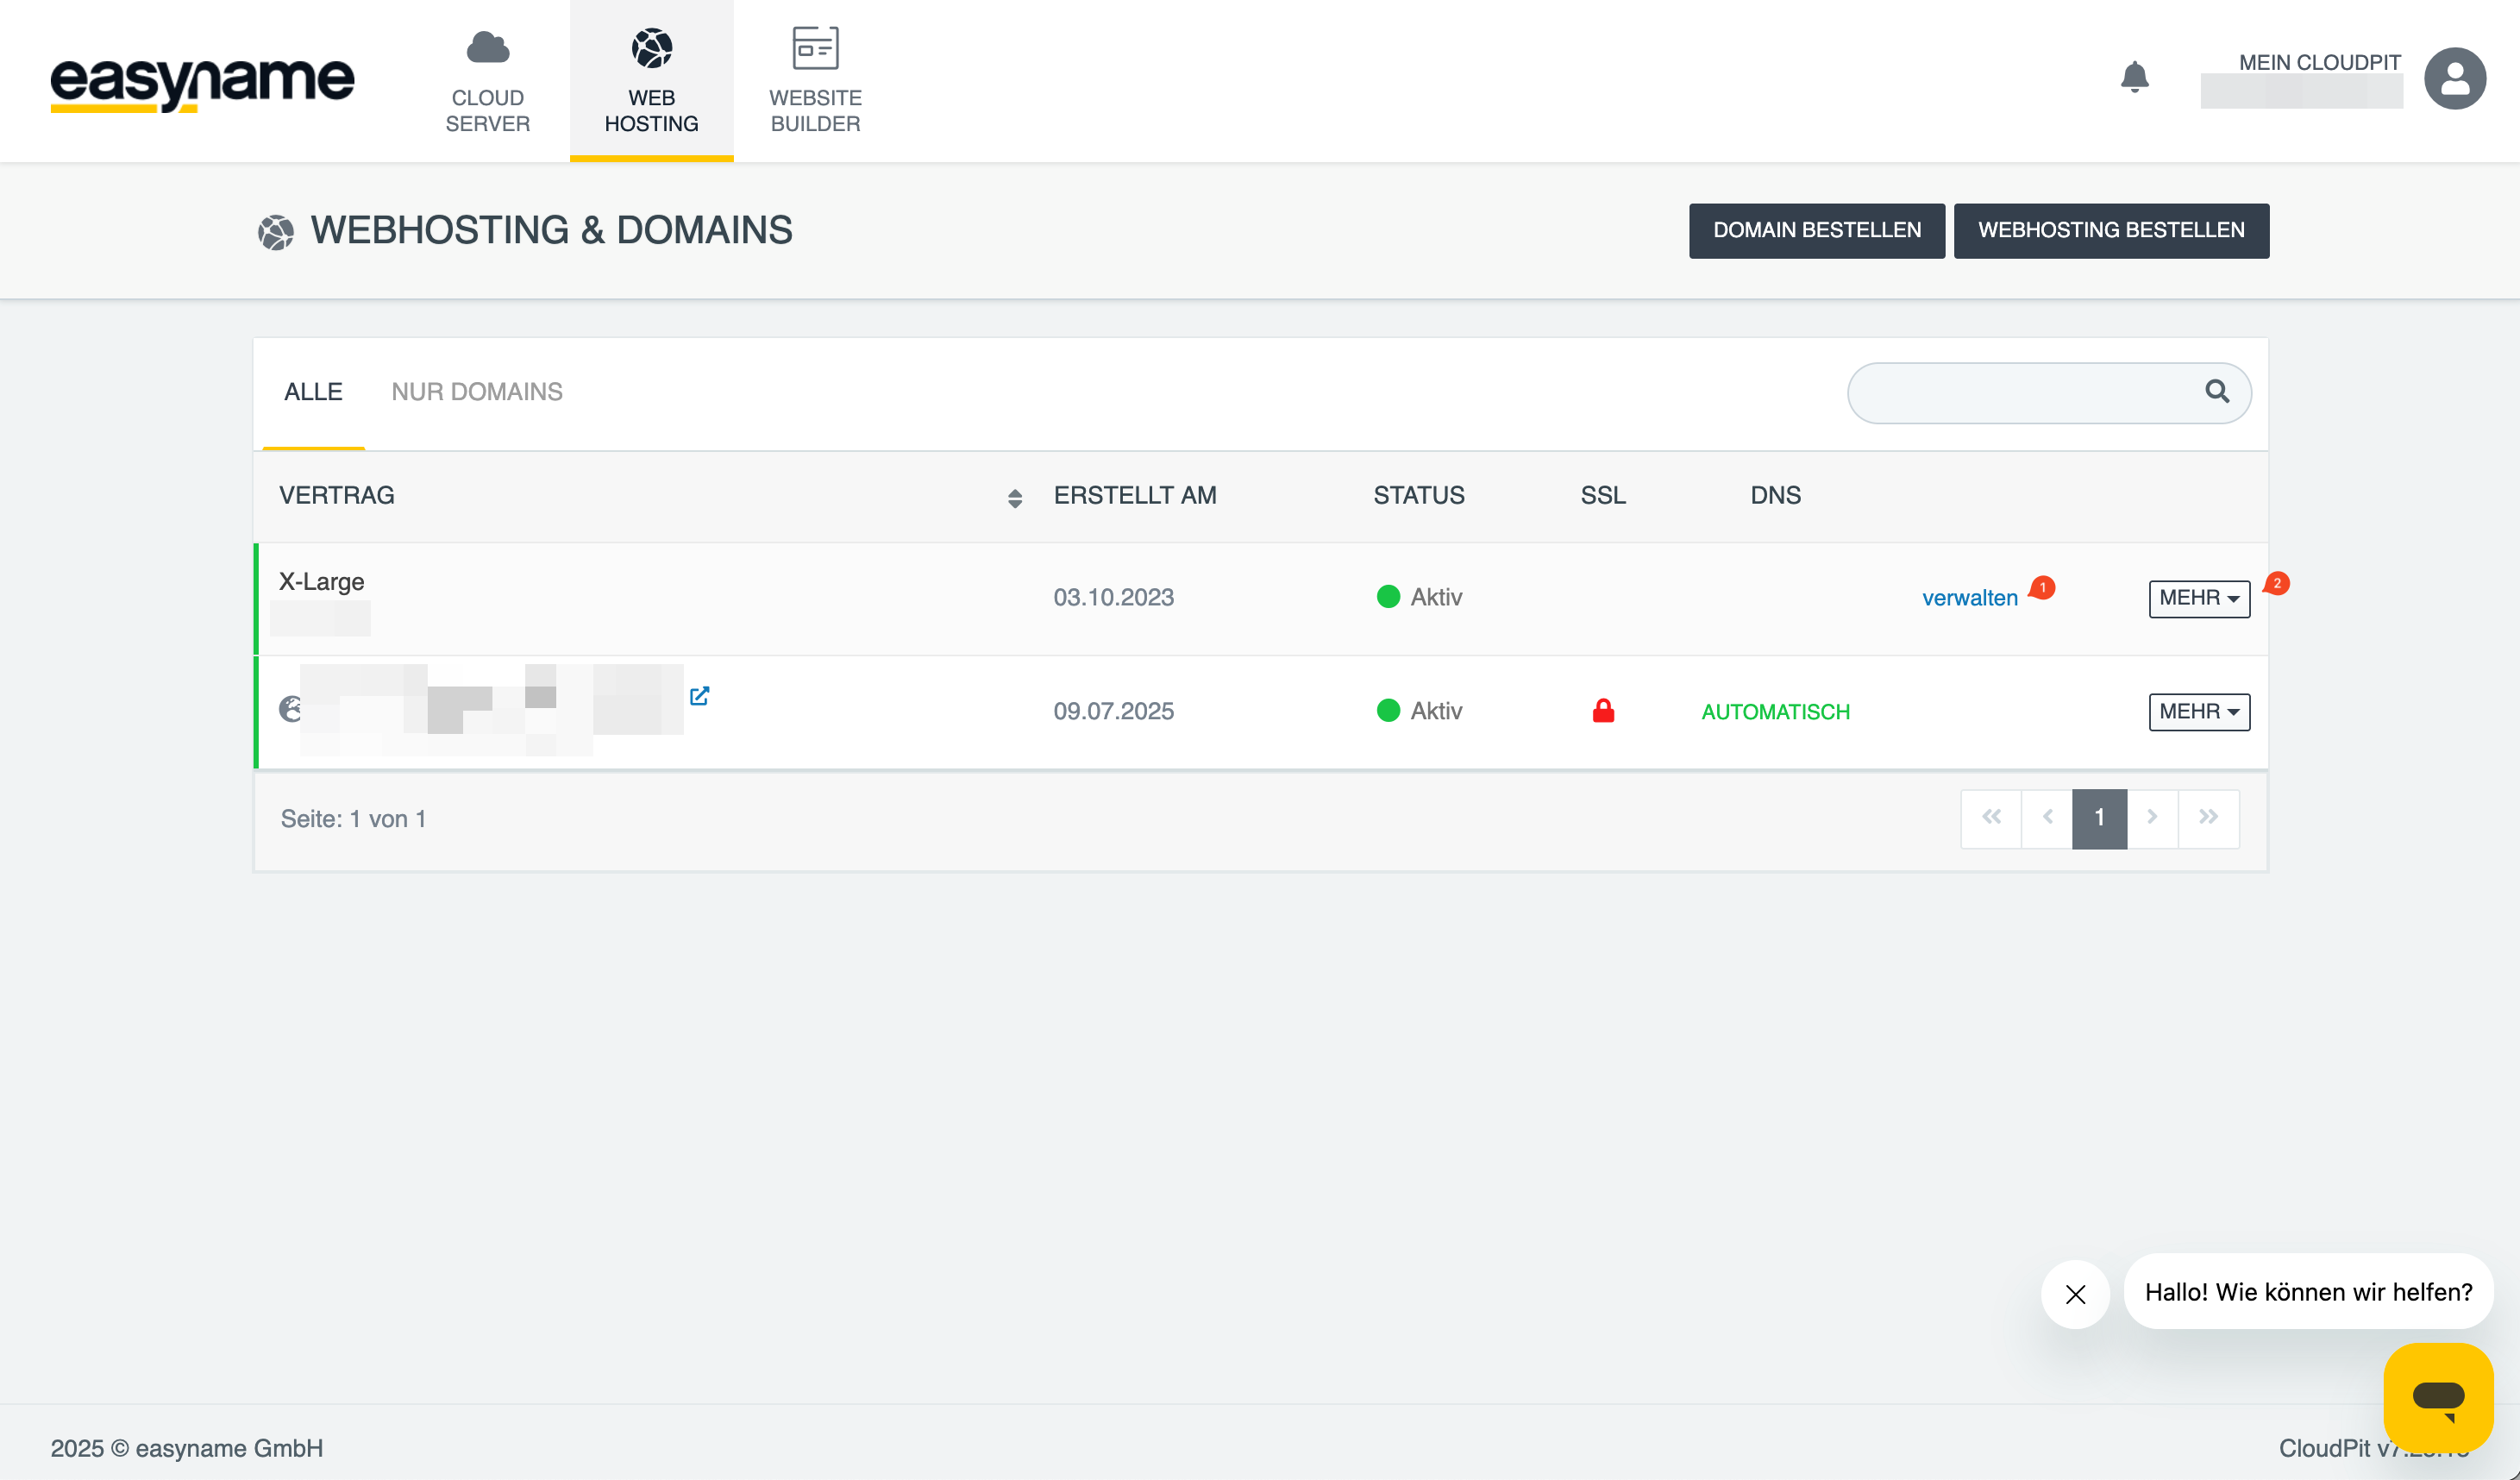
Log in to CloudPit. Select the desired web hosting package and click on Manage (1).
Alternatively, you can switch to the web hosting management via MORE (2) → Open Management.
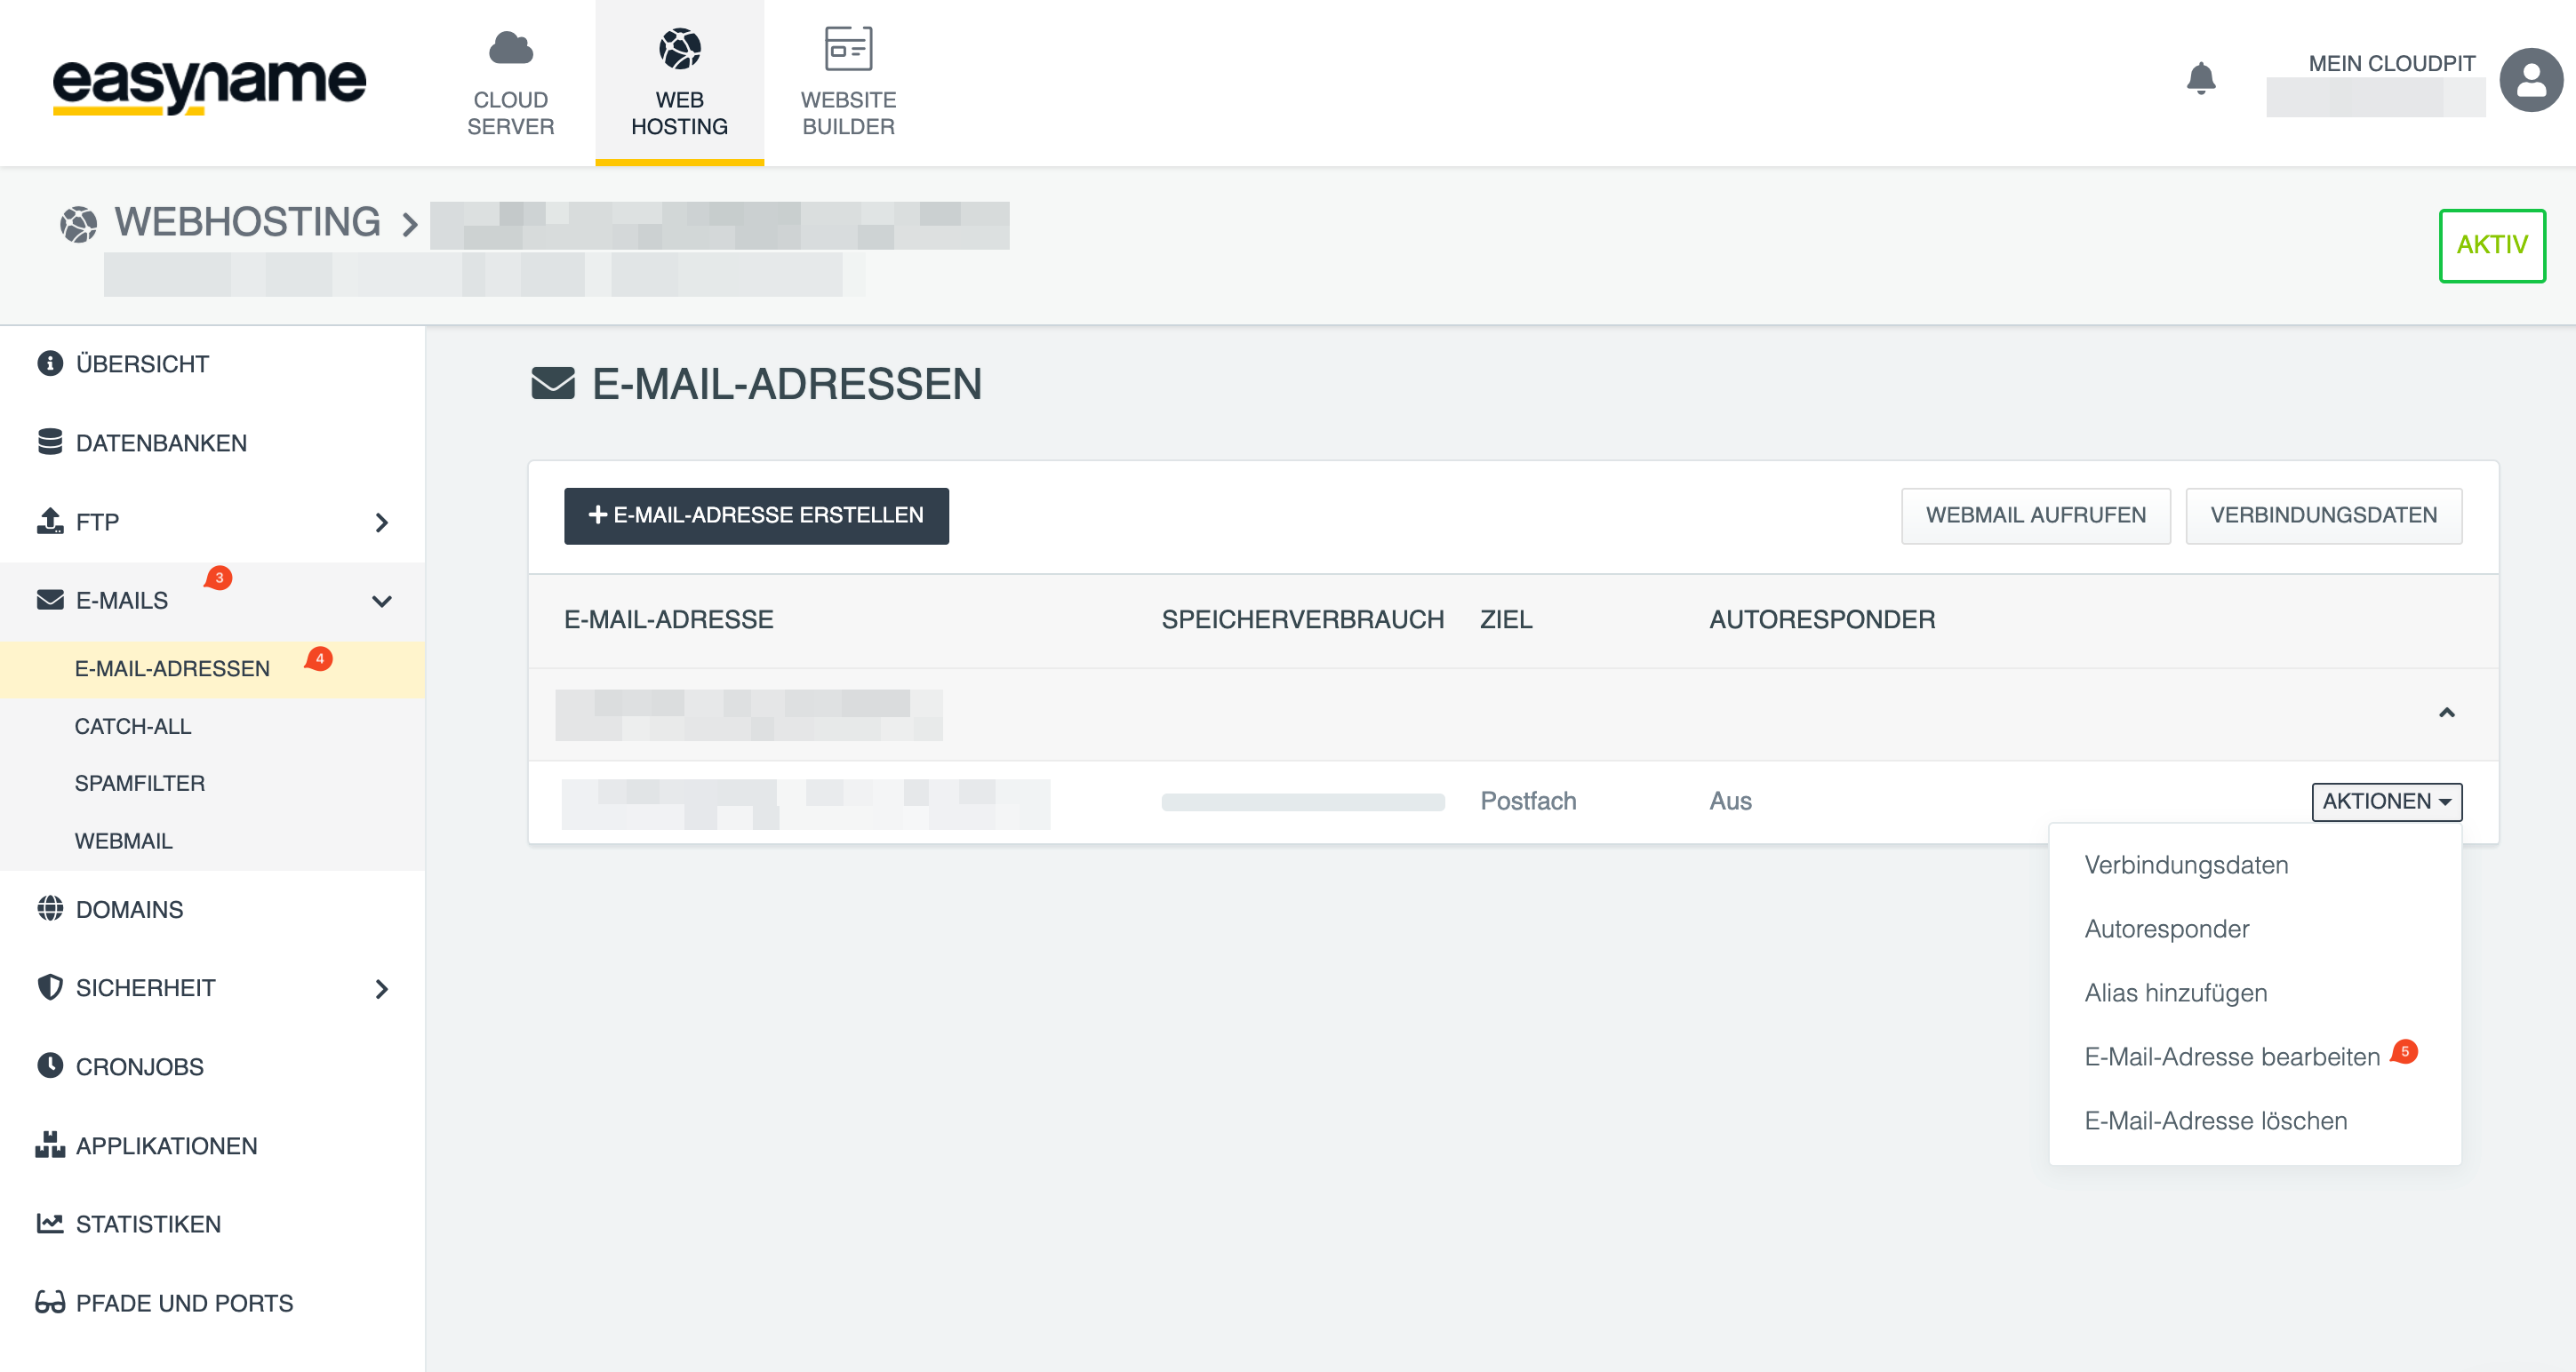
Open Emails (3) → Email Addresses (4) in the left menu.
Click on Edit Email Address (5) for the desired email address.
Change the desired mailbox size in the Email Storage Space section.
Save the change.
Change Mailbox Size in Controlpanel
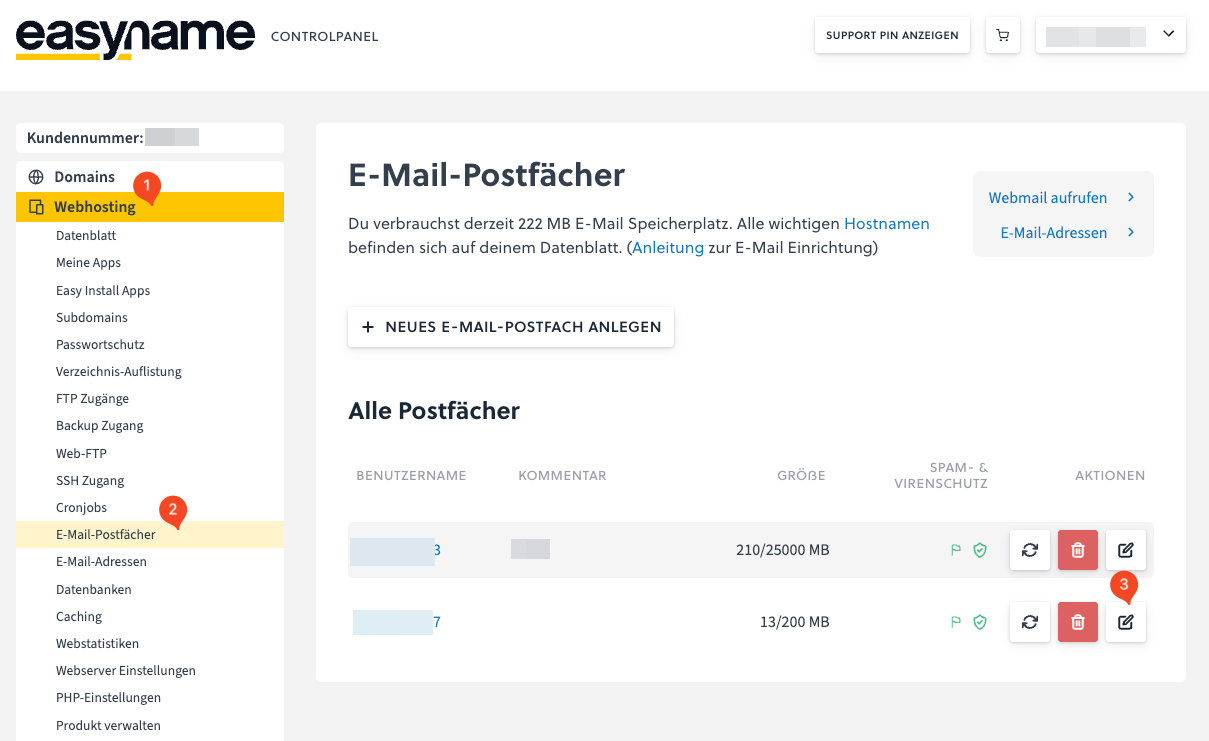
Log in to the Controlpanel and open Web Hosting (1).
Then select Email Mailboxes (2).
Click on Edit Email Mailbox (3) for the desired mailbox.
Change the desired mailbox size in the Mailbox Size section.
Save the change.
Important Notes
- The maximum mailbox size depends on the web hosting package you have booked.
- If your mailbox is already full, new emails may not be delivered.
- When your mailbox is full, also delete old messages from the Trash and Spam folders to actually free up storage space.
- The change in mailbox size may only take effect if sufficient storage space is available in the booked package.