- Change Mailbox Size
- Change the mailbox password in the Controlpanel
- Change the password of your mailbox in Cloudpit
- How can I change the password for my E-Mail Box?
- How can I create a new email address?
- How do Antispam and Antivirus work?
- How to configure my personal black-/whitelist?
- What is a mailbox and how can I manage it?
- email forwarding in Cloudpit
How can I create a new email address?
You want to add a new email address and are not quite sure how? This article describes the process for creating a new email address for both our CloudPit and our legacy Controlpanel.
Table of Contents
1. New email addresses in CloudPit
2. New email addresses in the legacy Controlpanel
0. Requirements
- active web hosting contract
- at least one domain
1. New email addresses in CloudPit
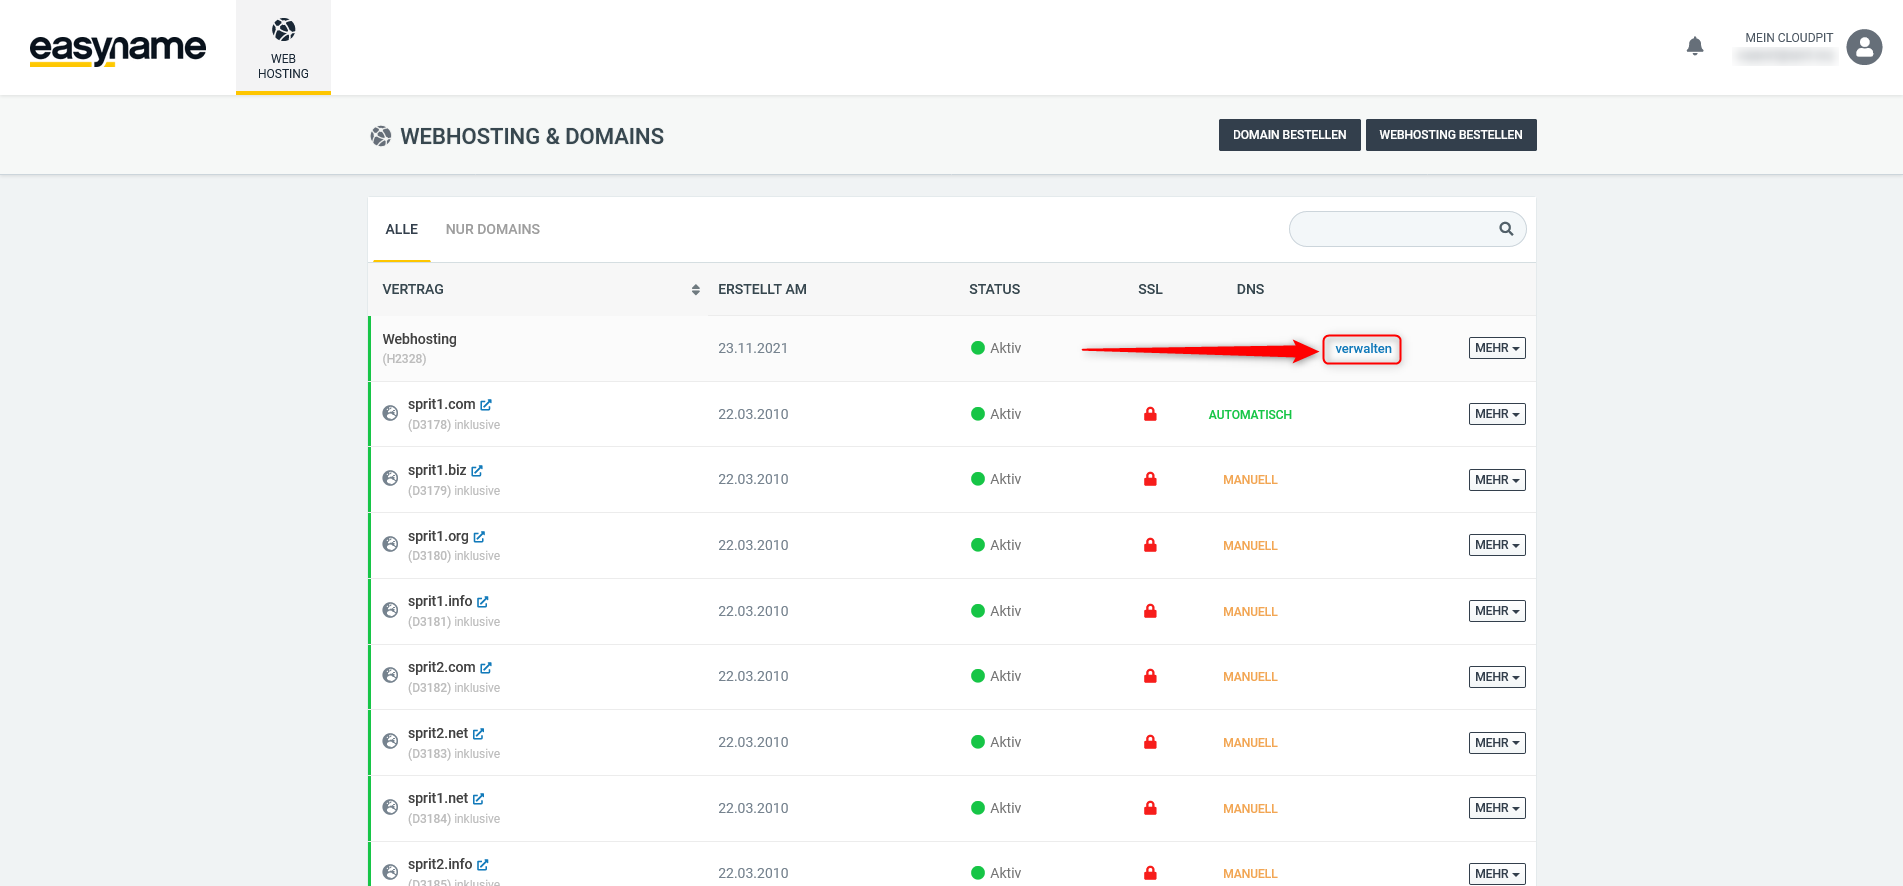
Navigate to the management of your web hosting by clicking on the "manage" link
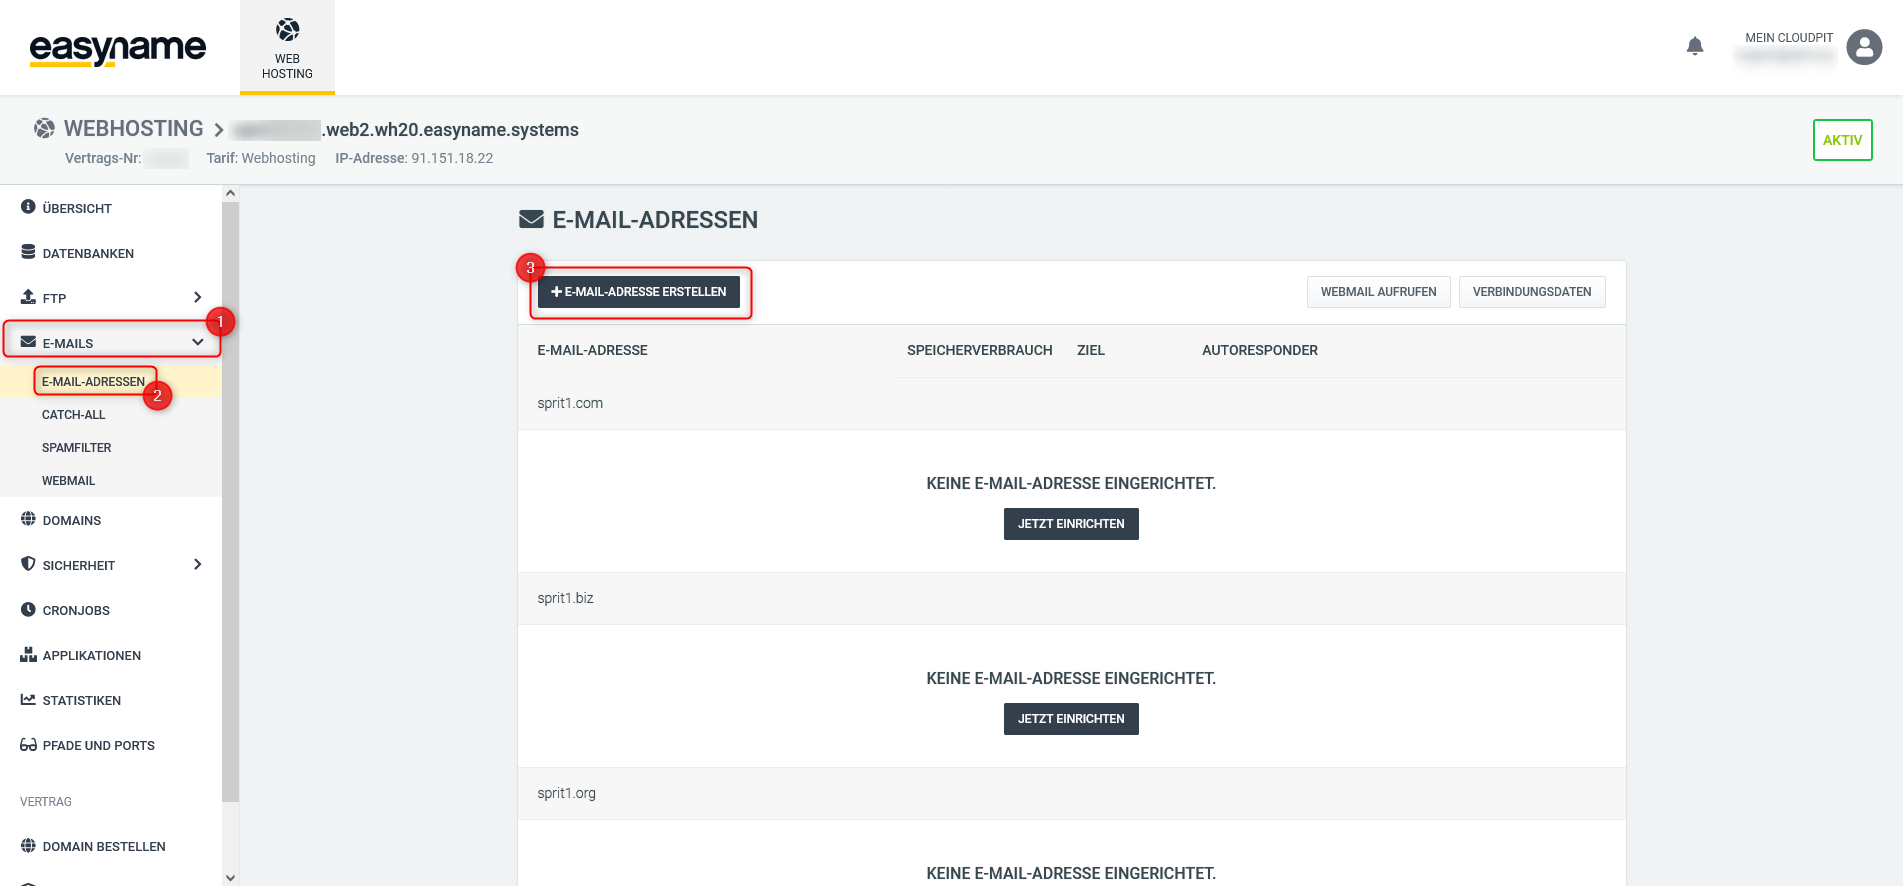
Then click on the left menu on the submenu "Emails", select the menu item "Email Addresses" and click on the button "Create Email Address"
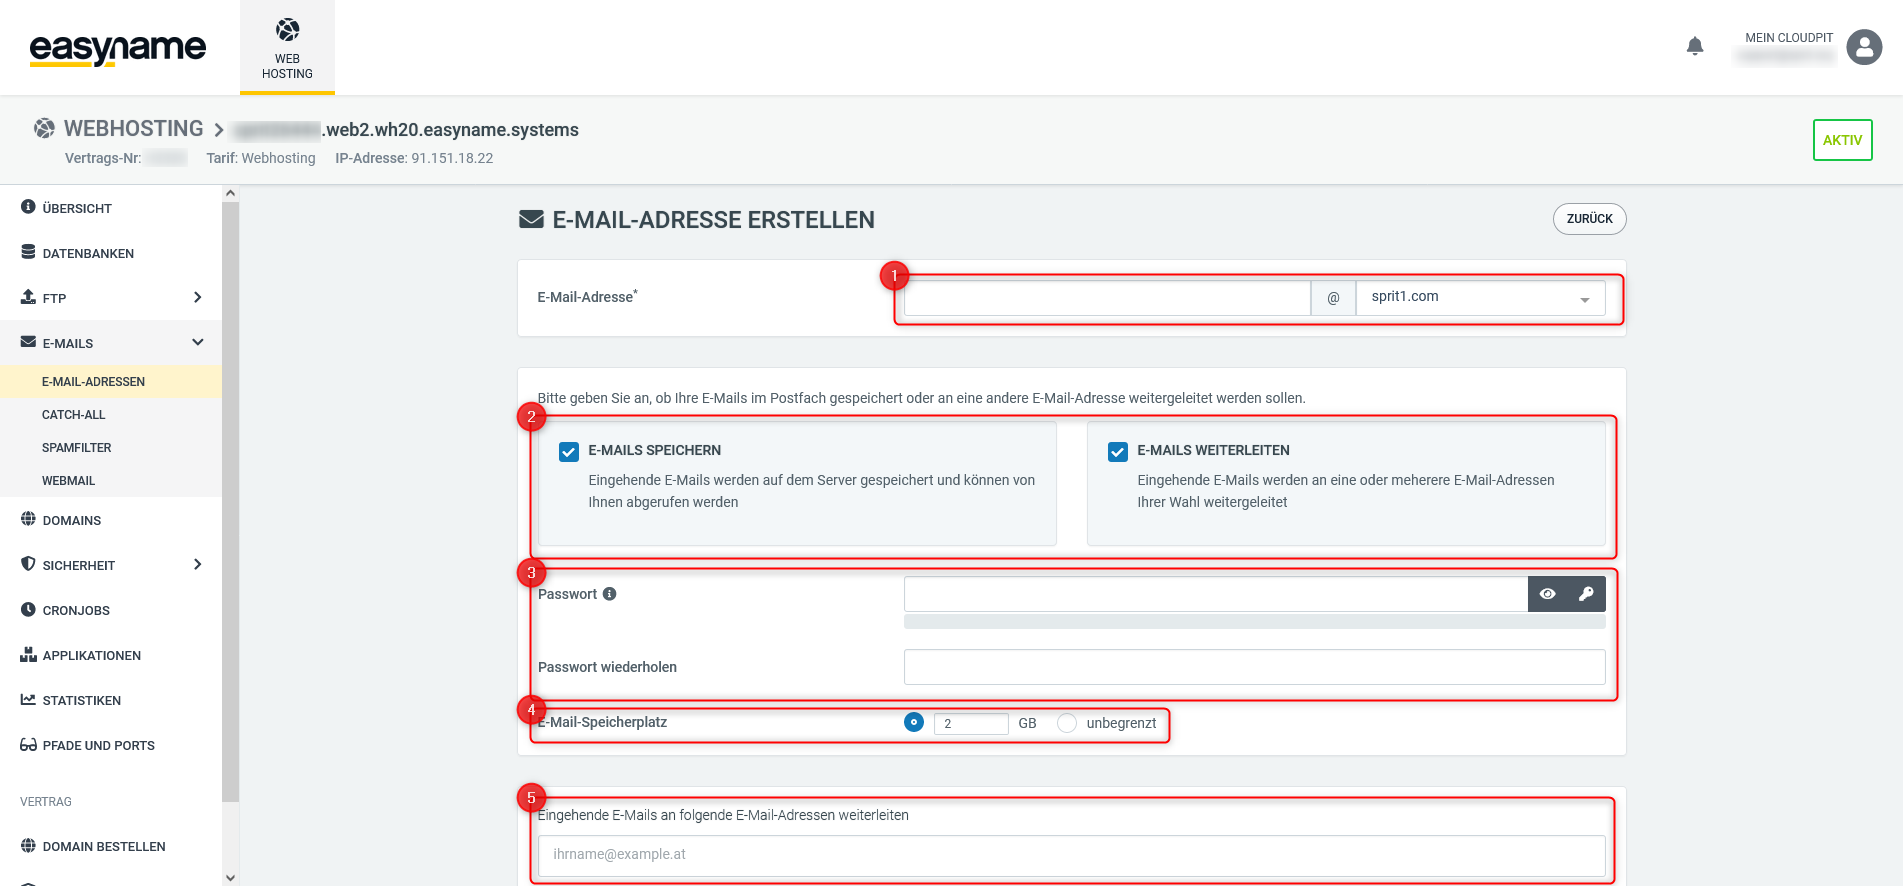
- Enter the email alias and select the associated domain
- Choose whether emails should be stored in a mailbox (for retrieval via webmail or email client) or simply forwarded to your existing email address. It is also possible to perform both actions simultaneously.
- Set a password for login to webmail and retrieval via email client. By clicking on the key symbol, a randomly generated, secure password will be created.
- Define how much storage the respective mailbox may use at most.
- [Only for forwarding] Enter the email address to which the emails should be forwarded.
2. New email addresses in the legacy Controlpanel
The management of your email addresses in the legacy Controlpanel takes place in two different categories: under the menu items [Email Mailbox], where the size of the mailboxes, spam filter, etc. are configured, and [Email Addresses], which can be found directly under the mailboxes in the Controlpanel.
More information about email mailboxes can be found in this FAQ article.
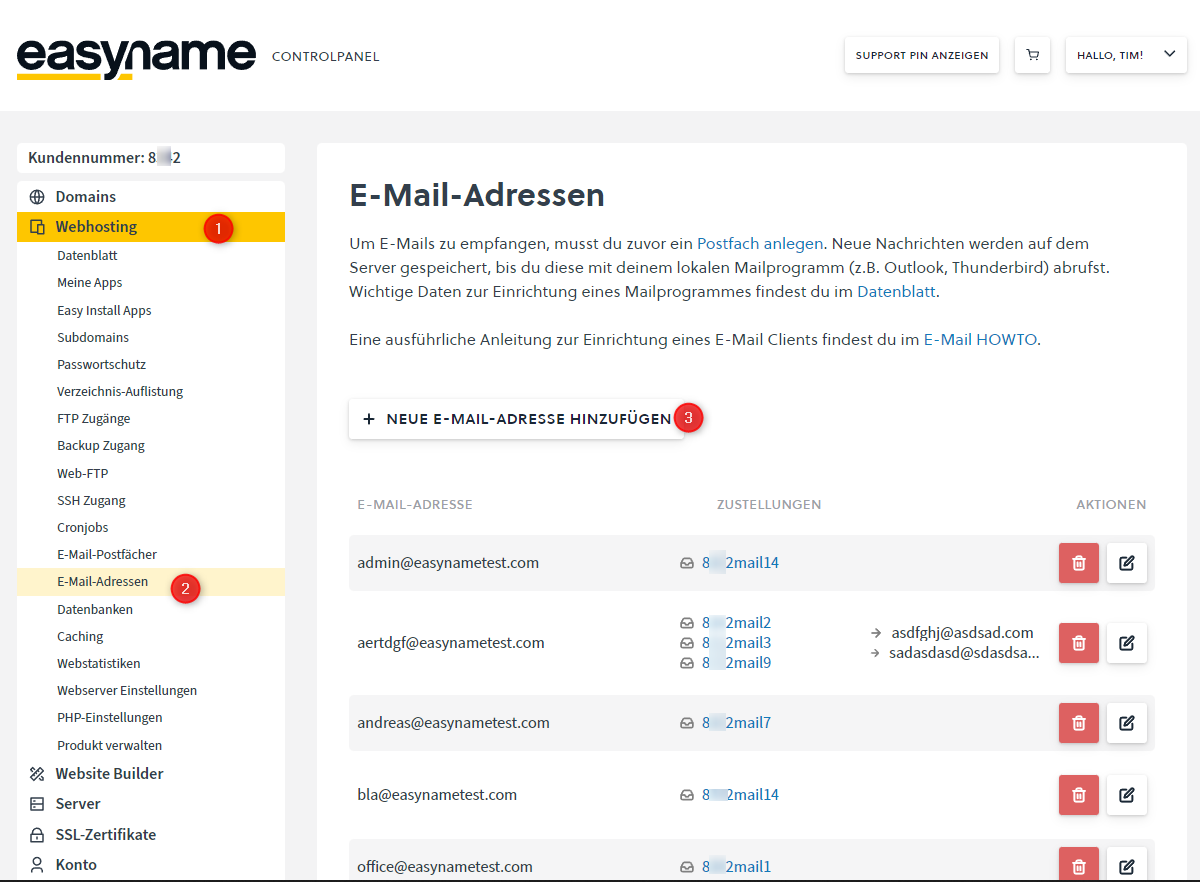
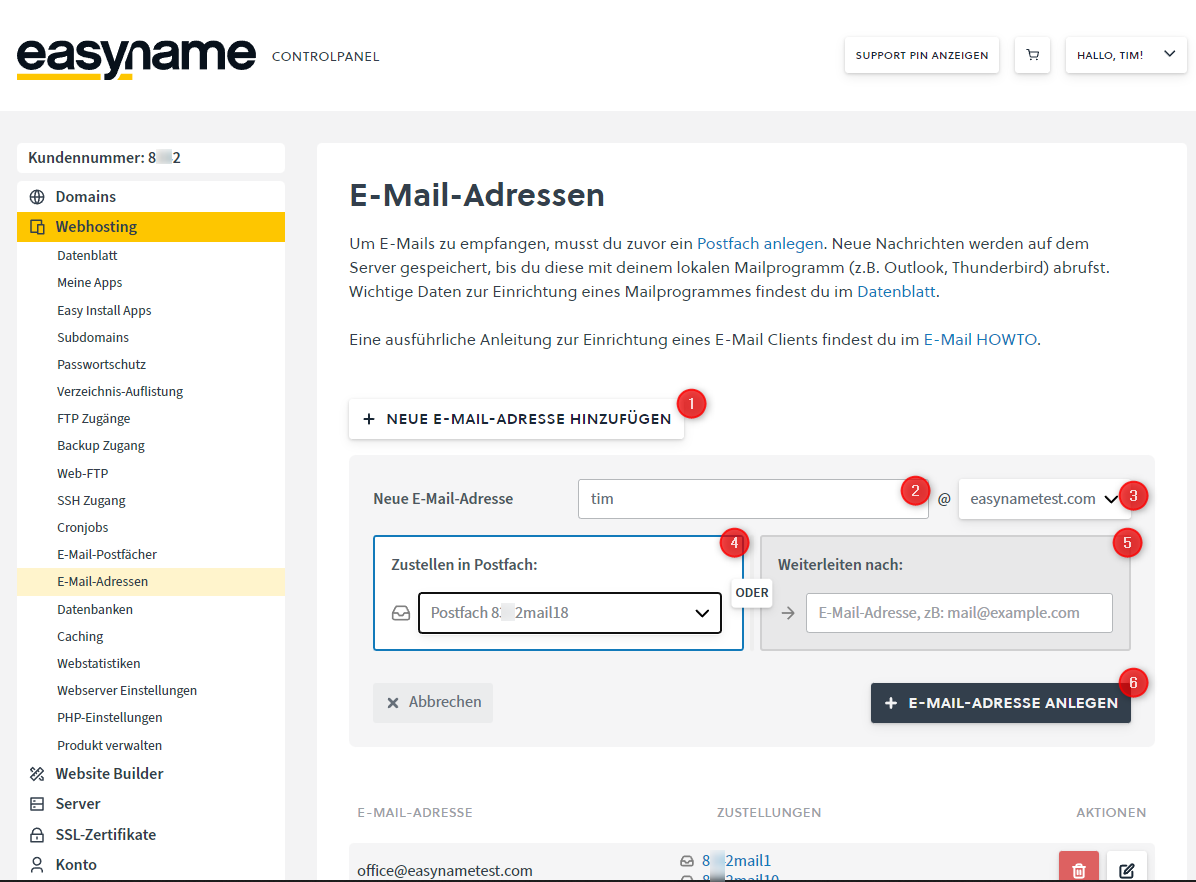
If you want to create a new email address, log into your Controlpanel and click on [Webhosting] (1) and then on [Email Addresses] (2). Then click on [+Add New Email Address] (3) to get more input options.
Enter the desired designation in the Email Address field and then select one of your domains (after the @ symbol). Then you can choose whether the delivery should go into one of your email mailboxes (if available) or if the emails should be forwarded to another email address. After the desired option is set, click on [Add Email Address]. You can add more email mailboxes and email forwards to the created email address.
 You can link any number of email addresses (aliases) to one mailbox or also connect any number of mailboxes with one email address. Here are two examples:
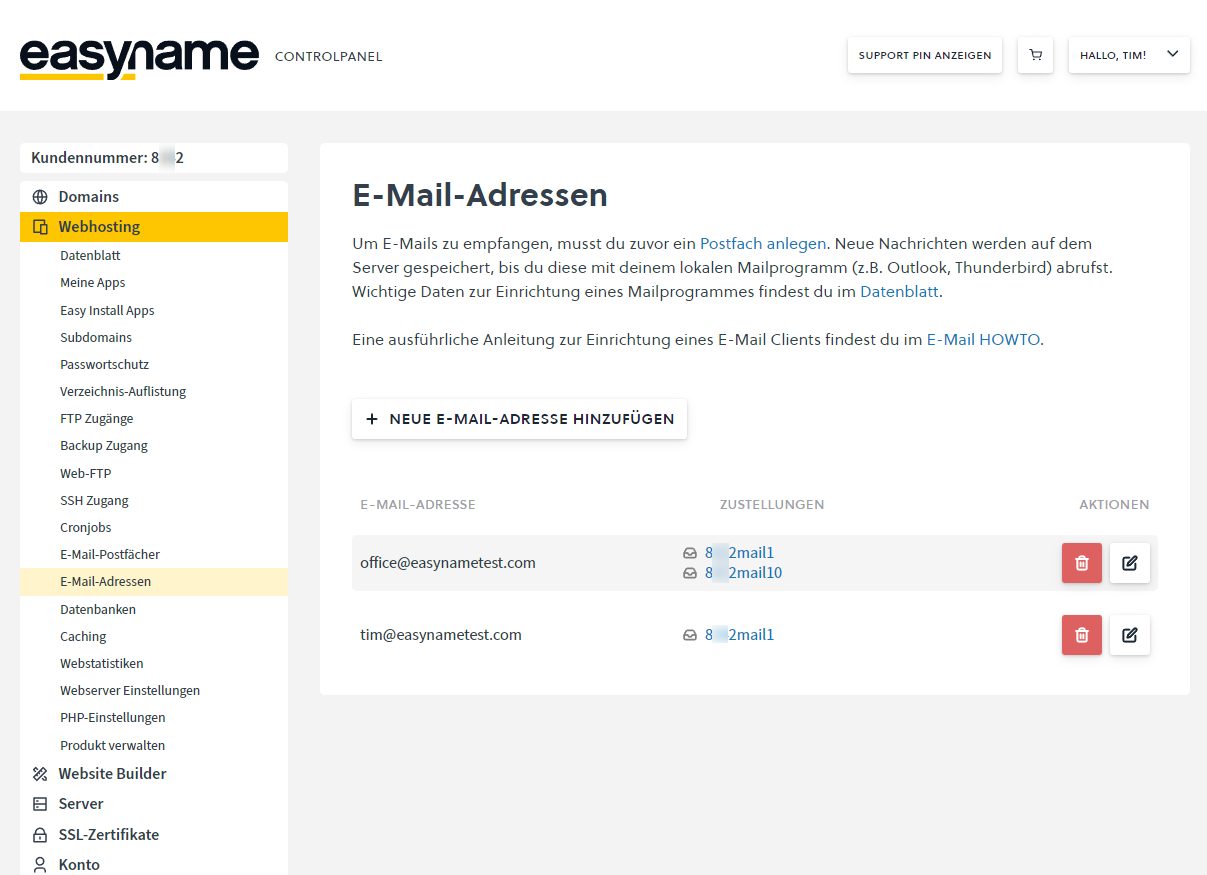 The email address office@easynametest.at is delivered to the mailboxes 8**2mail1 and 8**2mail10. Emails sent to office@easynametest.at are thus received by both users/email mailboxes.
The email address tim@easynametest.at, in turn, only has access to the mailbox 8**2mail1 and cannot read emails delivered to mailbox 8**2mail10.
Please note that an email address can only send via the mailboxes assigned to it. This serves to protect against spoofing, i.e. the impersonation of a foreign identity. You can read more about this at this link: Spoofing on Wikipedia
