Where can I find my backups?
easyname automatically creates backups of your webspace. These backups can be used if you want to restore older versions of your files, databases, or emails.
Table of Contents
Backups in CloudPit
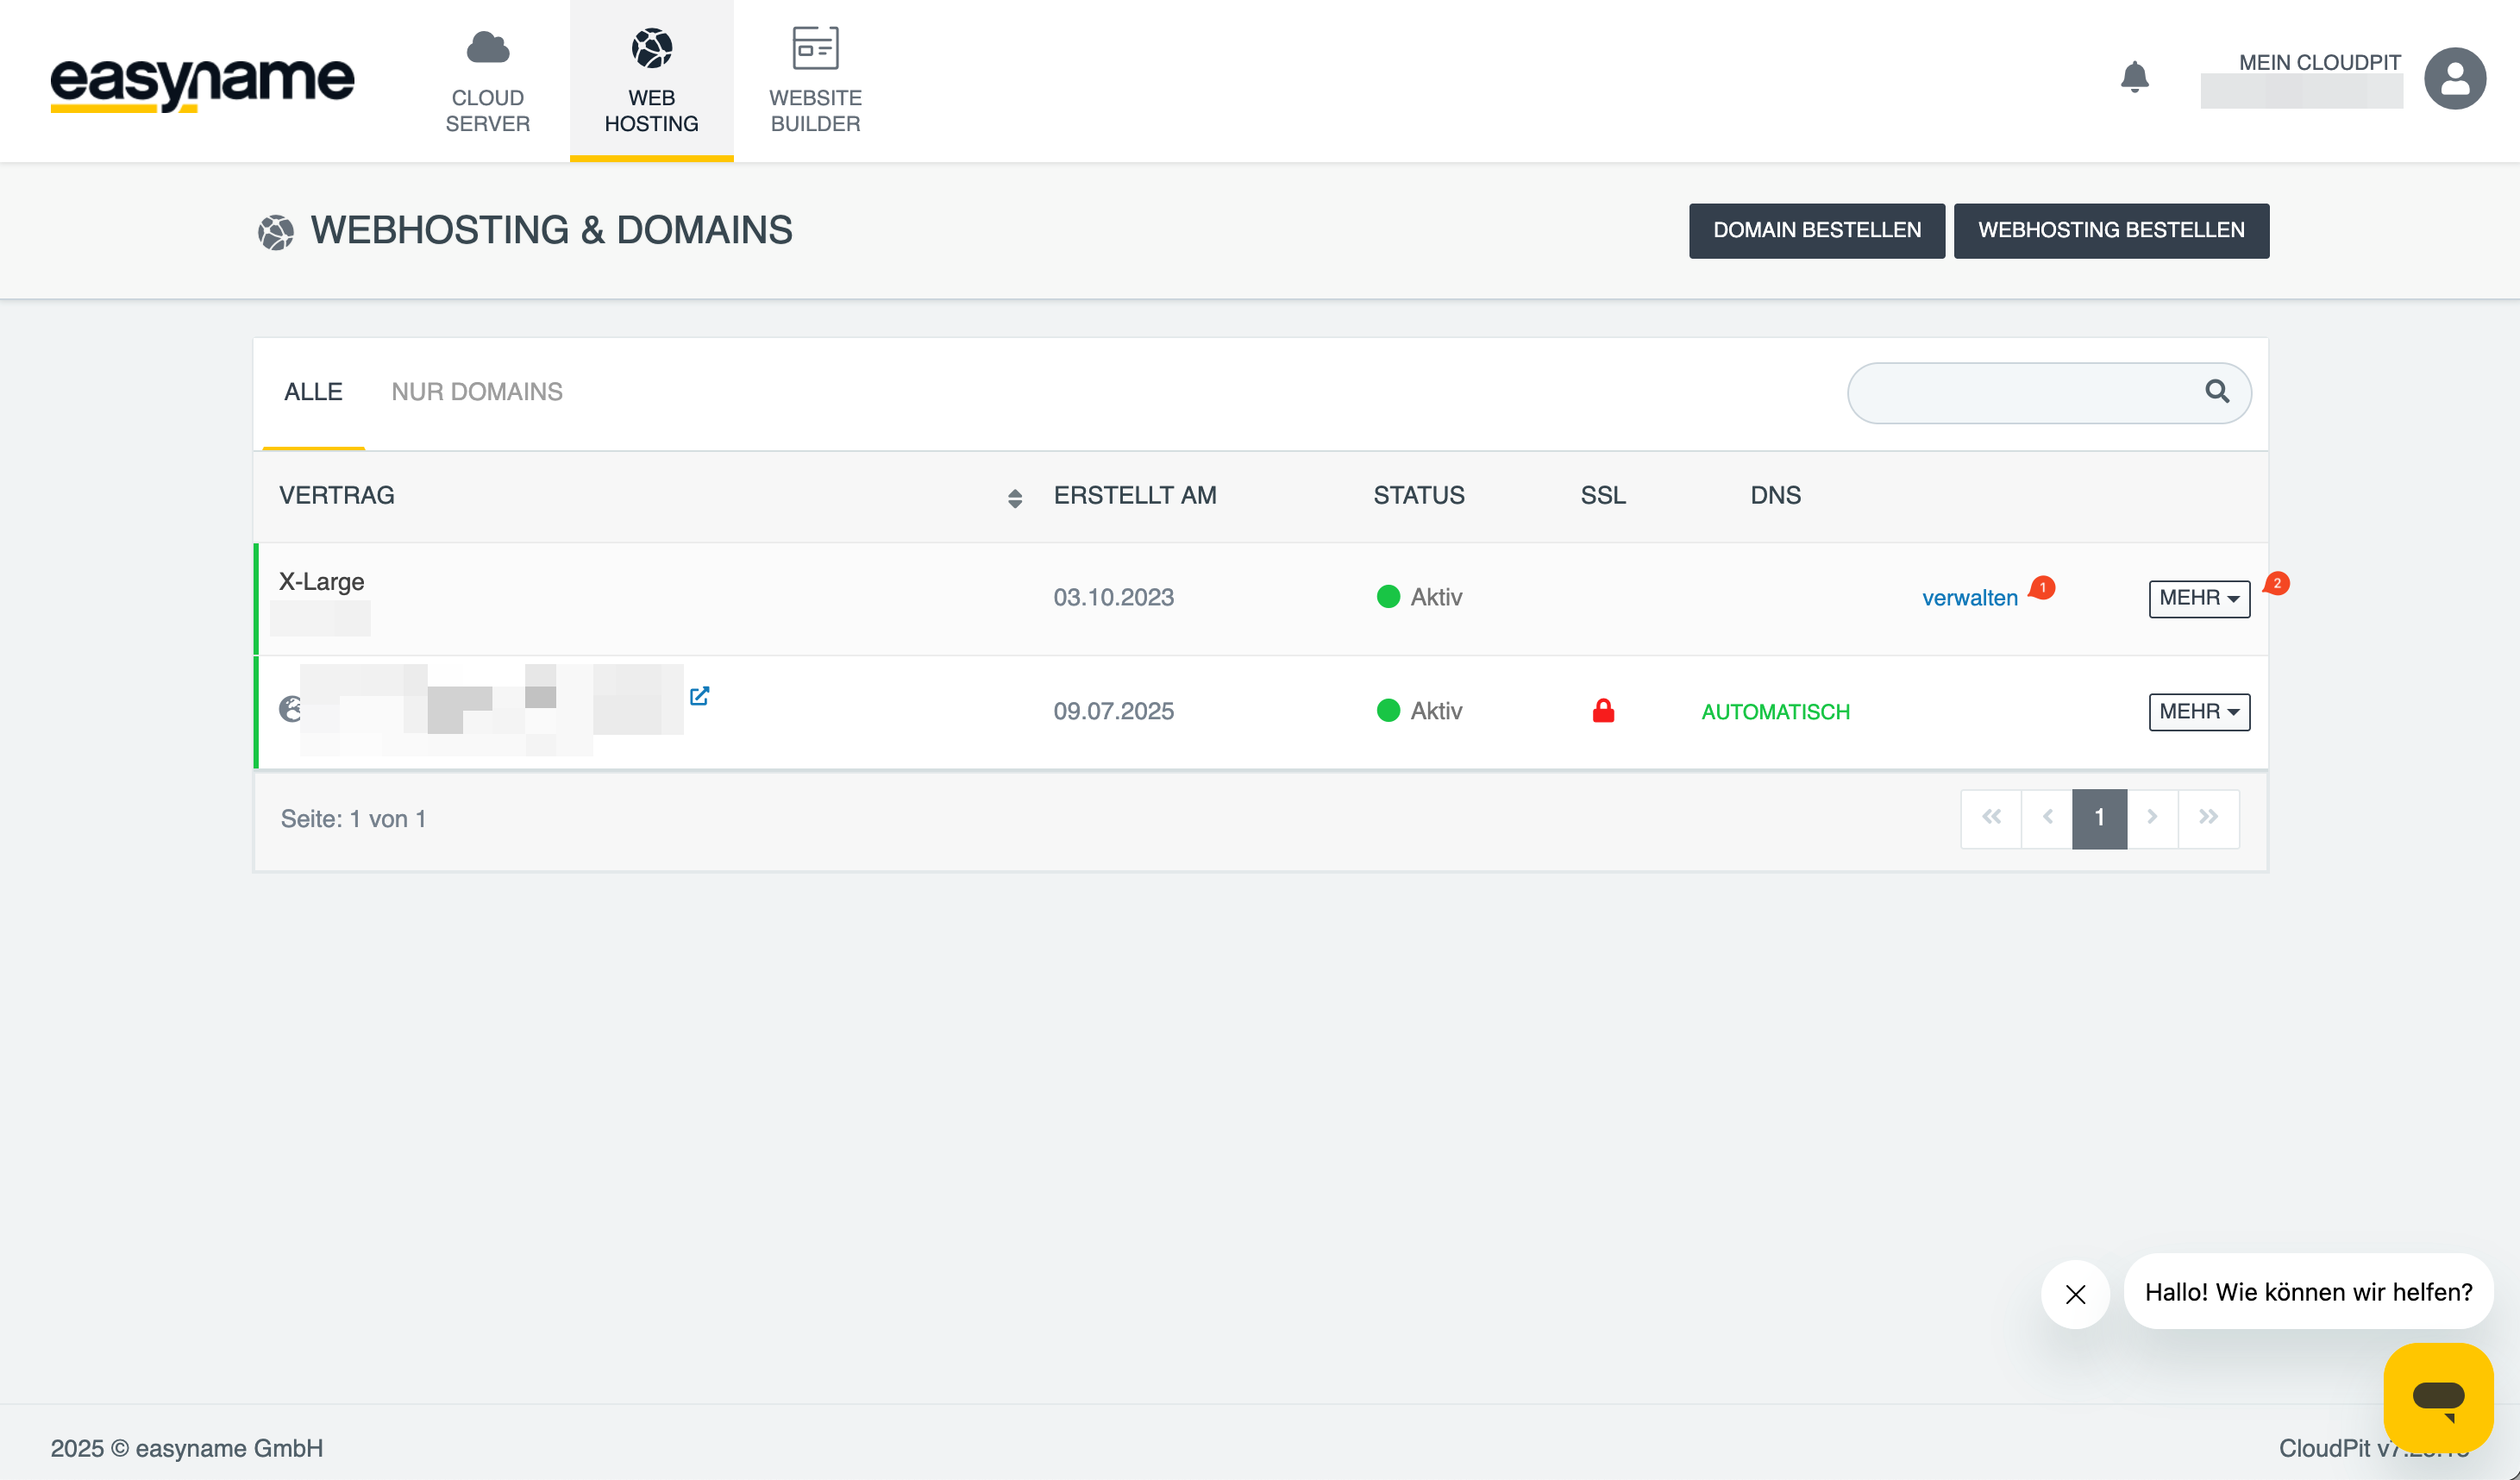
Log in to CloudPit. Select the desired web hosting package and click on Manage (1).
Alternatively, you can switch to the web hosting management via MORE (2) → Open management.
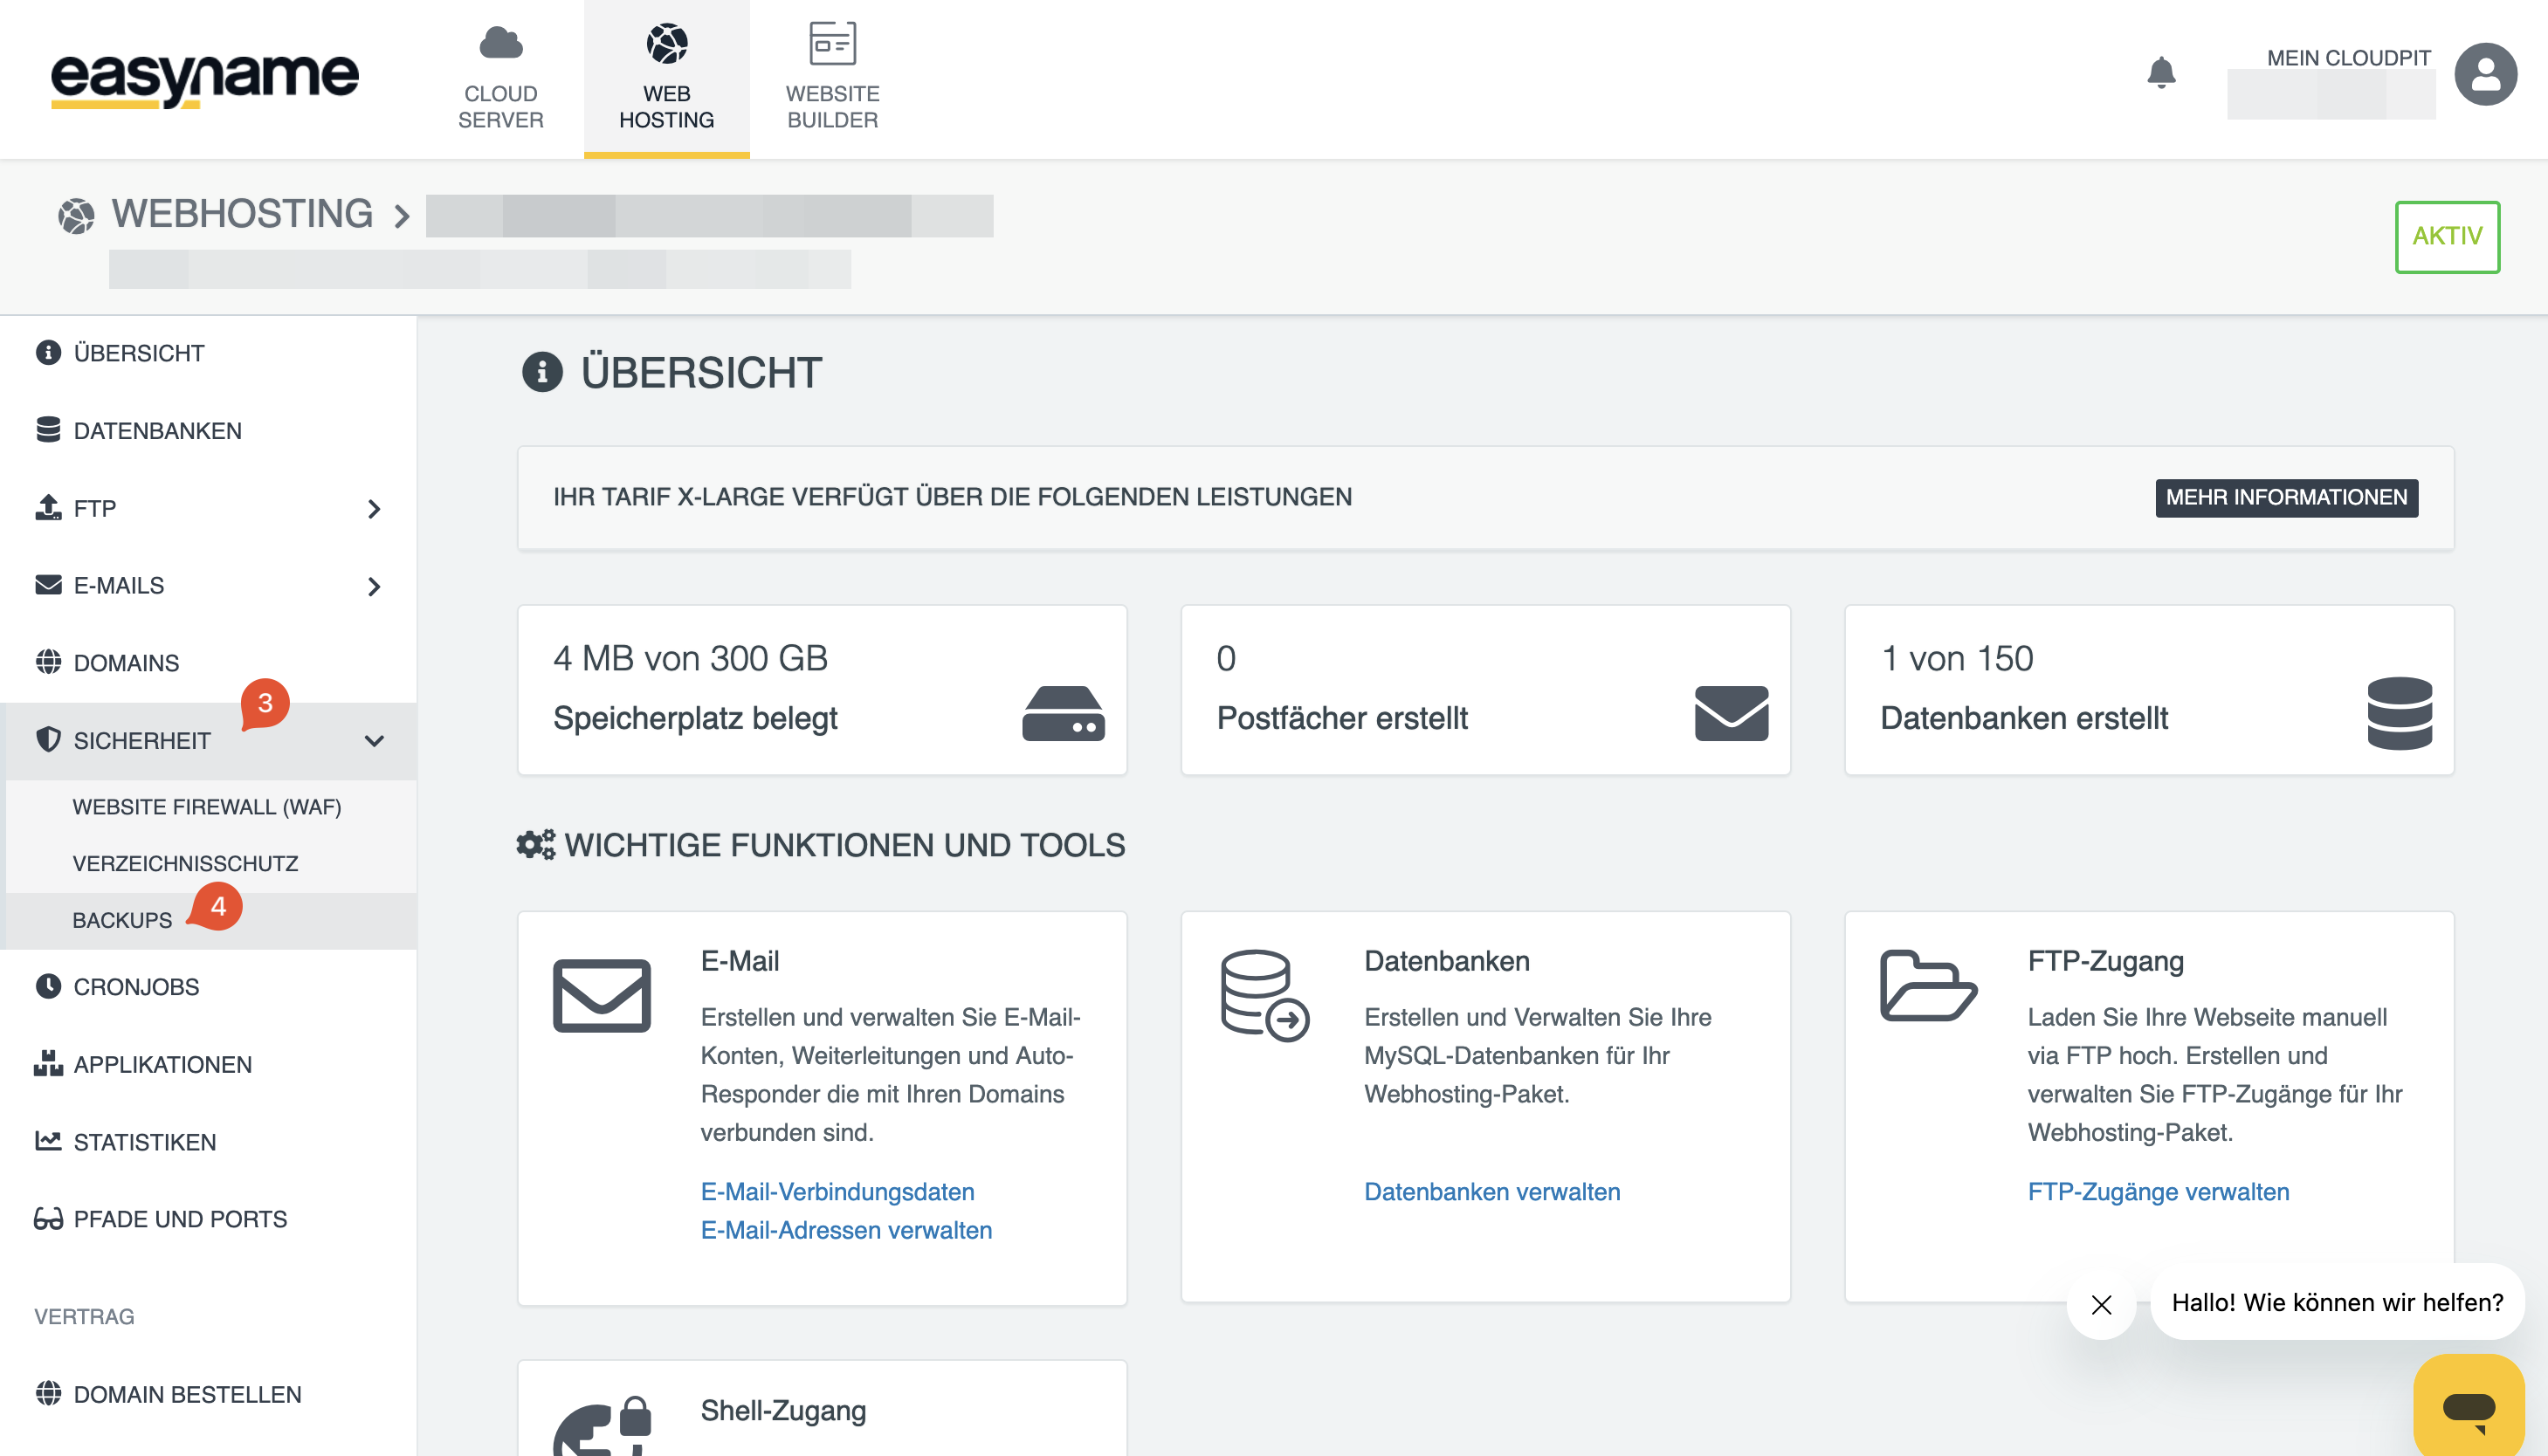
Open the menu Security → Backups.
Select the desired date and time.
Then choose which data you want to restore:
- Web data or FTP data
- Databases
- Emails
Next, specify how the restoration should be performed:
-
Overwrite
Existing data will be replaced by the backup. -
Restore to a new directory
The data will be restored separately without directly replacing existing files. -
Save as archive
The backup will be provided as an archive.
The restoration will then be automatically performed by the system.
Backups in Controlpanel
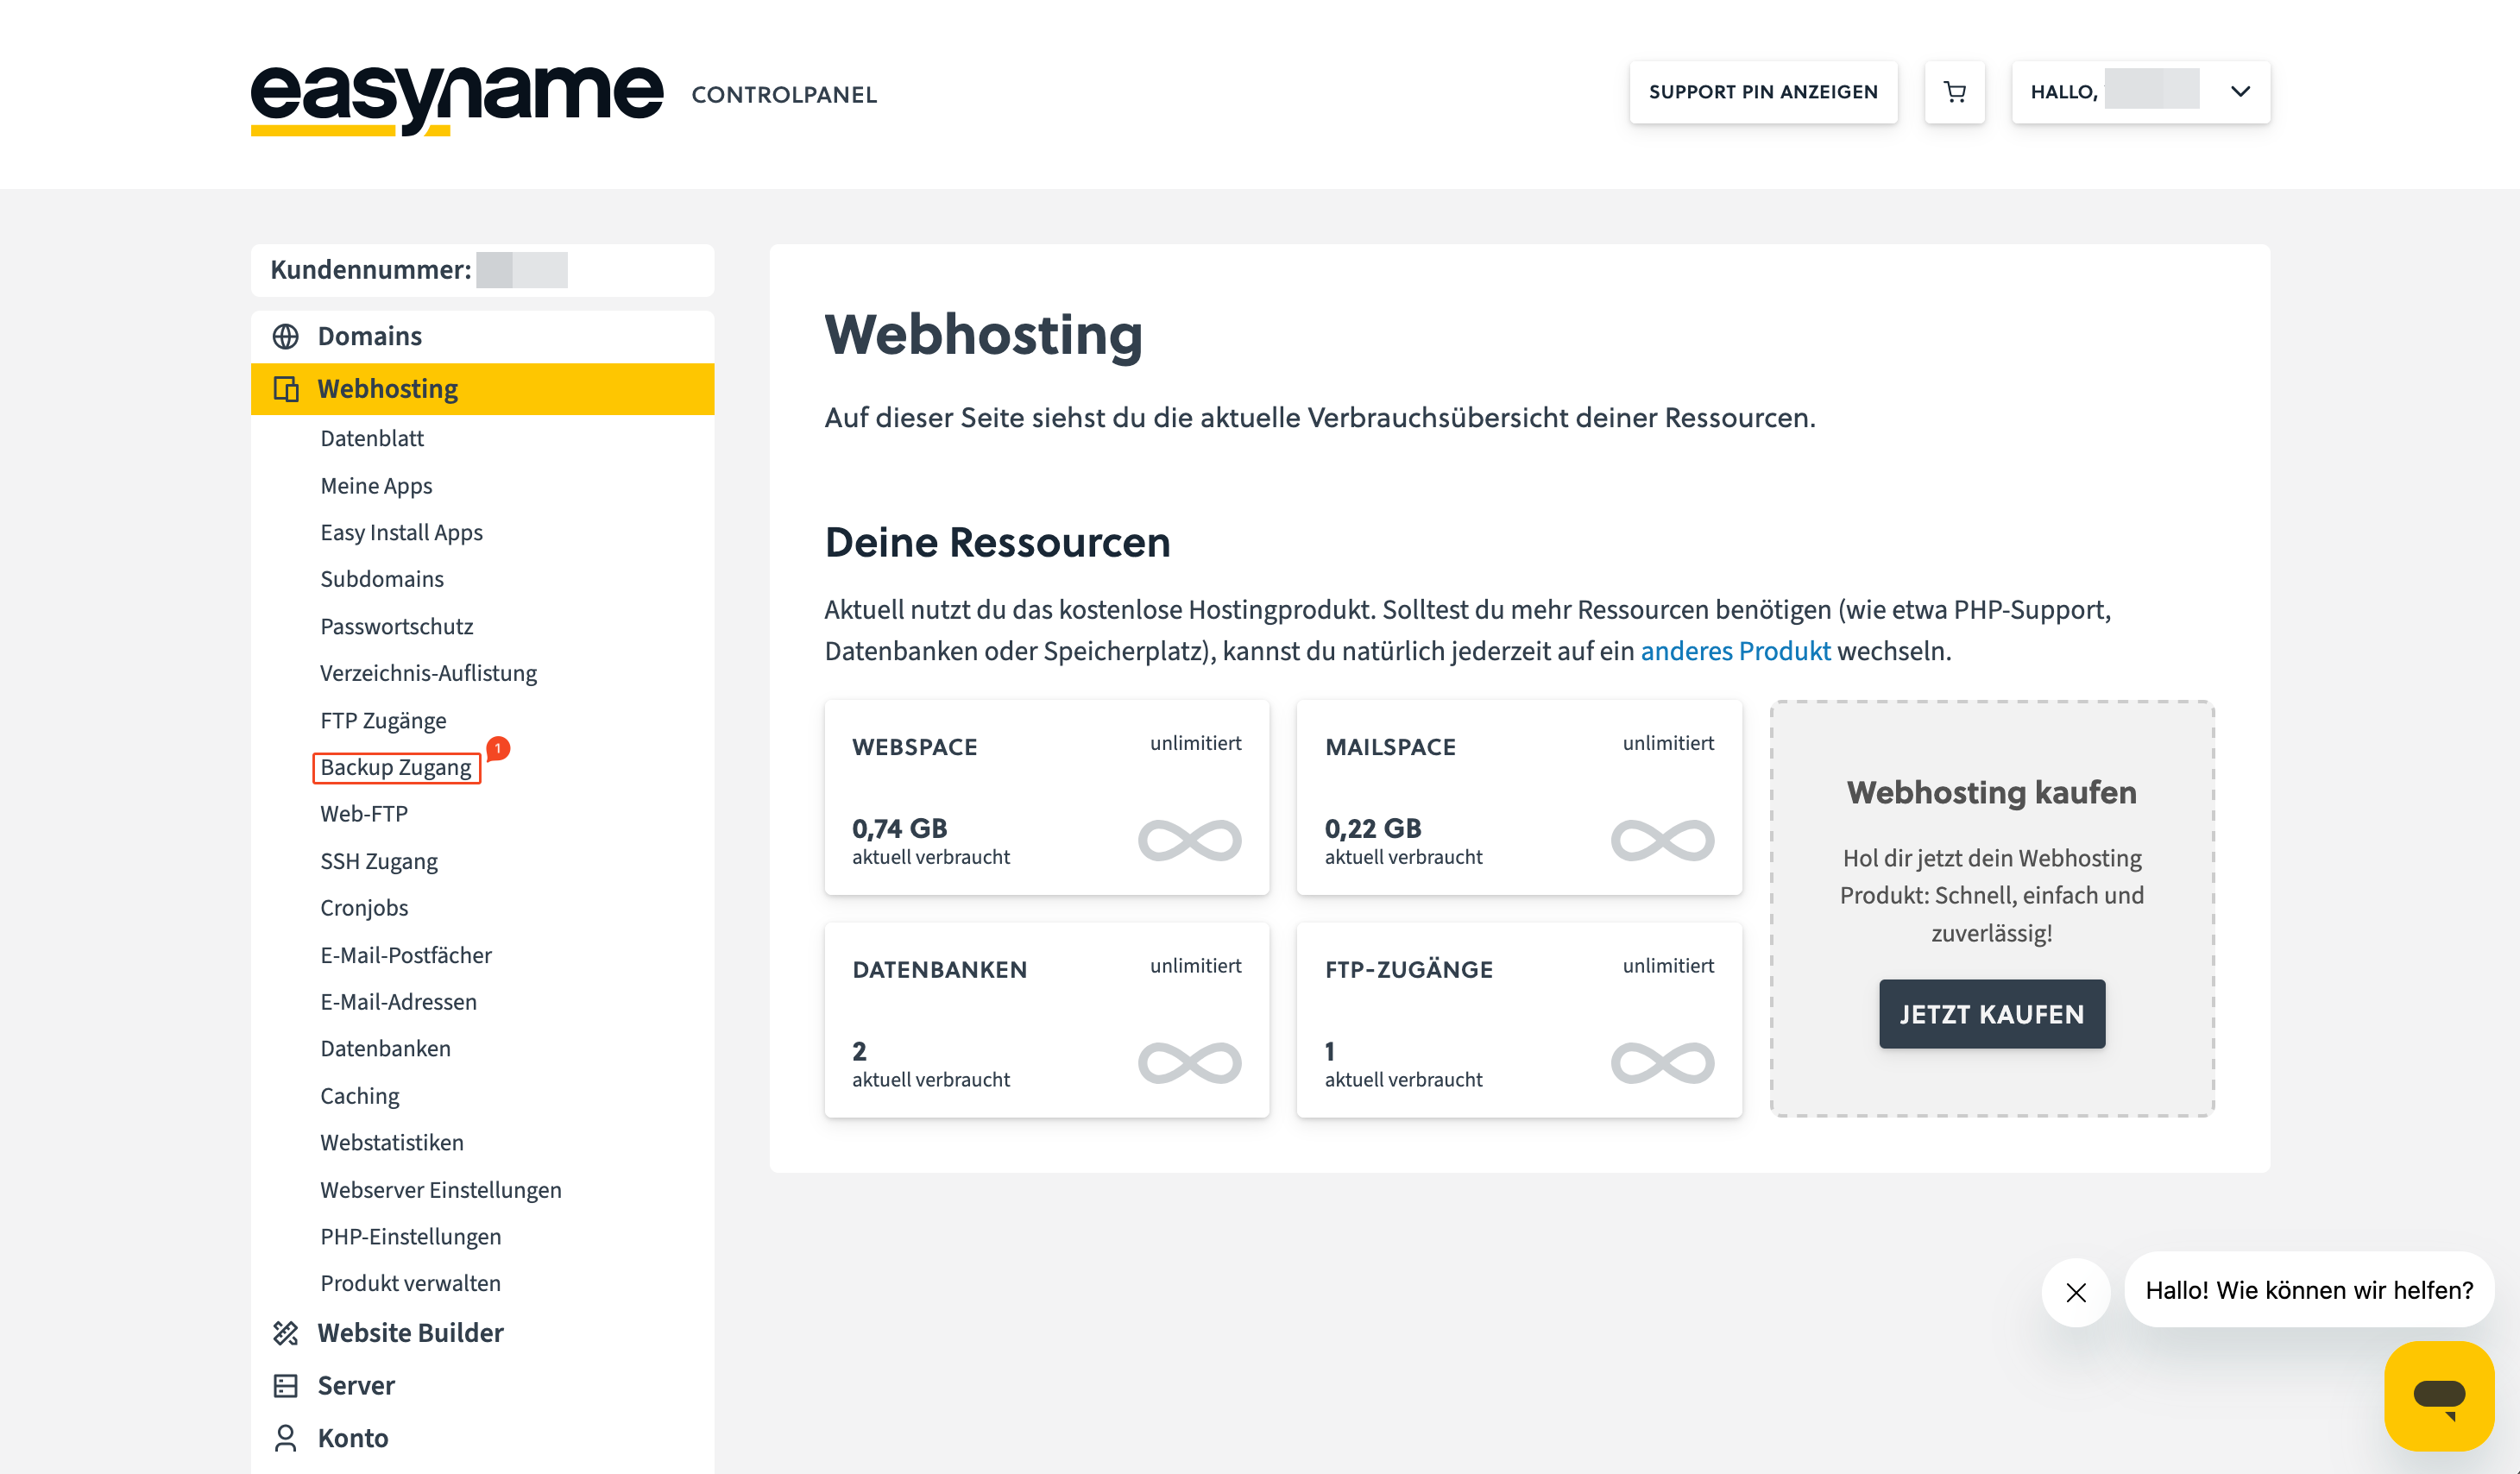
Log in to the Controlpanel. After logging in, you will see an overview of your available resources.
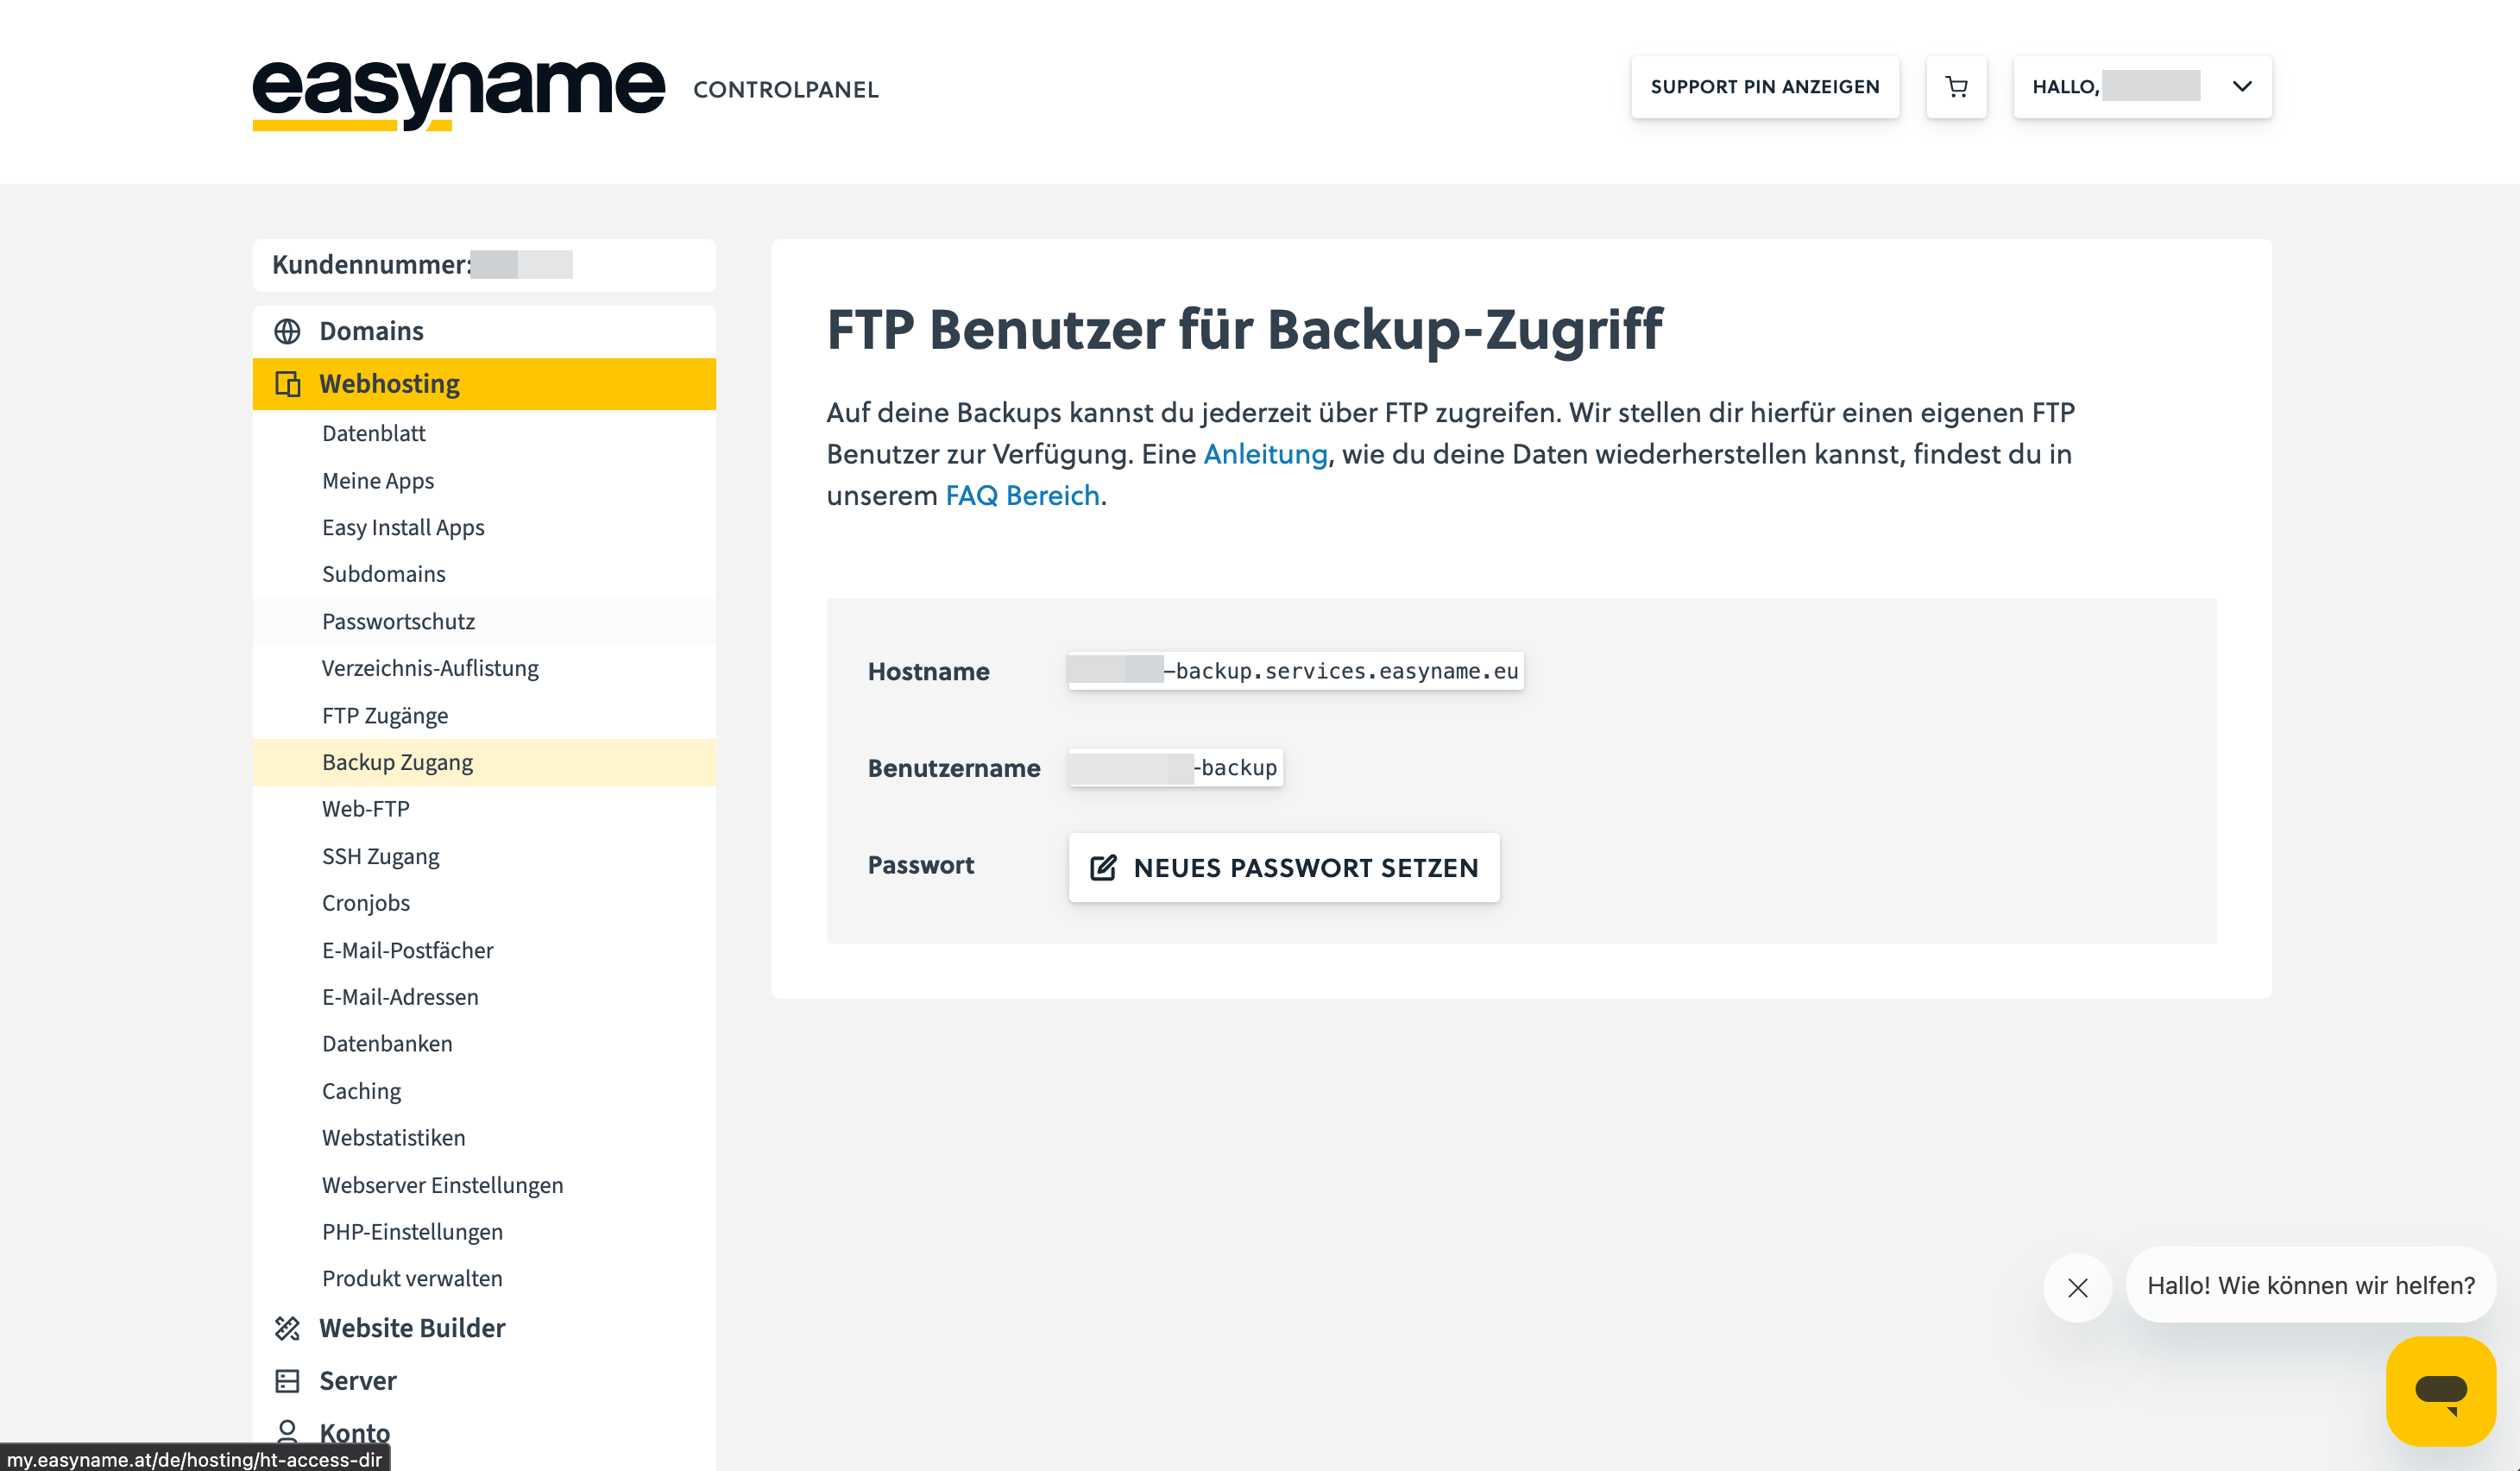
Click on Backup access.
There you will see the FTP access data for the backup server.
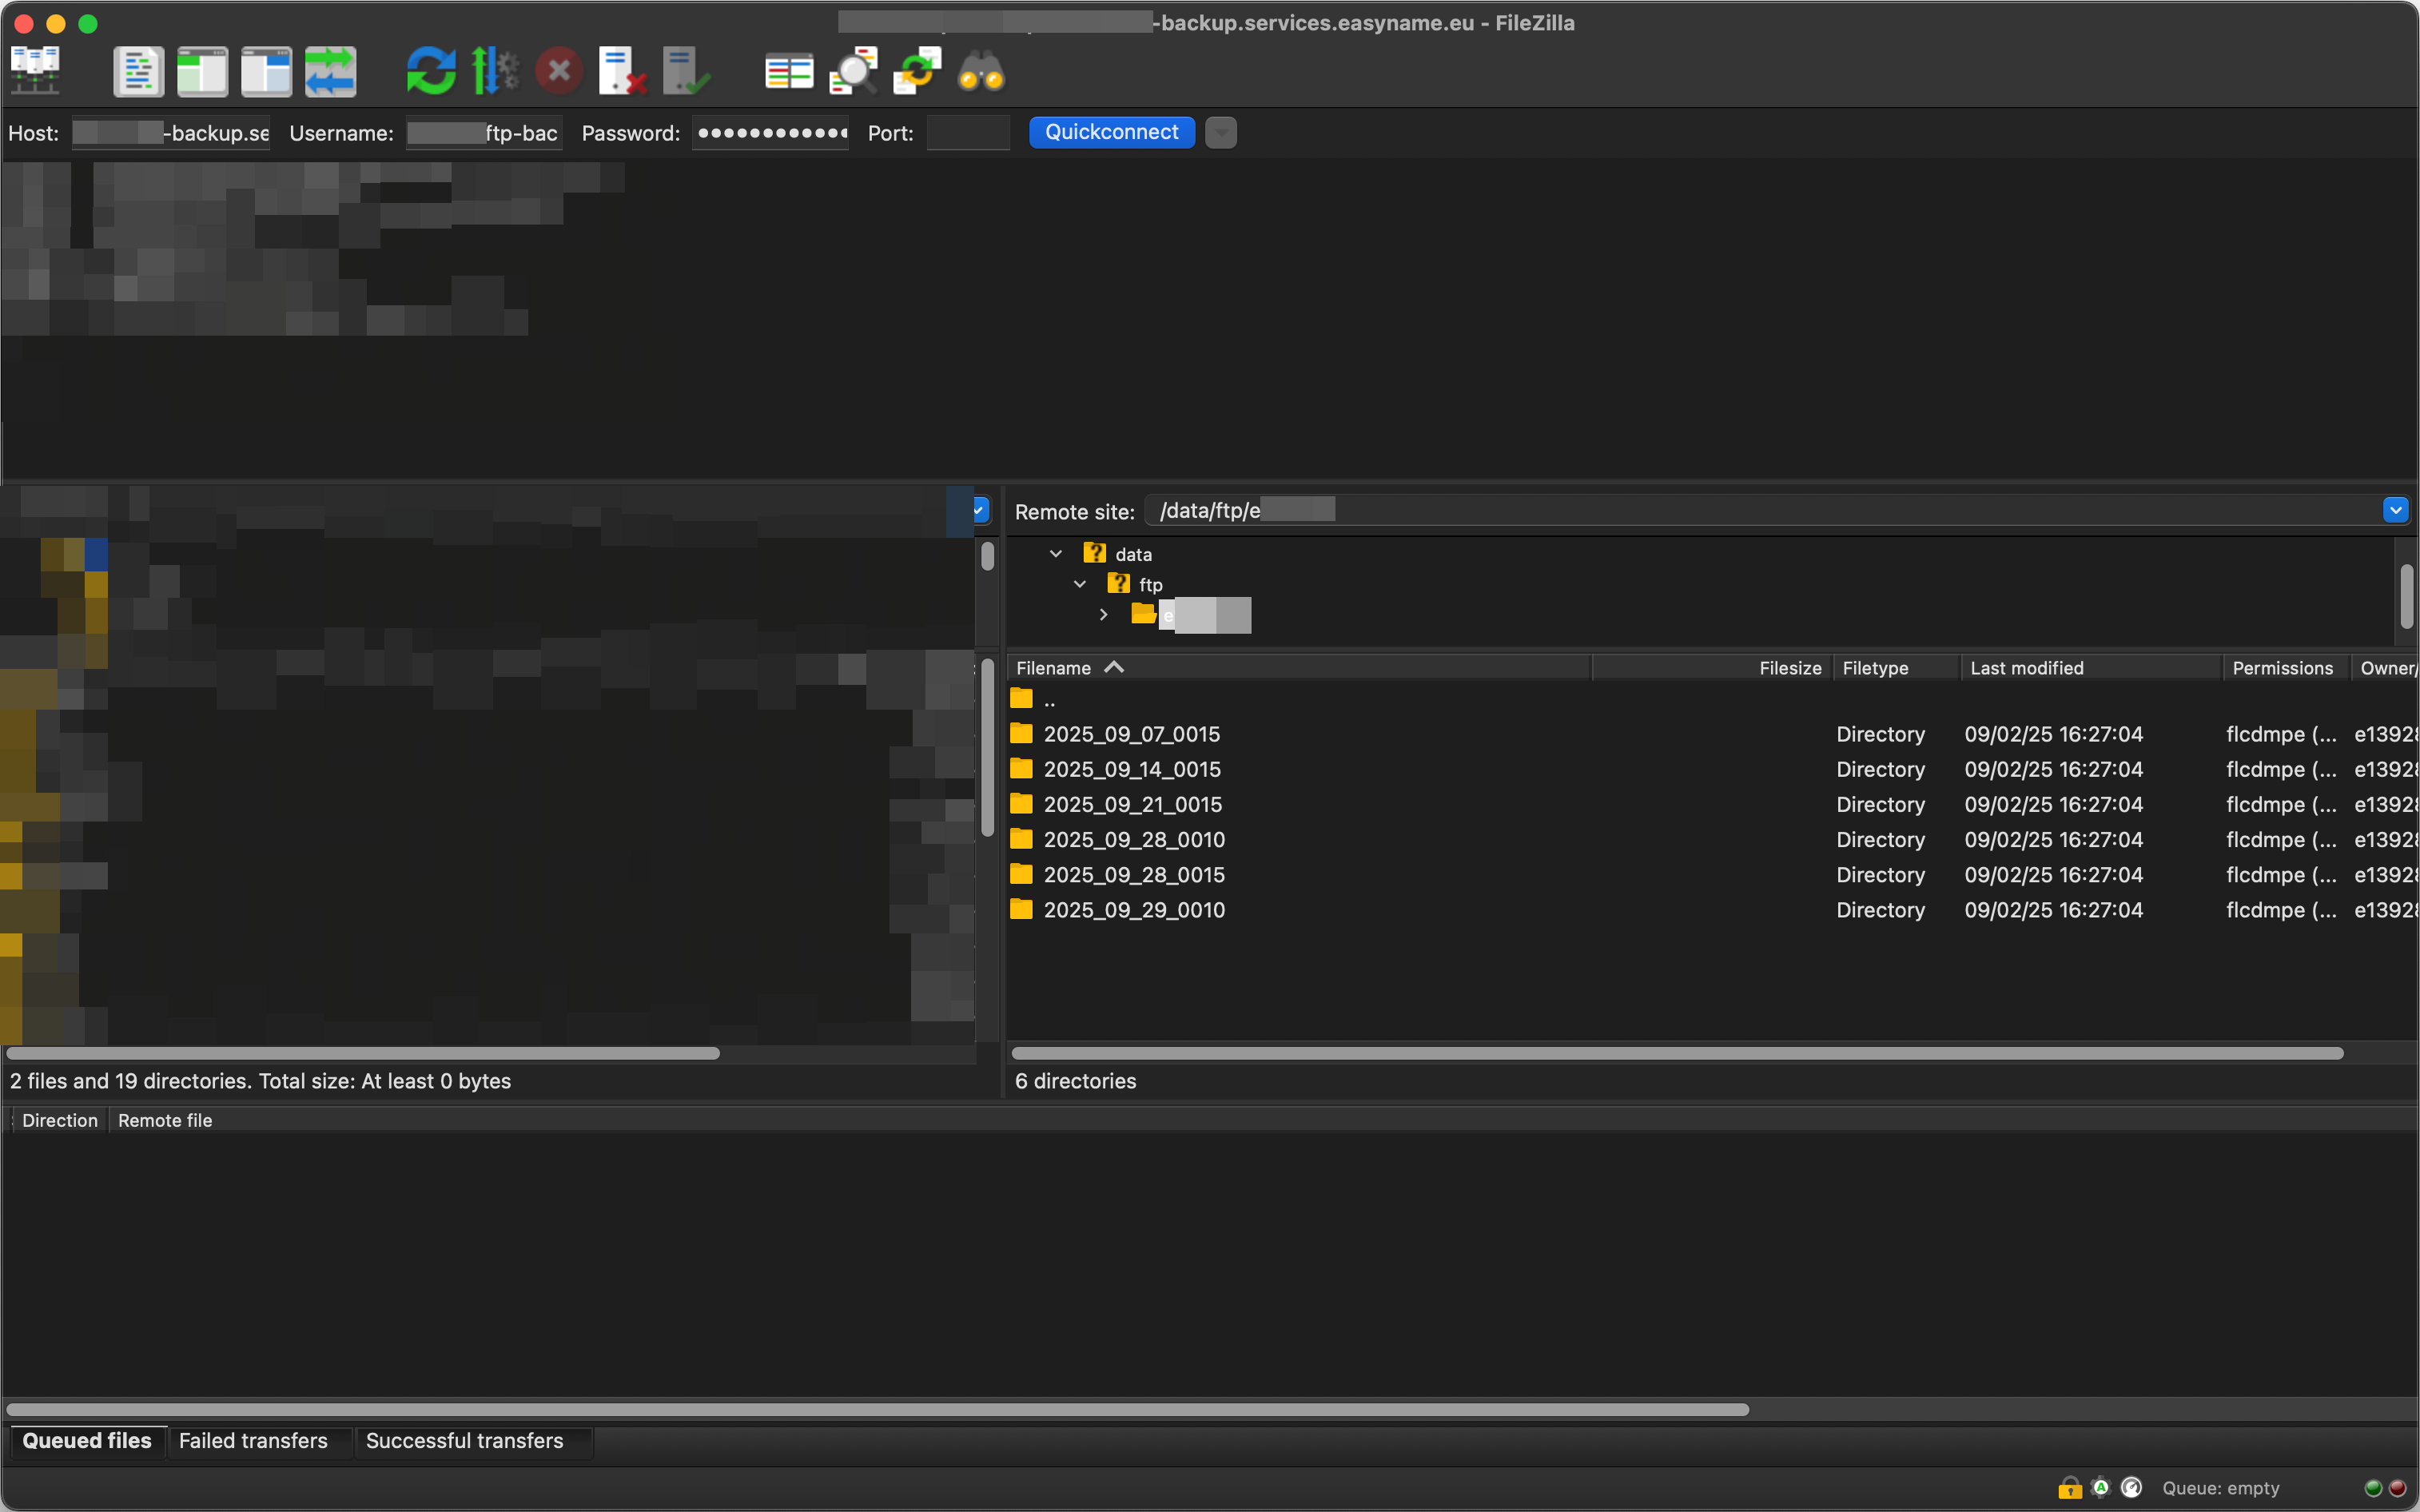
Accessing backups in Controlpanel
To download the backups, you need an FTP program, e.g., FileZilla or Cyberduck.
Enter the access data shown in the Controlpanel into the FTP program.
After a successful connection, you will see your available backups.
First, download the required files from the backup server to your computer.
Then upload the files back to your webspace if you want to restore them.
Which backups are available?
The availability of backups depends on the system used.
- CloudPit: Backups are available for up to two weeks.
- Controlpanel: The last two days as well as the last two Sundays are available.