How do I manage FTP users?
FTP users allow access to your web space to upload and download files. Below is an explanation of how to view and manage these accesses in CloudPit and the Control Panel.
Table of Contents
FTP accesses in CloudPit
In CloudPit, you can centrally manage your FTP accesses, view connection data, and change passwords.
Log in to your customer account and open the Webhosting section.
Select the desired hosting and click on "Manage".
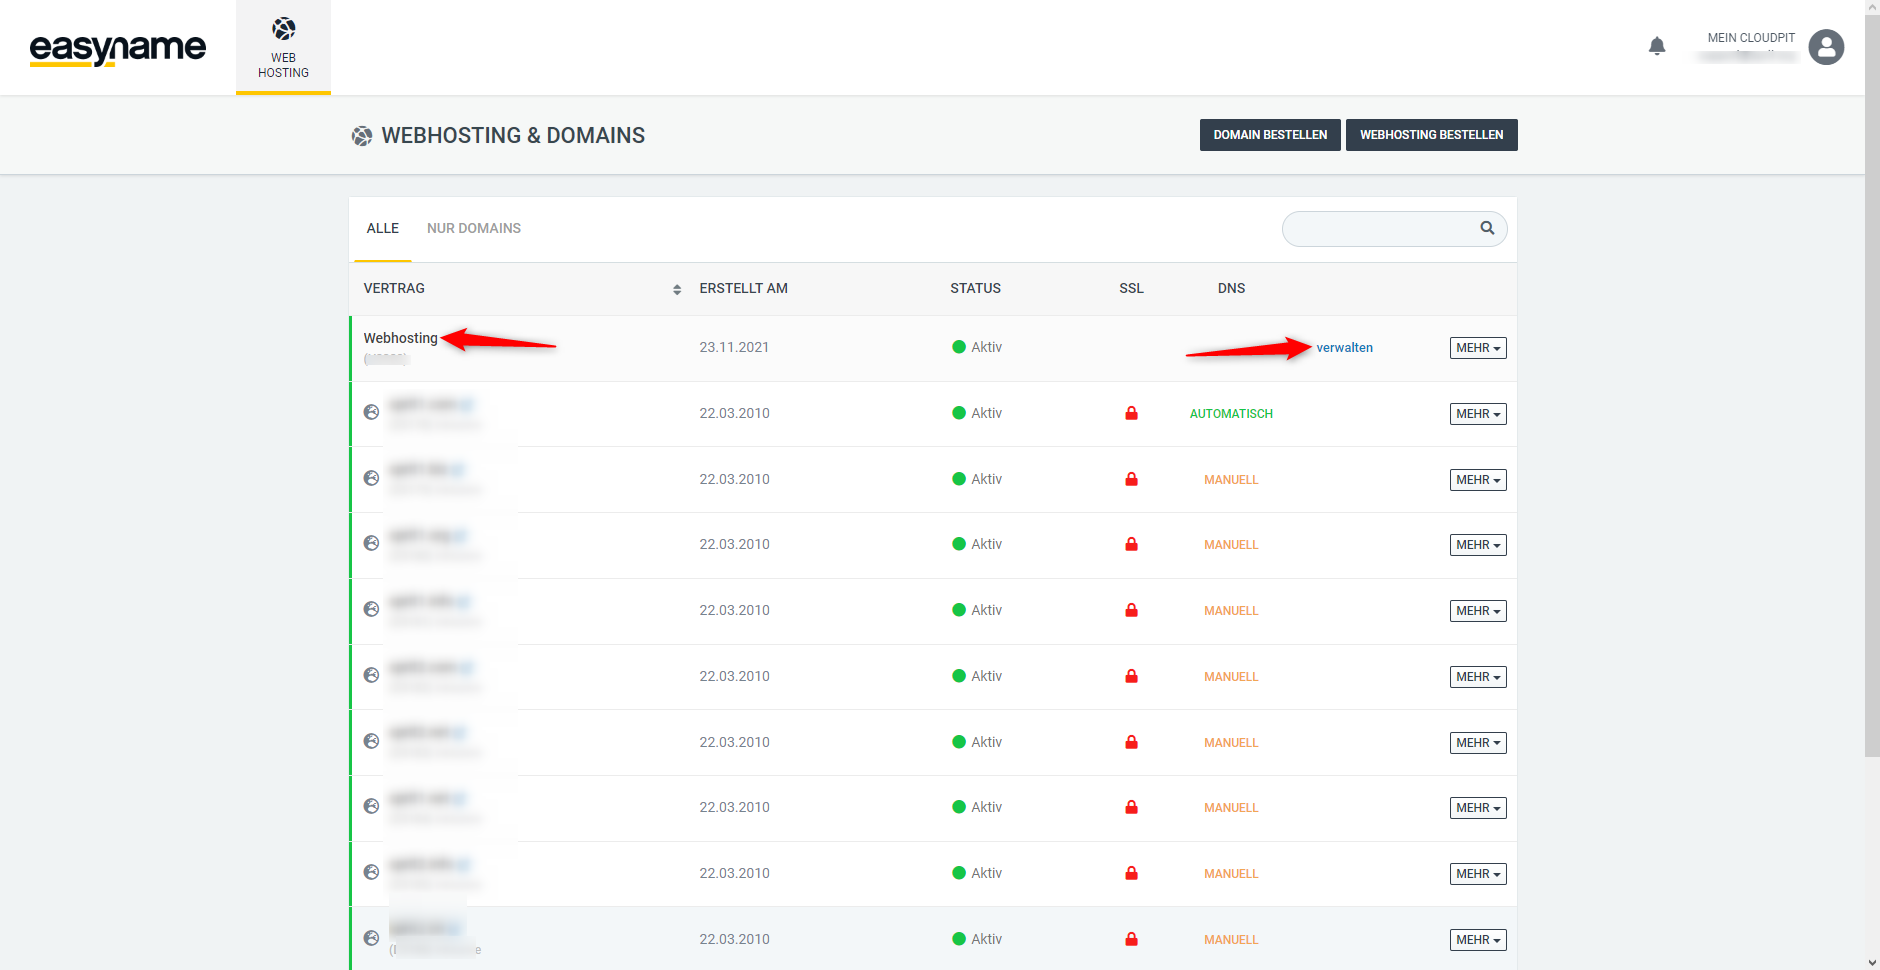
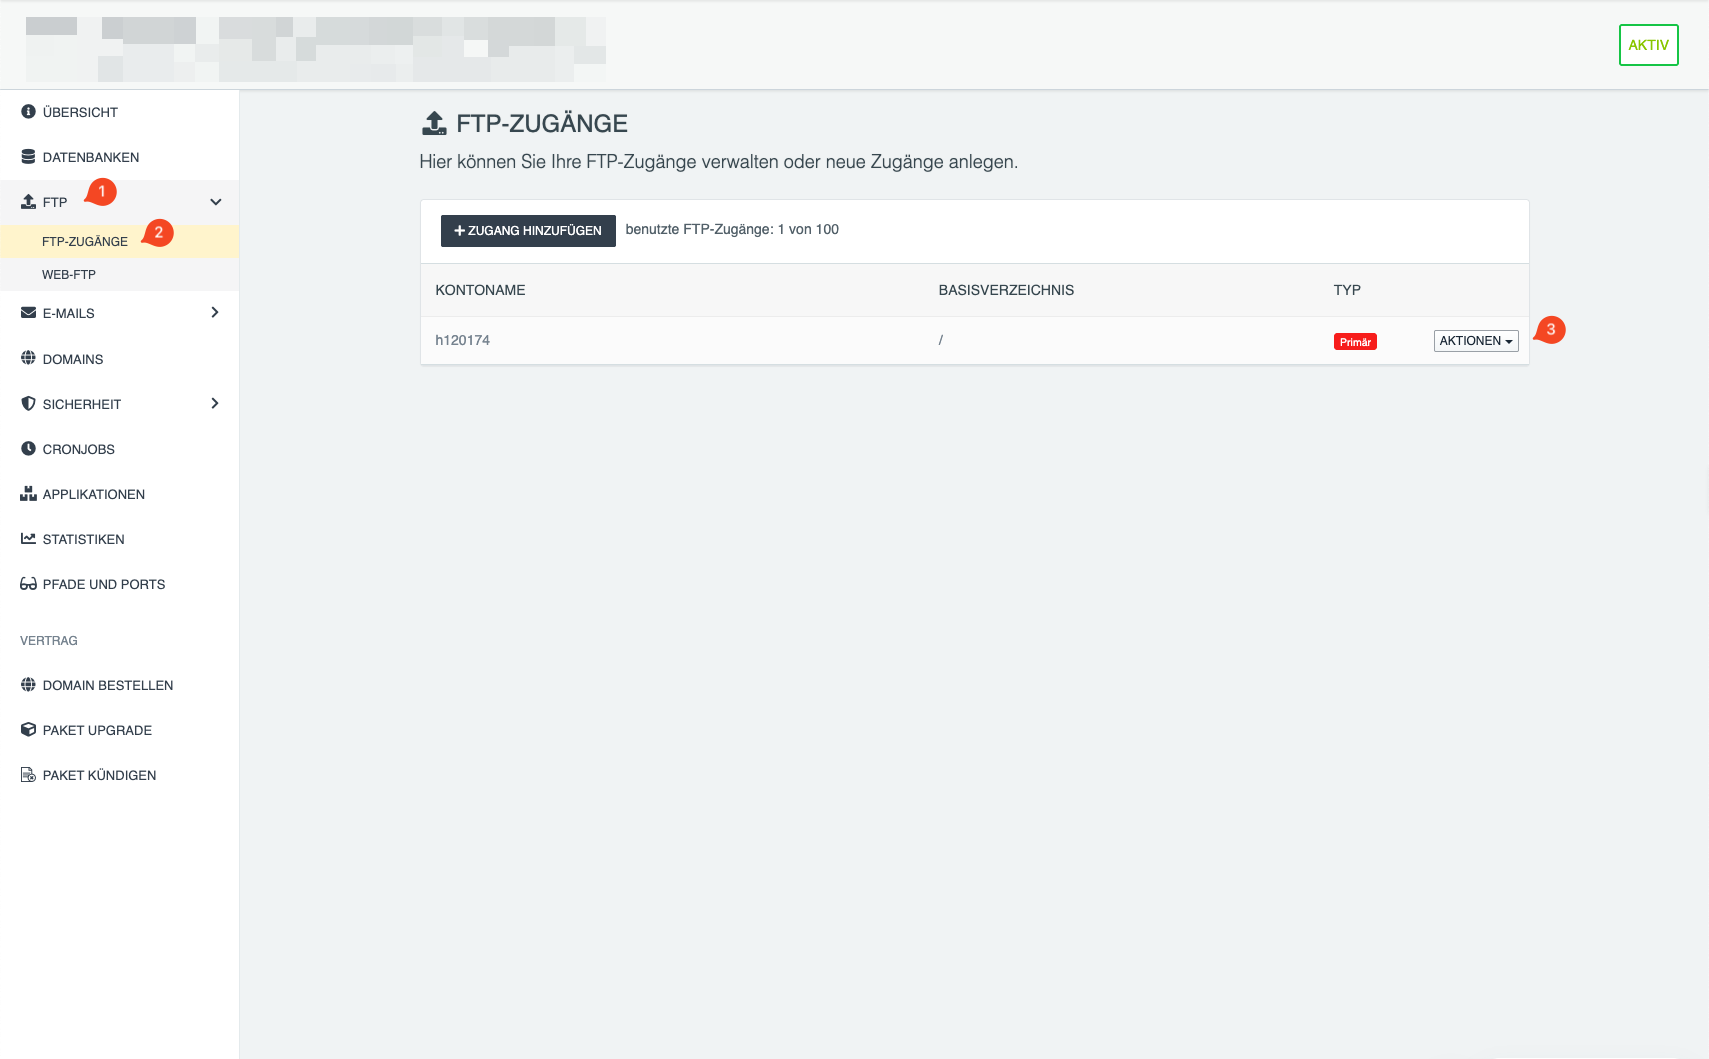
Then navigate to [FTP] → [FTP accesses].
All existing FTP users will be displayed there.
Under [ACTIONS] for each user, the following options are available:
-
Show connection data
Displays server (hostname) and username -
Change access
Allows setting a new password
FTP accesses in the Control Panel
Hostname
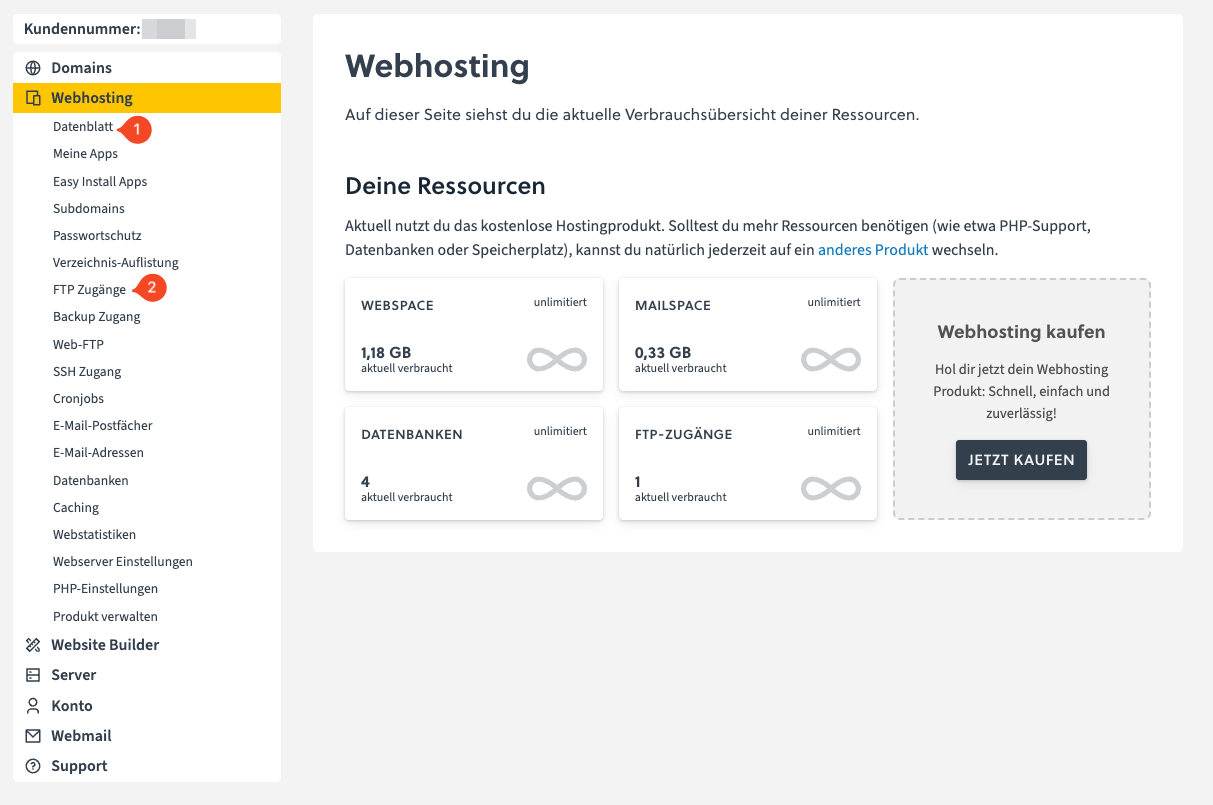
You can find the hostname in the easyname Control Panel under
[Webhosting] → [Data sheet] in the line "FTP Host"
FTP user
You can find this under
[Webhosting] → [FTP accesses]
FTP password
The password is set for each FTP user.
If no password has been set or it is no longer known:
- Open [Webhosting] → [FTP accesses]
- Click on [Edit FTP access] for the desired user
- Select [SET NEW PASSWORD]