How do I manage my firewall (WAF)?
In your web hosting, you can configure the Web Application Firewall (WAF) individually for each domain.
The firewall protects your website from typical web application attacks by analyzing incoming HTTP and HTTPS requests and blocking them if necessary.
Table of Contents
1. Manage firewall in CloudPit
You can activate, deactivate, or run the firewall in detection mode only for each domain.
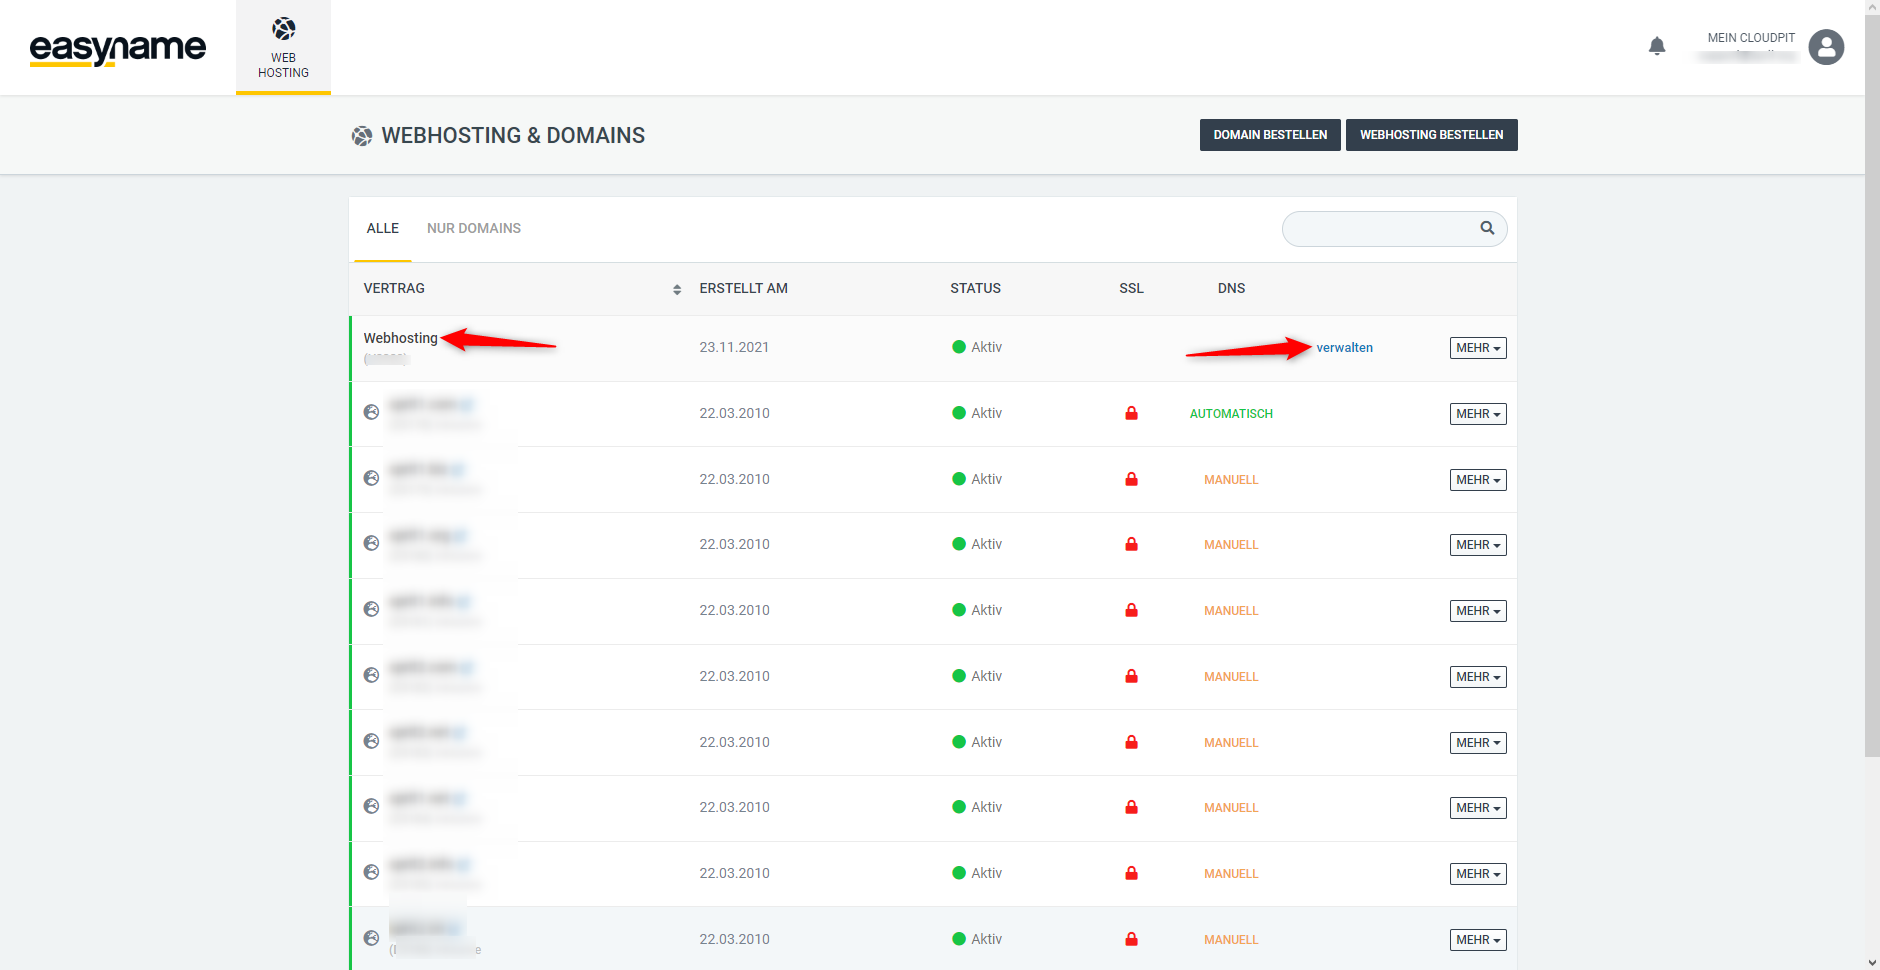
Log in to your customer account.
In CloudPit, open the Webhosting section.
Select the desired hosting and click on "Manage" on the right.
You are now in the overview of your web hosting.
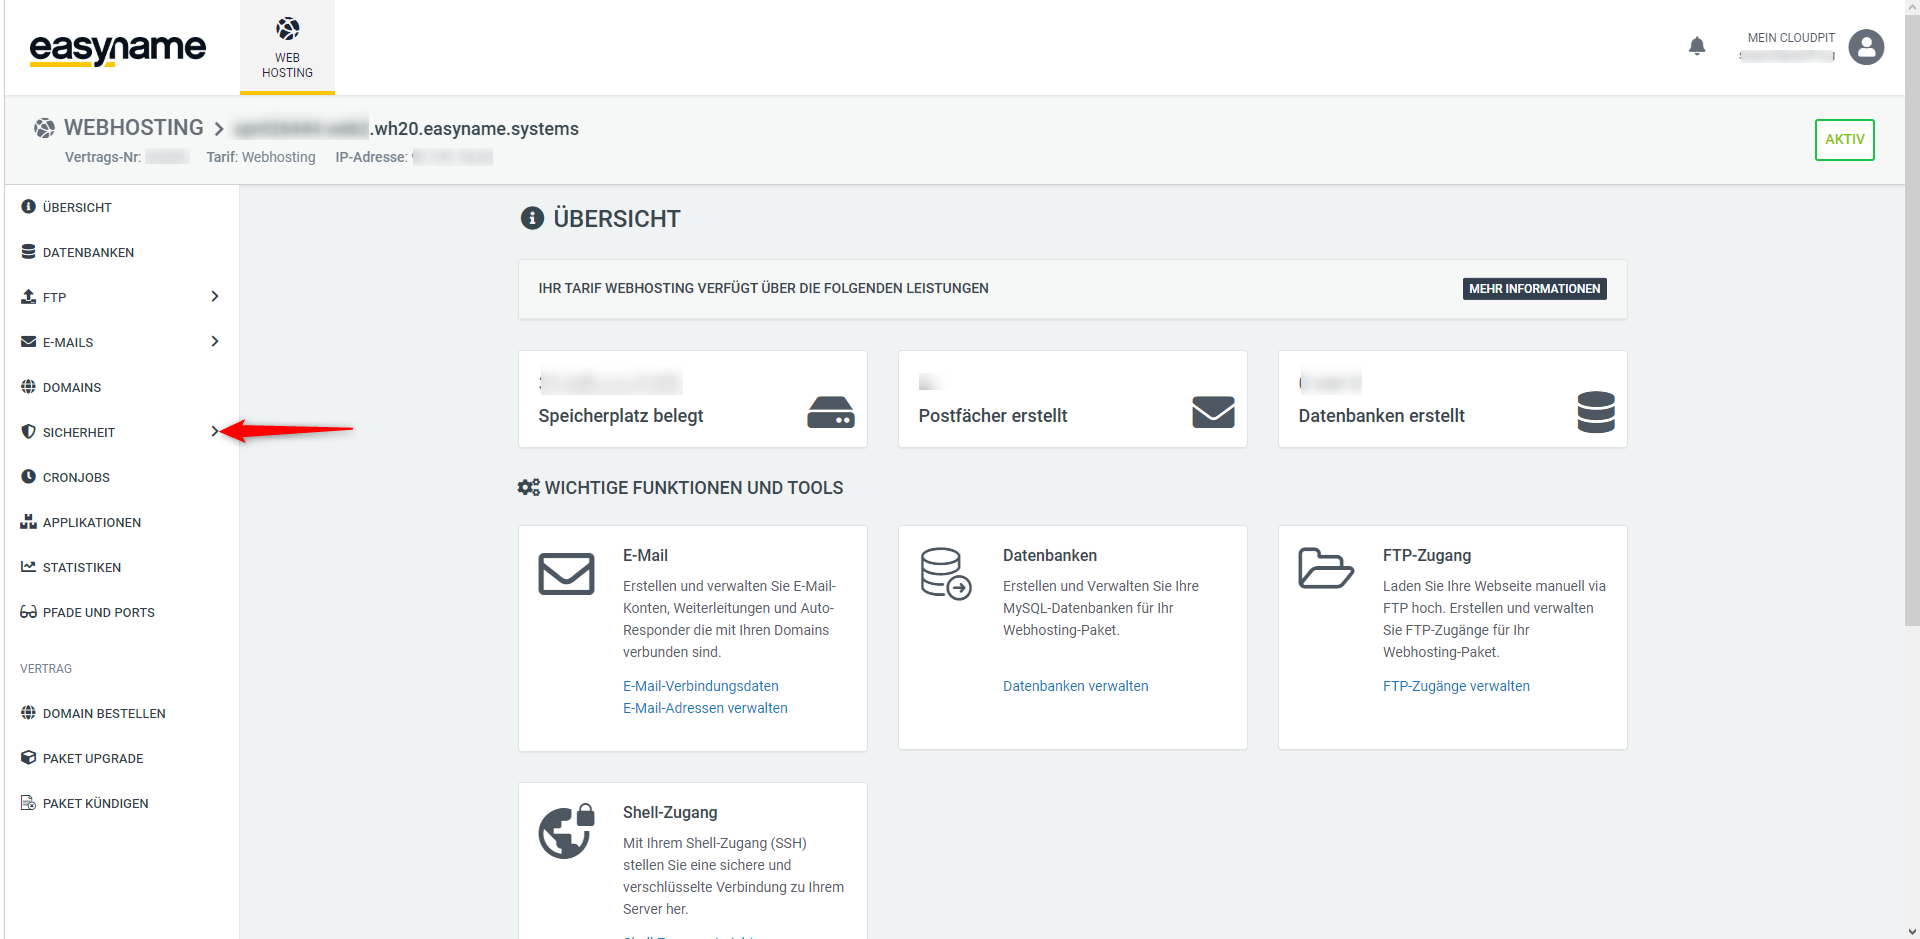
Open firewall settings
Navigate in the left menu to:
Security → Website Firewall (WAF)
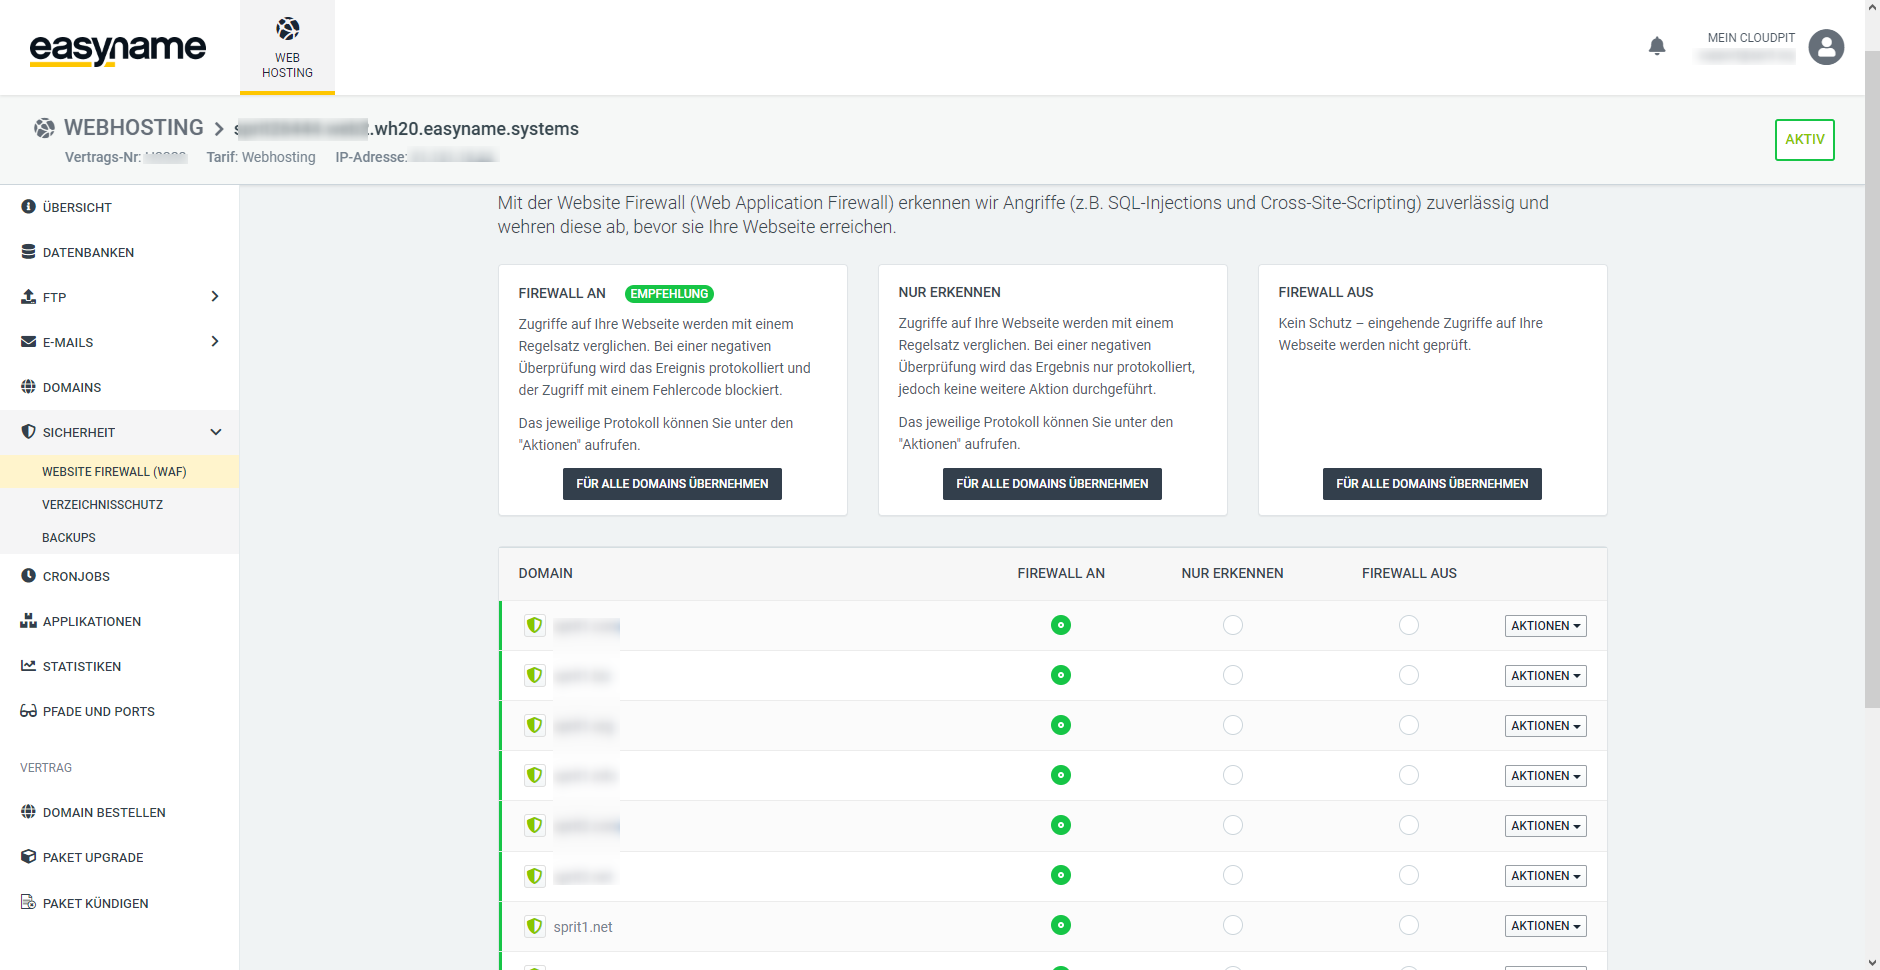
Here you see a list of all domains and subdomains of your web hosting. You can configure the firewall individually for each domain.
There are three options available for each domain.
FIREWALL ON
The firewall checks all accesses to your website based on a set of rules.
If a request is detected as suspicious, access is blocked.
The blocked access is logged and saved in the error log of your website.
DETECT ONLY
The firewall also checks all accesses based on the rule set.
Suspicious requests are logged, but not blocked.
This mode is suitable, for example, for troubleshooting or testing applications.
FIREWALL OFF
The firewall is disabled.
Incoming requests are not checked or filtered.
This reduces protection against automated attacks on your website.
2. Manage firewall in the Control Panel
Disable firewall by default for new subdomains
In the easyname Control Panel, you can specify whether the Application Firewall (WAF) is enabled or disabled by default for newly created subdomains.
Please note that this setting applies only to new subdomains. Existing subdomains are not affected by this change.
- Log in to the customer account.
- Open the Webhosting section in the Control Panel.
- Click on Webserver Settings.
- Disable the Application Firewall option.
- Save the change.
New subdomains created thereafter will adopt this setting.
Disable firewall for an existing subdomain
To disable the firewall for an already existing subdomain, proceed as follows:
- Open the Webhosting (1) section in the Control Panel.
- Click on Subdomains (2) in the left menu.
- Select the desired subdomain.
-
Click on Manage (notepad icon) (3).
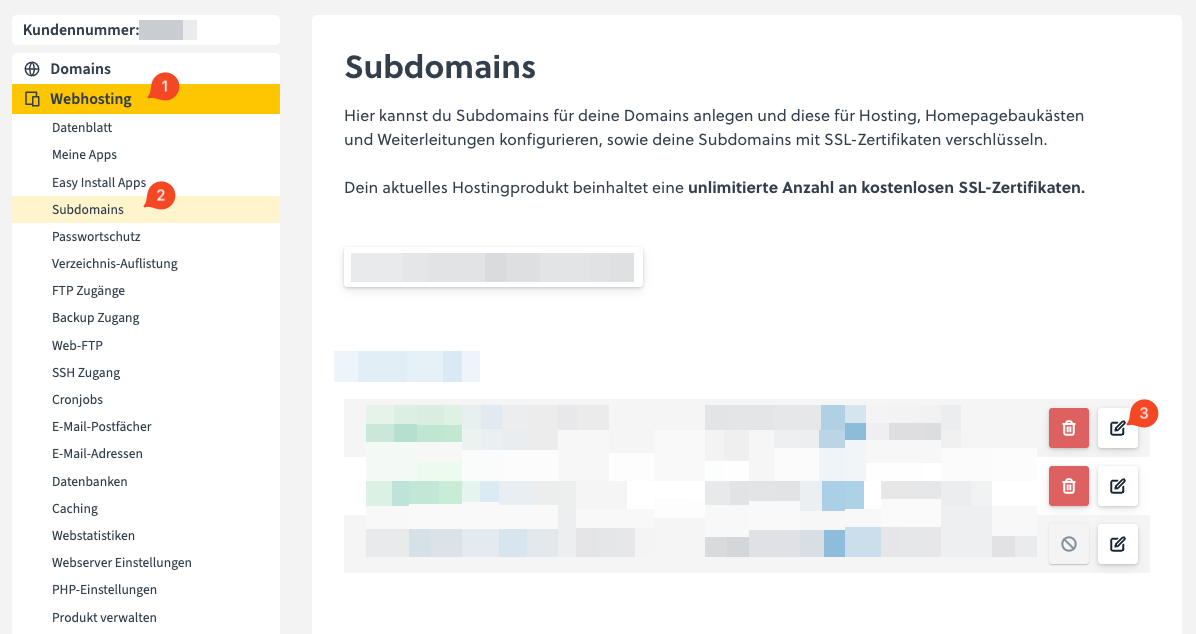
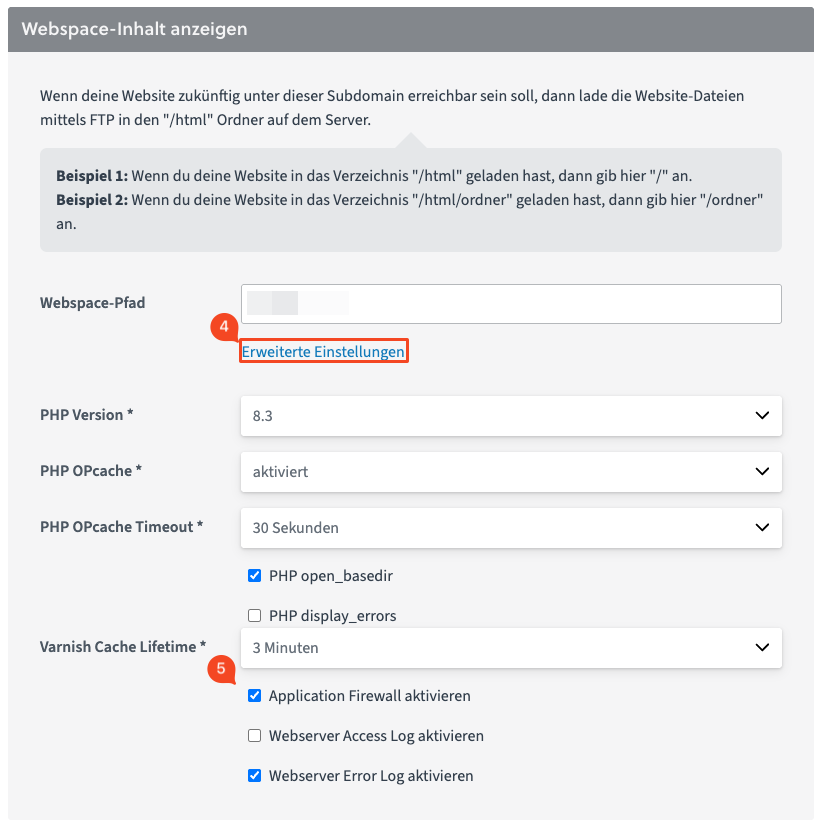
- Under the Webspace Path, click on Advanced Settings (4).
-
Disable the Application Firewall (5) option.
- Save the change.
The change then applies to the selected subdomain.
Note on blocked accesses
If legitimate functions of your website no longer work correctly, it may be that a request is being blocked by the firewall.
In this case, you can:
- check the error log of your website
- set the firewall to "Detect Only" for testing
- or temporarily disable the firewall