What is a subdomain and what types are there?
With subdomains, you can provide different content under one domain, such as a shop, blog, or internal applications. A subdomain is an additional part before your domain, for example, shop.yourdomain.com.
You can point each subdomain either to content on your webspace or redirect it to an external address.
Table of Contents
Managing Subdomains in CloudPit
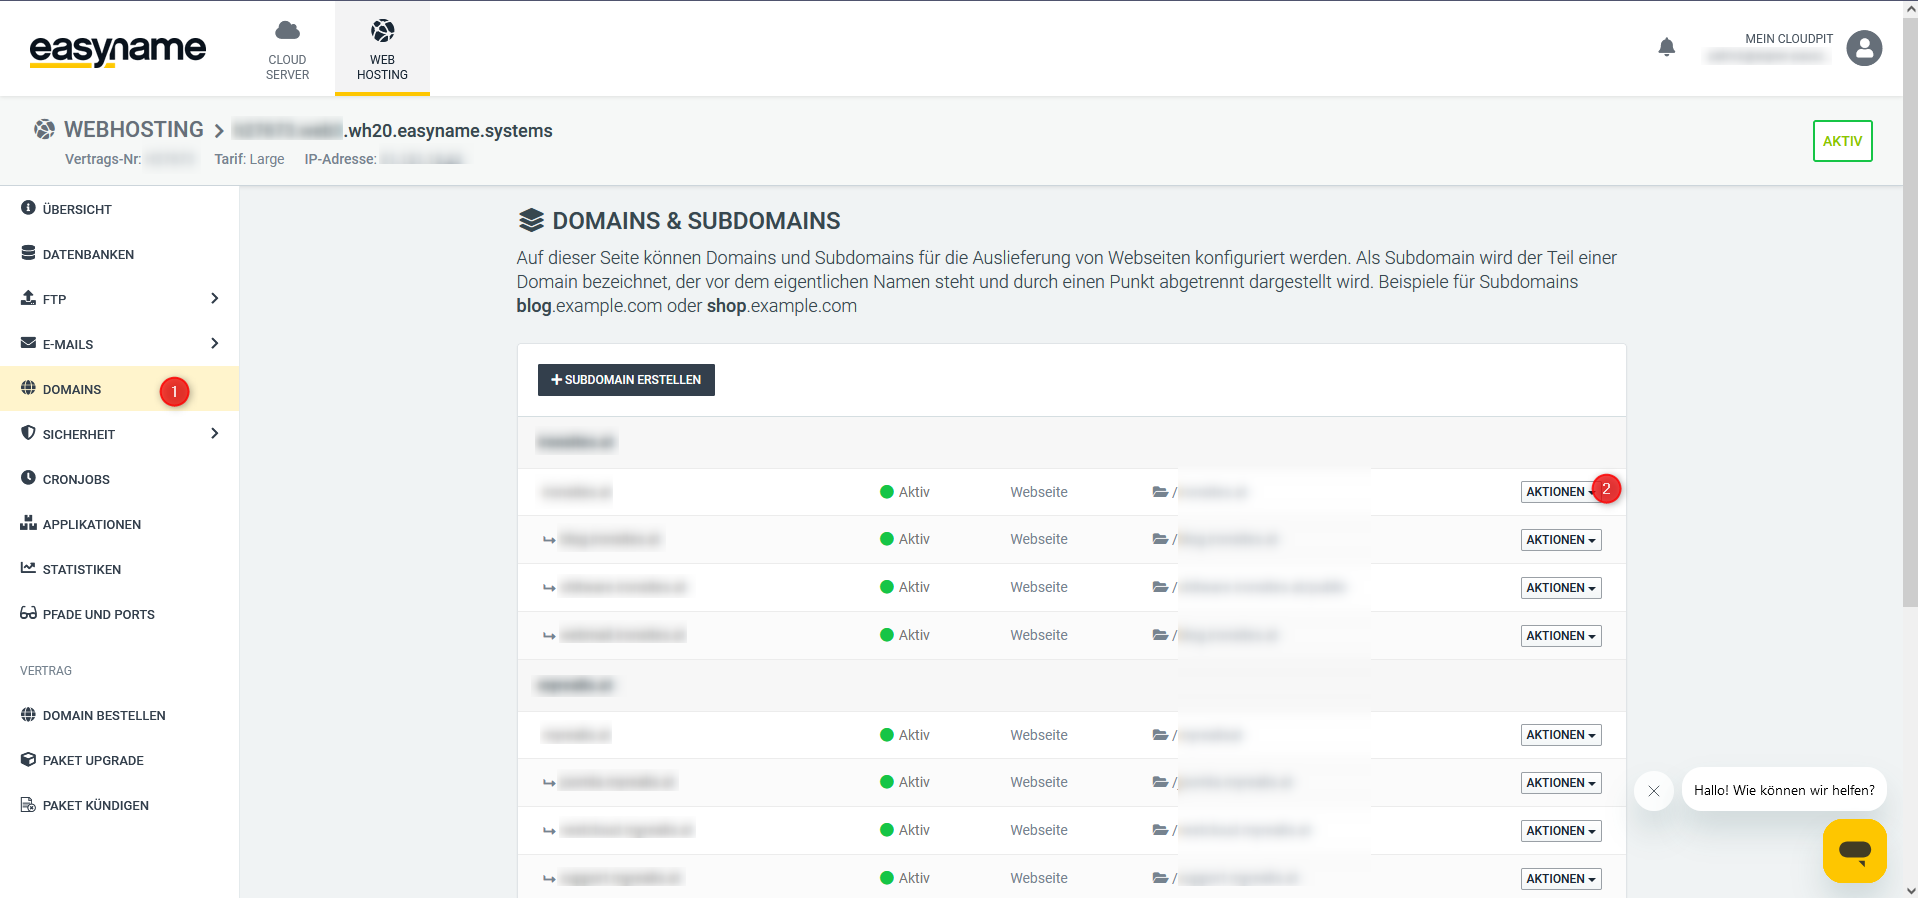
Open the web hosting management and click on Domains (1).
Click on Actions (2) for the desired (sub)domain.
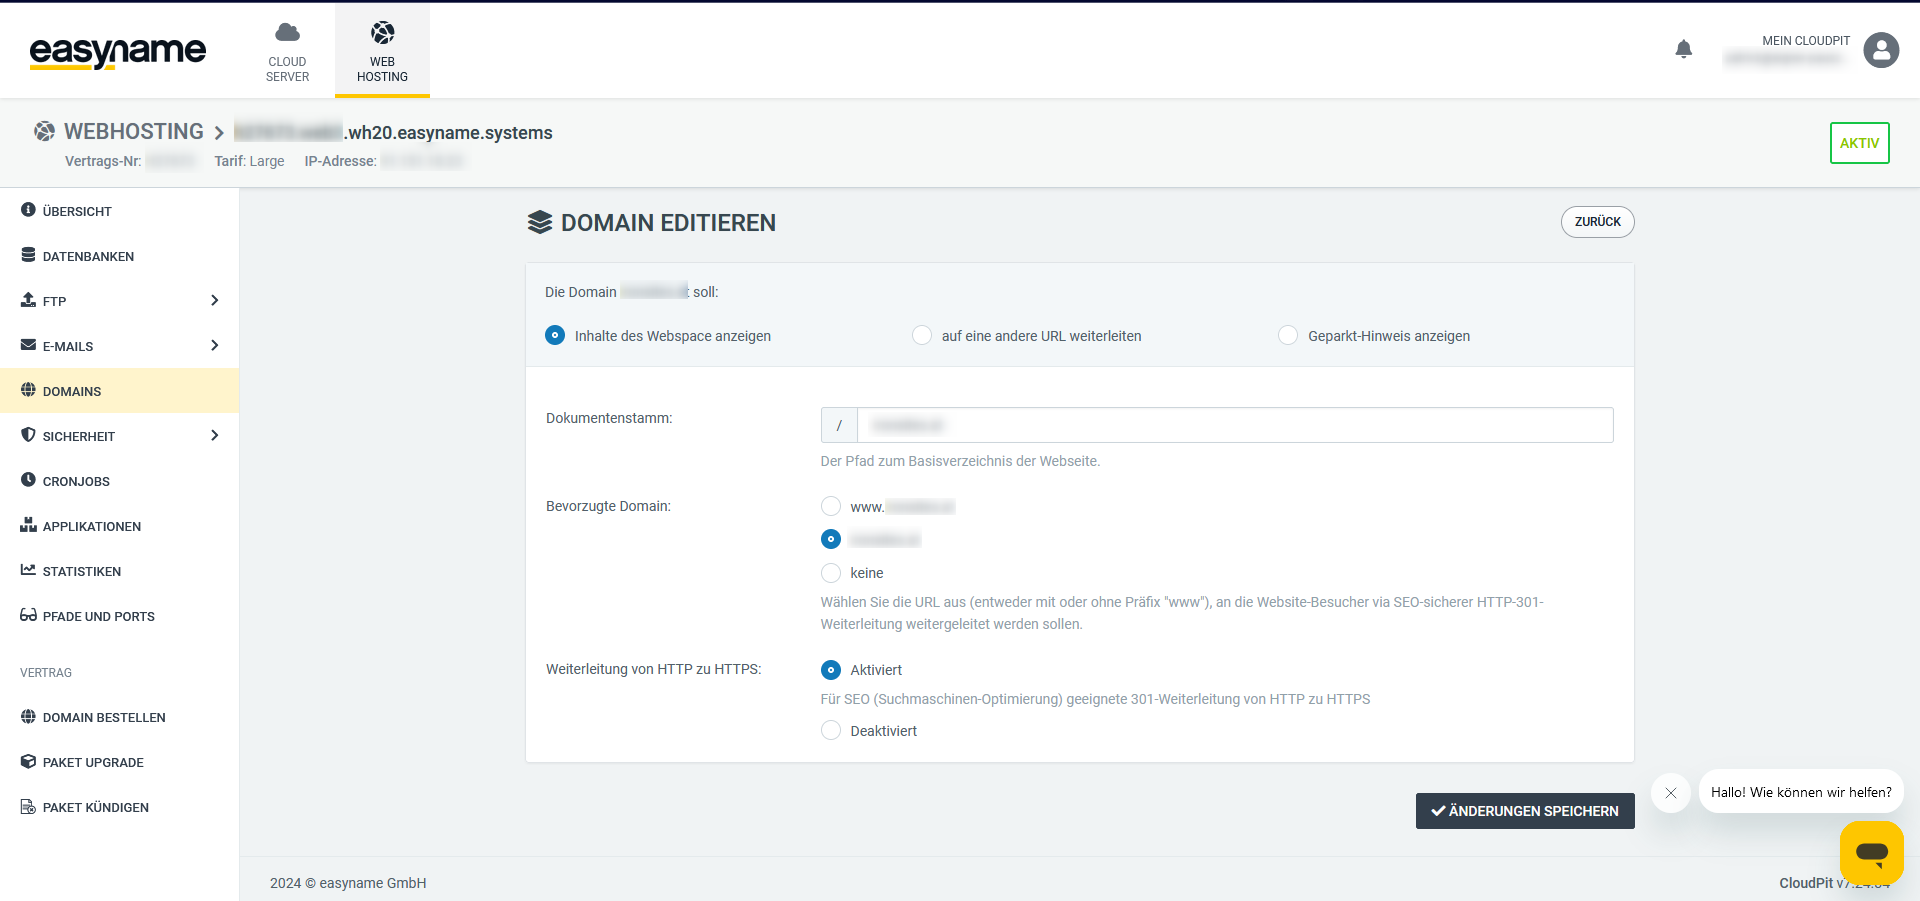
Show Webspace Content
Select Show webspace content to point the subdomain to a directory of your webspace.
Enter the full path, e.g., /shop/.
Optionally, you can:
- set a preferred domain (www / without www)
- enable automatic redirection from HTTP to HTTPS
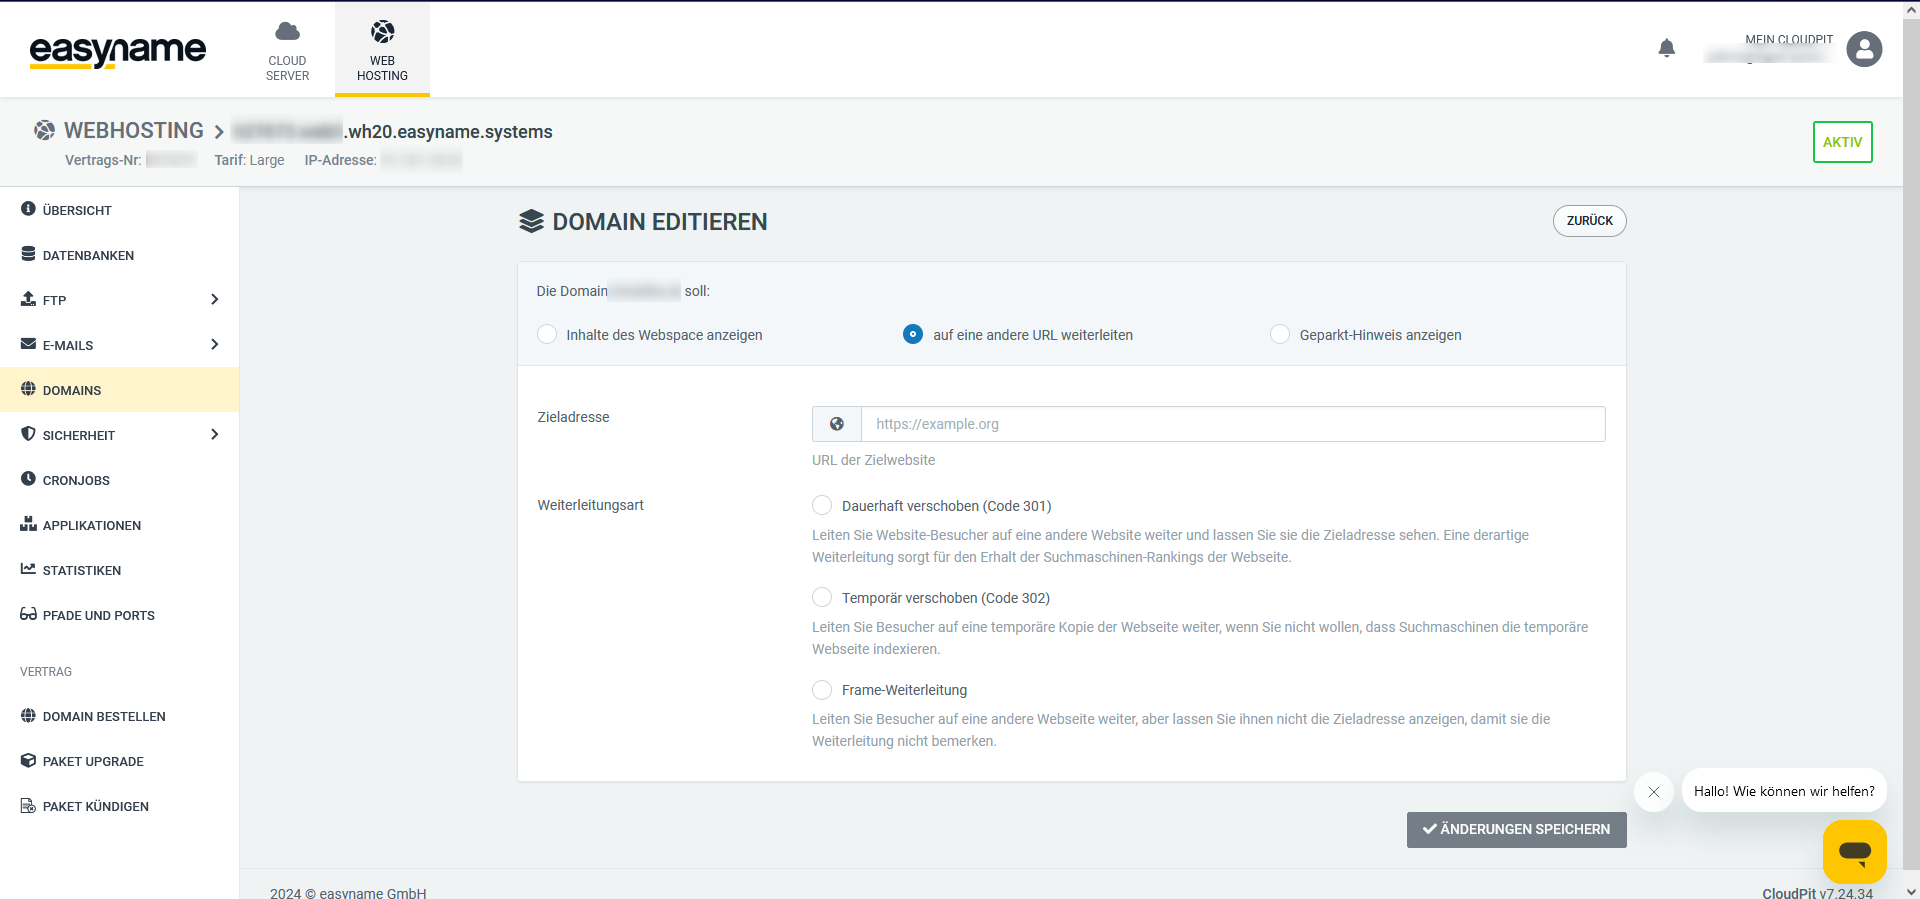
Redirect to Another URL
Select Redirect to another URL to redirect visitors to an external address.
- 301 (permanent) – for permanent redirects
- 302 (temporary) – for temporary redirects
- Frame – target address is not displayed
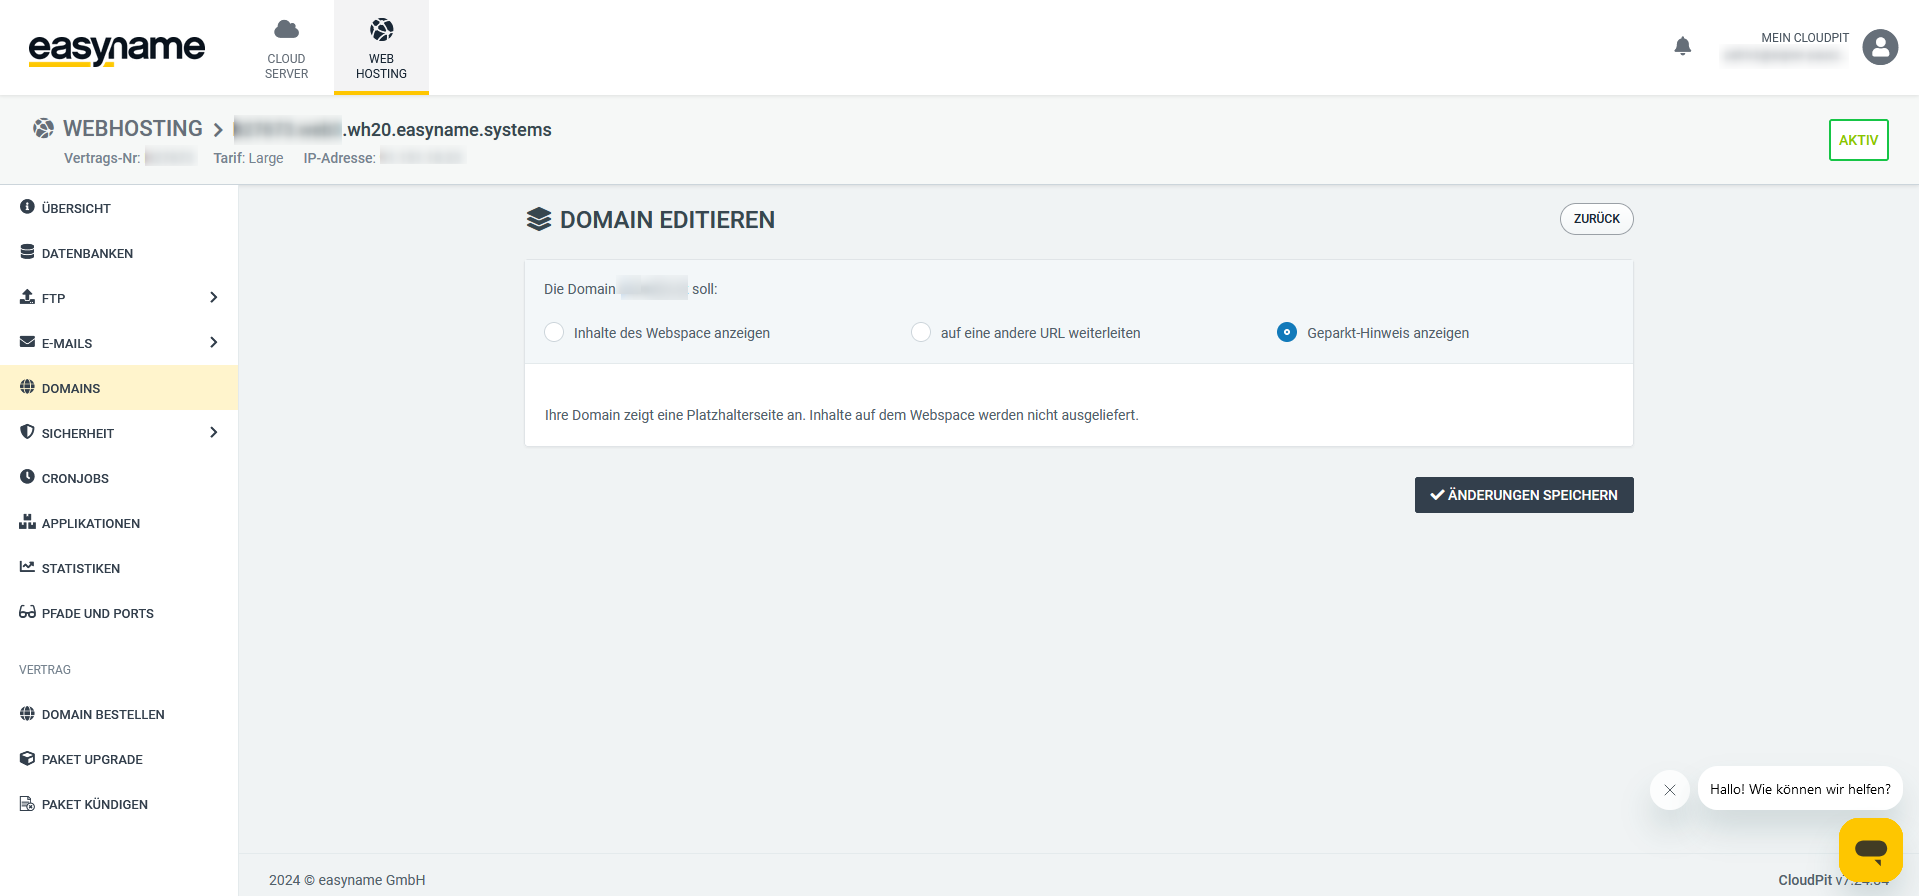
Show Parked Page
Select this option to display a placeholder page, e.g., during maintenance or before going live.
Managing Subdomains in the Controlpanel
Open Webhosting → Subdomains.
Click on + Add New Subdomain and enter the desired name.
If you want to configure the main domain, leave the field empty.
Then specify how the subdomain should be used.
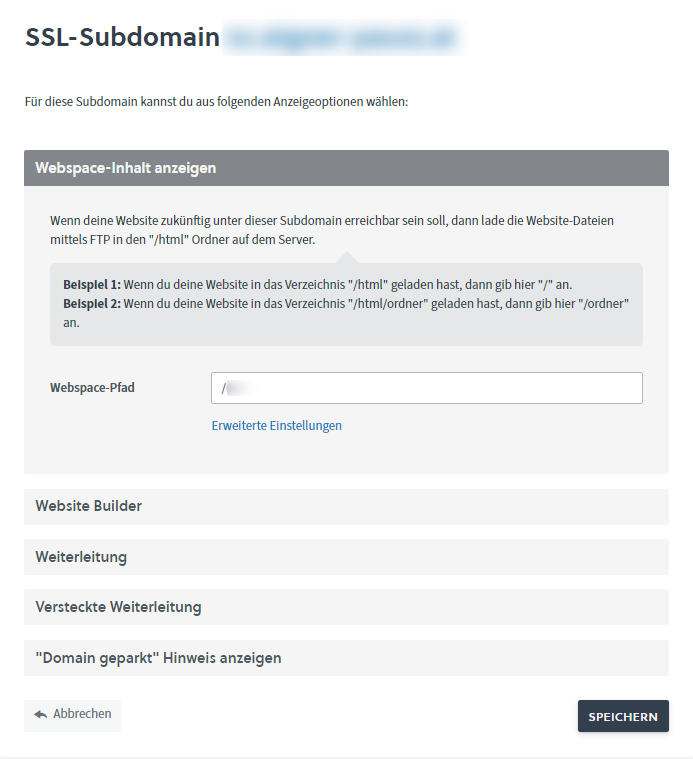
Show Webspace Content
Upload your files via FTP into the folder /html.
Then specify the subfolder, e.g., /shop/.
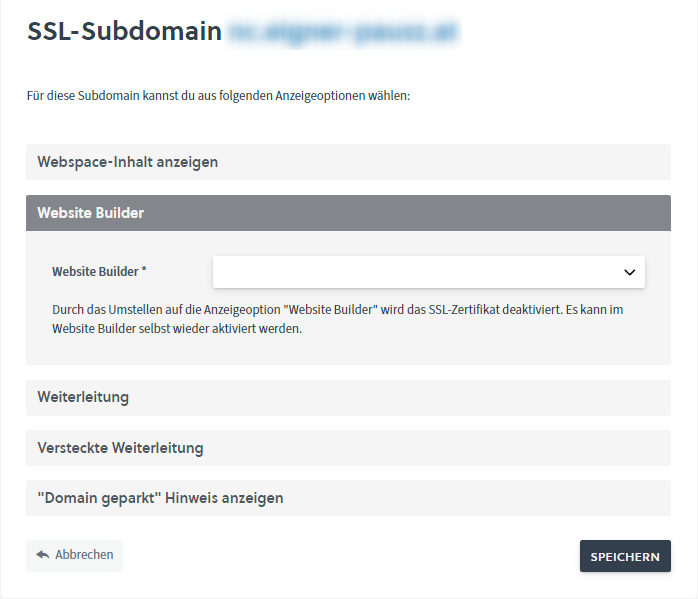
Website Builder
If you use the Website Builder, you can link it here with your subdomain.
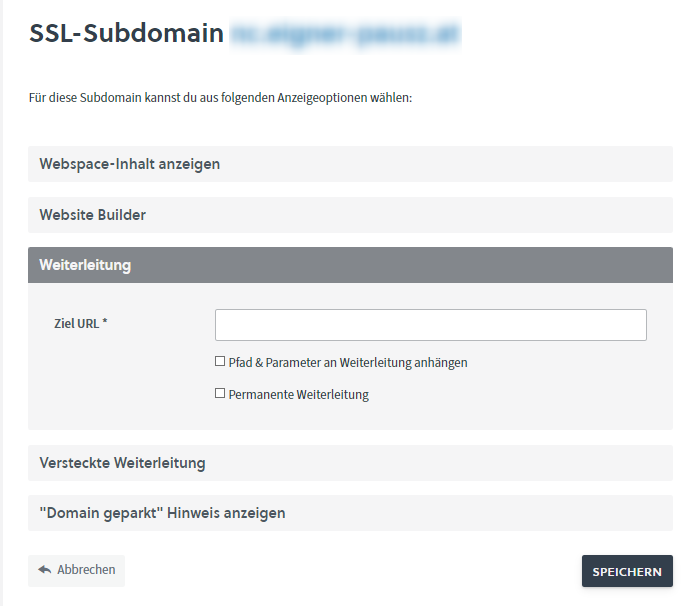
Redirect
Redirect the subdomain to another address.
- Normal Redirect – target address is displayed
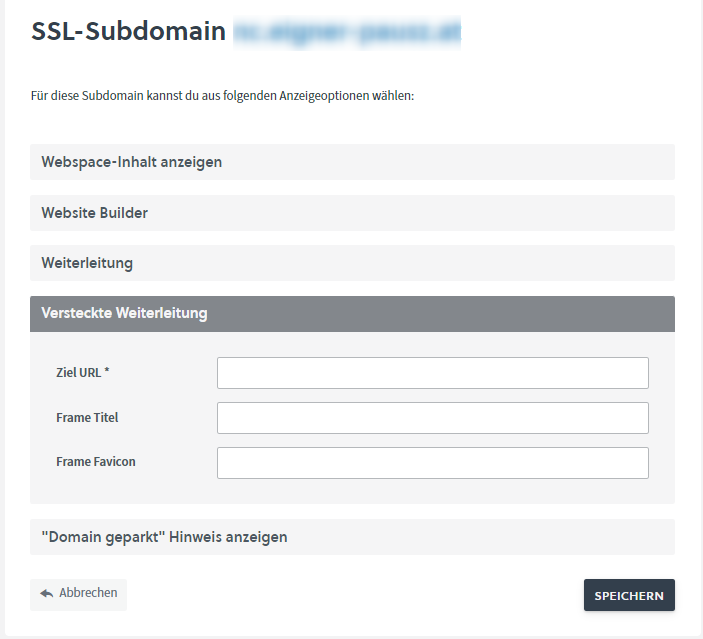
- Hidden Redirect (Frame) – target address remains hidden
Show Parked Page
Displays a placeholder page when no content is available yet.
Requirement: The subdomain must point to the web server as an A record.