Getting Started and Basic Settings for Spam Control
With Spam Control, you can manage the spam filter for a domain, adjust filter settings, set up Email Scout reports, train messages, and monitor email traffic. Spam Control always applies to a single domain.
Table of Contents
- Basics of Spam Control
- Adjust Filter Settings
- Set Up Email Scout Reports
- Train Messages
- Track Email Traffic
- Check Spam Quarantine
Basics of Spam Control
By default, the settings made apply to all mailboxes of the domain stored in Spam Control.
For Spam Control to work according to your requirements, settings in the filter and, depending on the domain configuration, also DNS settings may be necessary. If the domain is not managed by easyname, the provided DNS entries must be entered with the responsible provider.
Adjust Filter Settings
Under Incoming – Protection Settings > Filter Settings, you can set the threshold for quarantine.
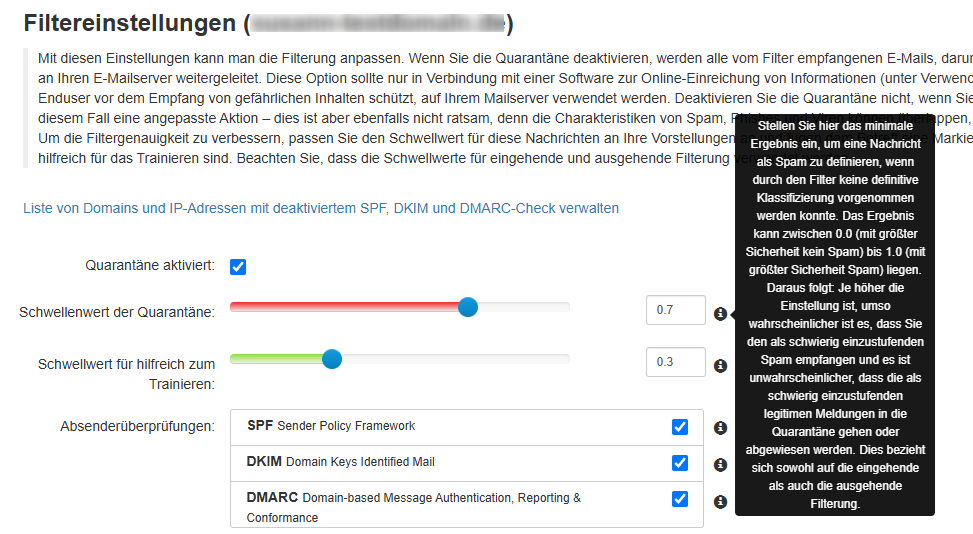
The lower the value, the more likely emails are detected as spam.
Set Up Email Scout Reports
Under Reporting > Email Scout Reports – Incoming, you can specify which mailbox should receive the report about filtered emails.
If no different setting is made, the report is usually delivered once daily at 6:00 AM CET. With high email volume, multiple reports per day can also be set up.
- Open the tab Automatic Email Scout Reports (1).
- Click on Add Automatic Email Scout Reports (2).
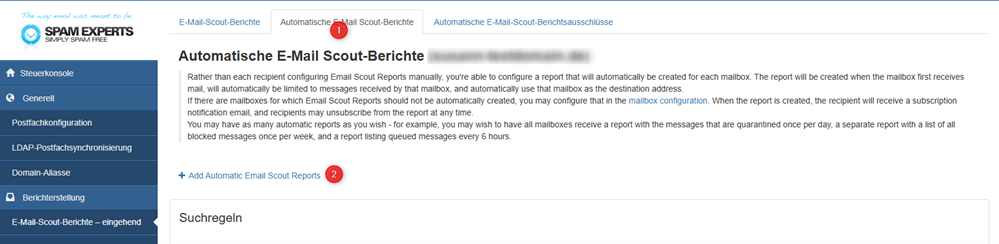
The following overview will then be displayed:

To adjust an existing report, select the report (1) and click on Edit (2).

The window to edit the report will then open.
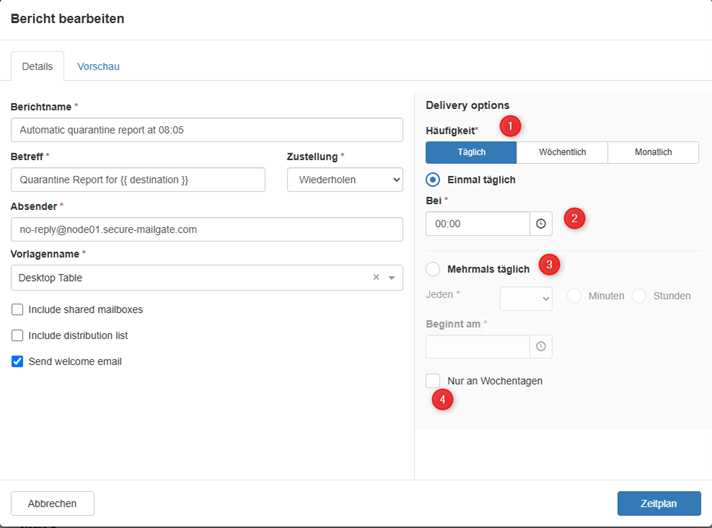
In this window, you can specify the frequency of the report (1), the sending period, and the time (2). For multiple daily reports, you can also set a recurring sending interval (3).
If you activate Weekdays Only (4), no reports will be created or delivered on Saturdays and Sundays.
Train Messages
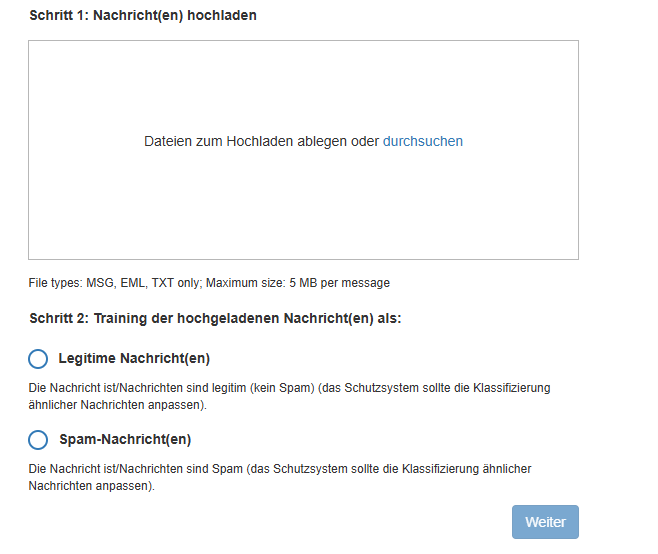
Messages can be trained in Spam Control so that similar emails are better recognized and correctly handled in the future.
The requirements for training are displayed in Spam Control:
The placeholder * replaces any number of characters. Example: *@domain.tld stands for all email addresses of this domain.
Track Email Traffic
Under Incoming > Logs, you can review incoming email traffic.
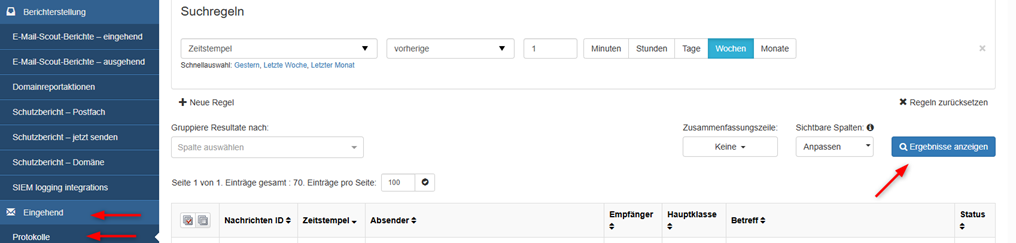
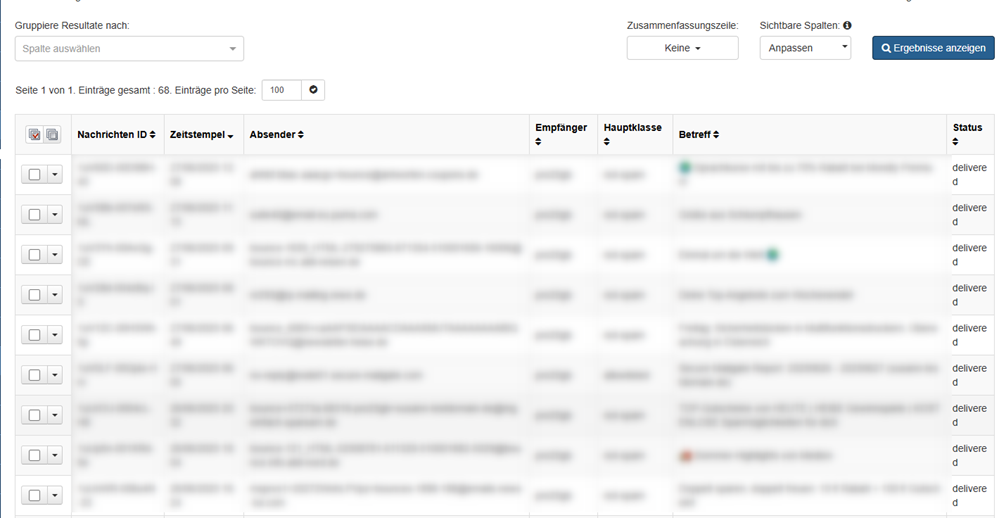
Click on Show Results to display received emails and their processing by Spam Control.
The column Status shows how an email was handled:
- rejected = rejected
- quarantined = moved to quarantine
- delivered = delivered
Check Spam Quarantine
Under Incoming > Spam Quarantine, you can check emails that have been detected as spam or require action.
Click on Show Results to access the existing entries in the spam quarantine.
If the subject is highlighted in blue, you can open and review the message. Afterwards, you can decide whether to release the message, train it, or block the sender.
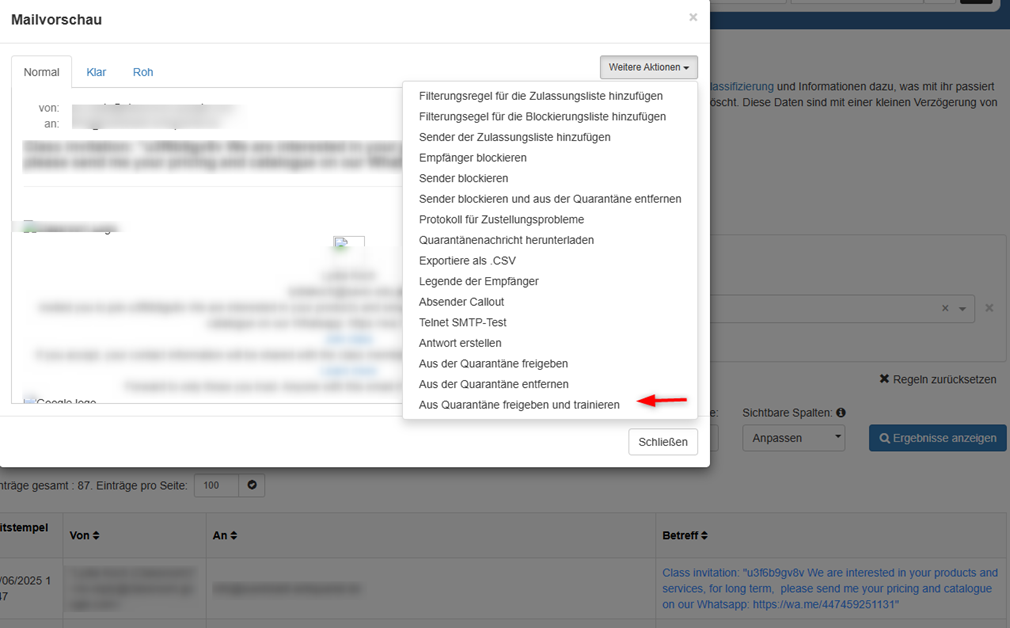
To block the sender, select the option Block Sender from the dropdown list.
When messages are regularly checked and correctly trained, the detection of similar emails improves.