How can I connect my domain with Wix?
You can connect your domain to Wix via DNS. Use the connection method Pointing so that existing easyname mail services can continue to be used.
If you still want to change the nameservers, use this guide: Changing the nameservers of a domain
Table of Contents
- Retrieve DNS values in Wix
- Set Wix DNS in CloudPit
- Set Wix DNS in Controlpanel
- Check existing DNS entries
- After setup
Retrieve DNS values in Wix
Before changing DNS entries at easyname, retrieve the current DNS values in Wix.
- Open your Wix dashboard.
- Open your website settings.
- Select Connect Domain.
- Choose the connection via DNS or Pointing.
Wix will then display the required values:
- A record: IP address of Wix
- CNAME record: Target address for www
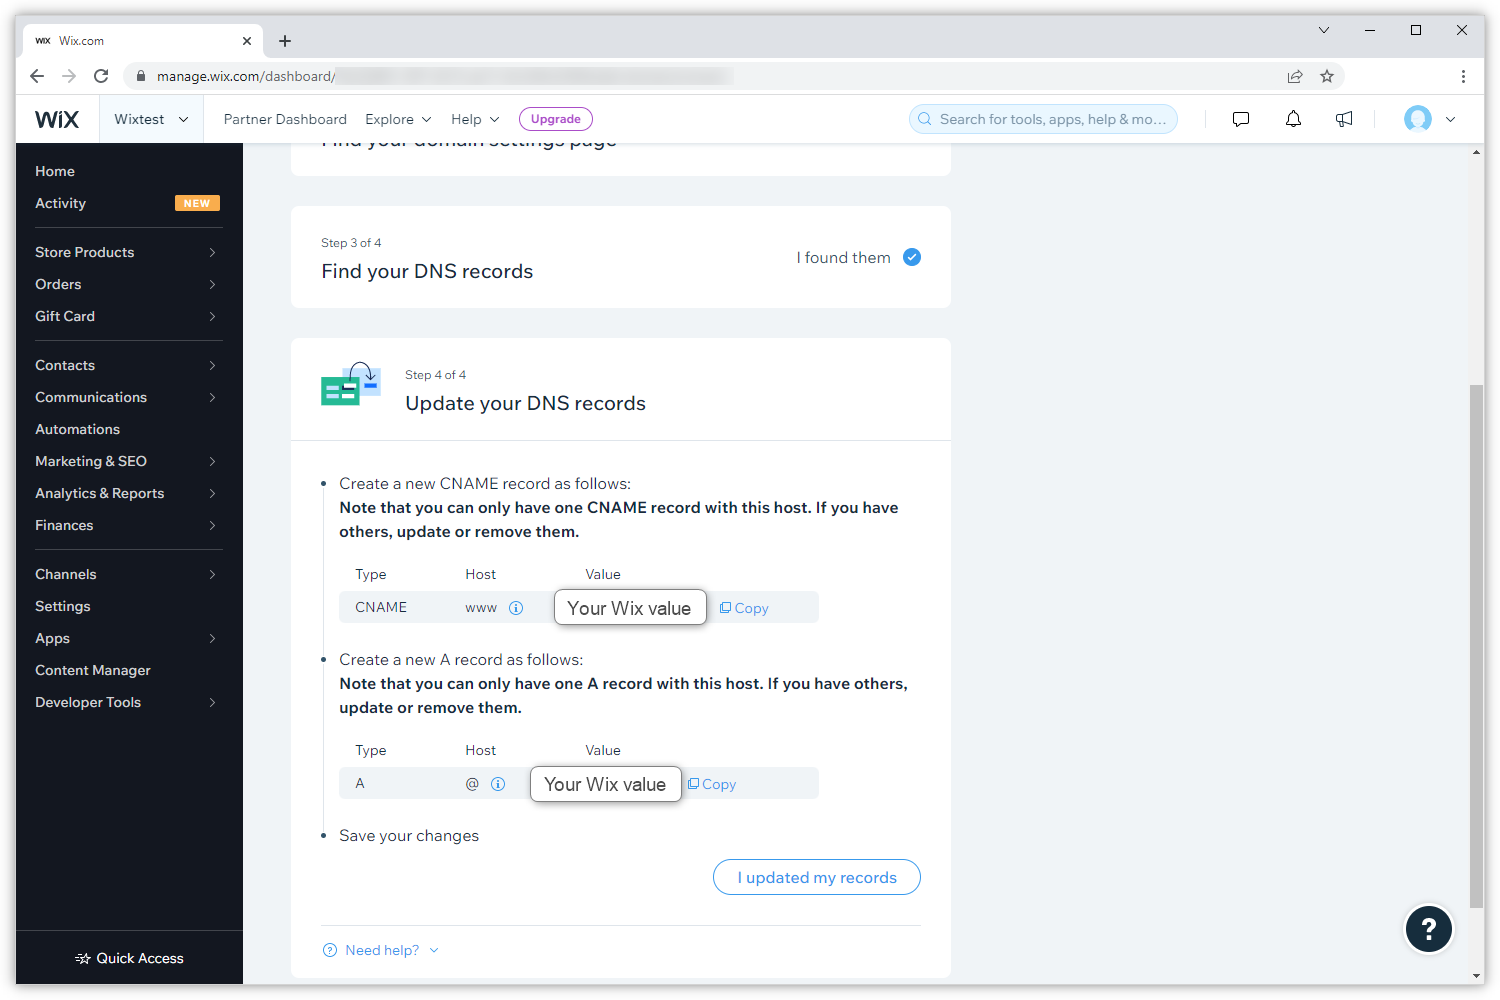
Enter the values exactly as displayed in Wix.
Set Wix DNS in CloudPit
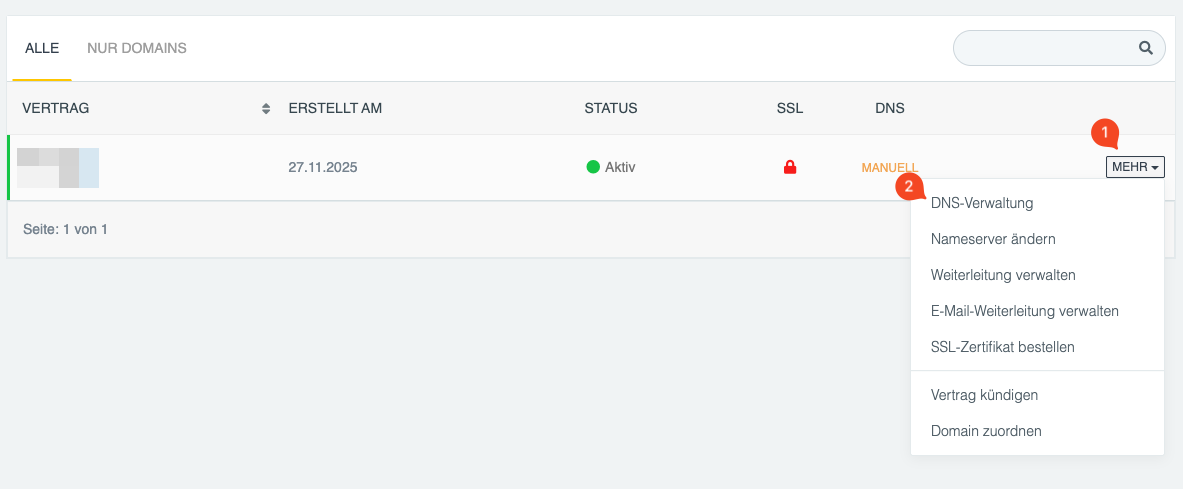
Log in to CloudPit.
Click MORE (1) next to the desired domain and then click DNS Management (2).
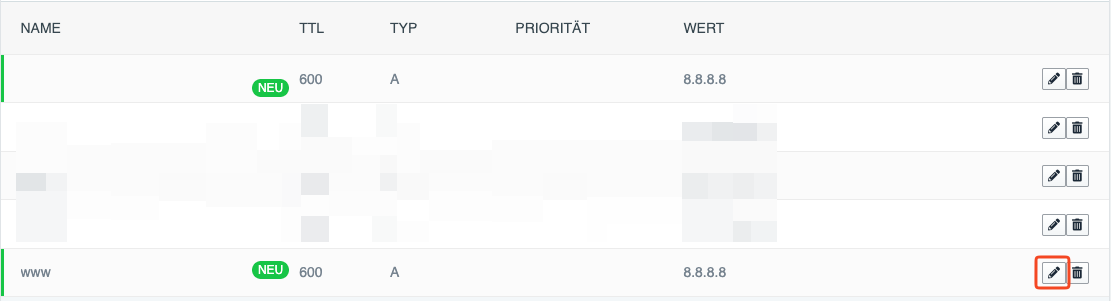
Set A record for the main domain
Create or edit the A record for the main domain.
- Type: A
- Name: @ or blank
- Value: IP address of Wix
Set CNAME record for www
Create or edit the CNAME record for www.
- Type: CNAME
- Name: www
-
Value:
pointing.wixdns.net
Set Wix DNS in Controlpanel
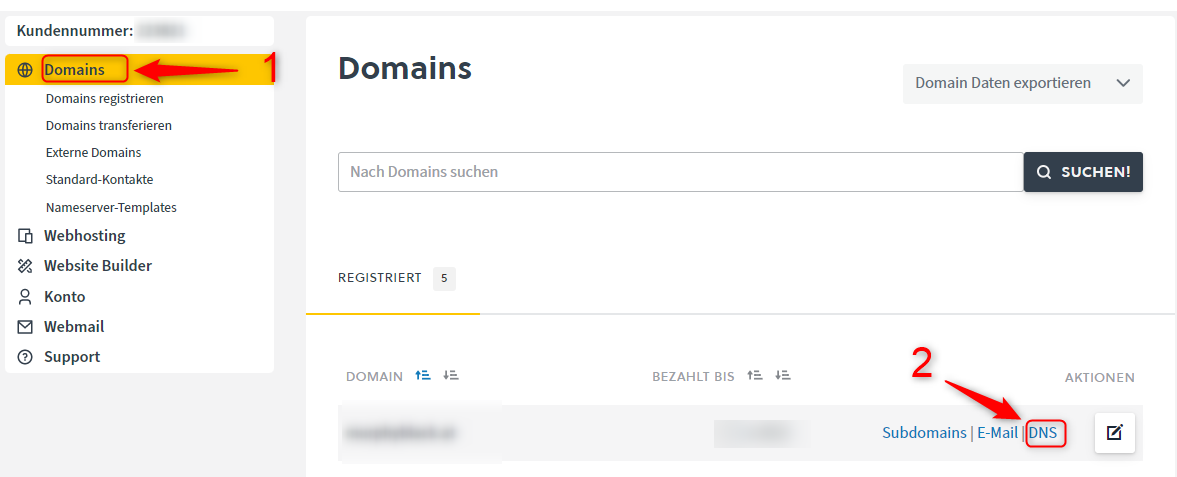
Log in to the Controlpanel.
Open Domains (1) and click DNS (2) next to the desired domain.
Set A record for the main domain
Create or edit the A record for the main domain.
- Type: A
- Host/Name: blank
- Value: IP address of Wix
This entry ensures that the main domain points to your Wix website.
Set CNAME record for www
Create or edit the CNAME record for www.
- Type: CNAME
- Host/Name: www
-
Value:
pointing.wixdns.net
This entry ensures that www.yourdomain.com also points to your Wix website.
Check existing DNS entries
Before saving, check whether conflicting DNS entries already exist.
- If an A record for the main domain already exists, edit it instead of creating a second A record.
- If a CNAME for www already exists, edit it instead of creating a second CNAME.
- If there is an A or AAAA record for www, remove it before setting the CNAME record.

After setup
Save the changes and wait for the DNS update.
- Initial results are usually visible after a few minutes.
- The complete worldwide update can take up to 48 hours.
During this time, the old website may still be displayed or the website might not be accessible consistently everywhere.