How do I manage my DNS records?
With DNS records, you specify where your domain points and which services are used for your domain. This guide explains how to add and manage DNS records such as A records, MX records, TXT records, and CNAME records at easyname using the CloudPit or Control Panel.
Table of Contents
- Add a DNS record in CloudPit
- Add a DNS record in the Control Panel
- Set up an A record
- Set up an MX record
- Set up a TXT record
- Set up a CNAME record
- Common sources of errors
- How long do DNS changes take?
Add a DNS record in CloudPit
Log in to the CloudPit.
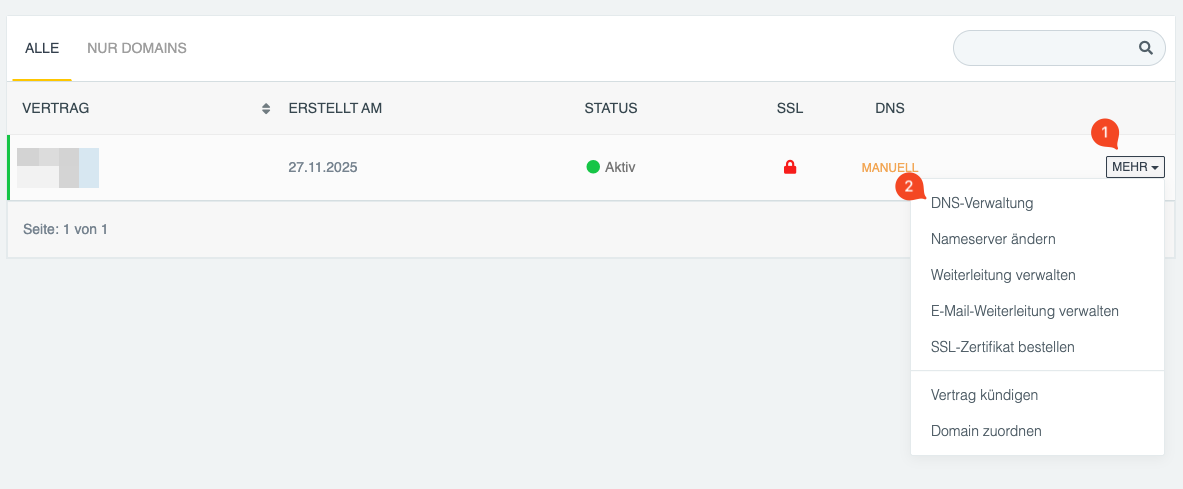
Click MORE (1) next to the desired domain, then click DNS Management (2).
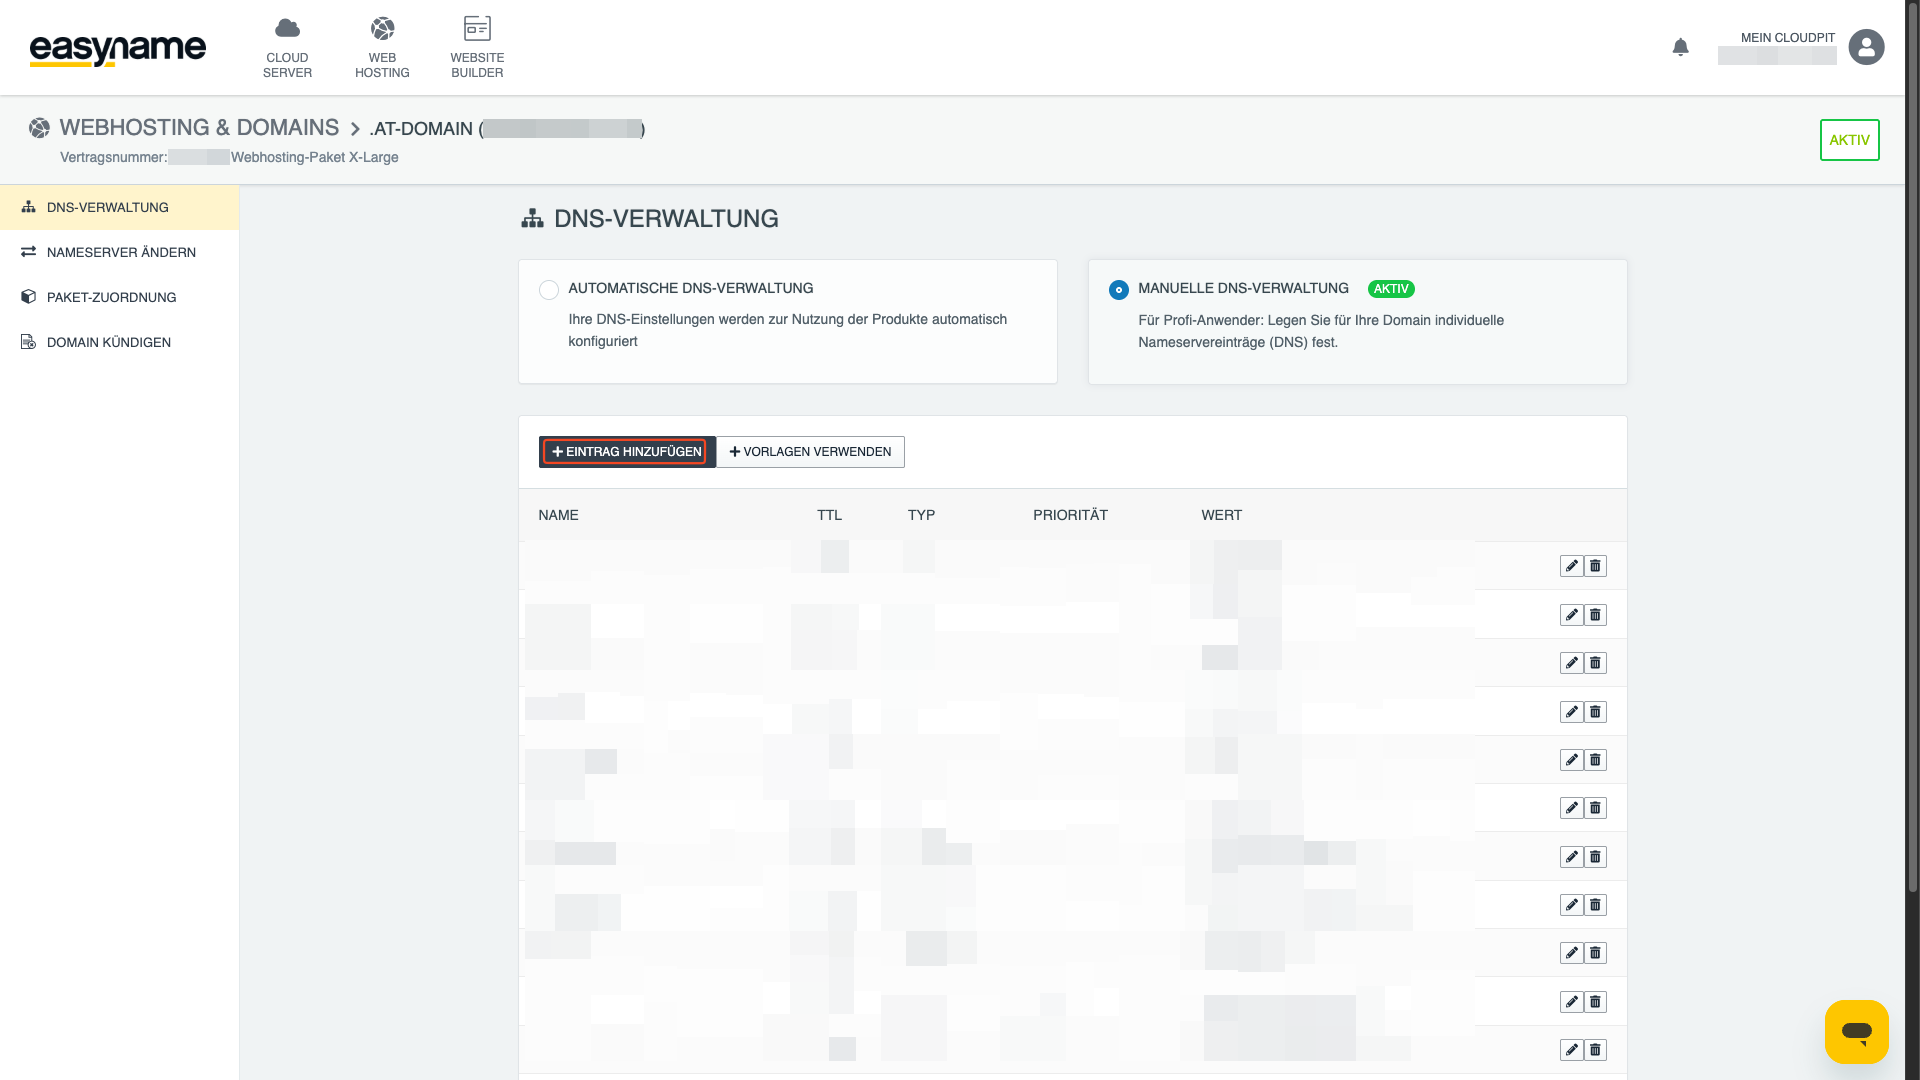
If DNS management is still set to automatic, select manual management for your own DNS records (3).

Click + Add record.
Select the desired record type, enter the required values, and save the changes.
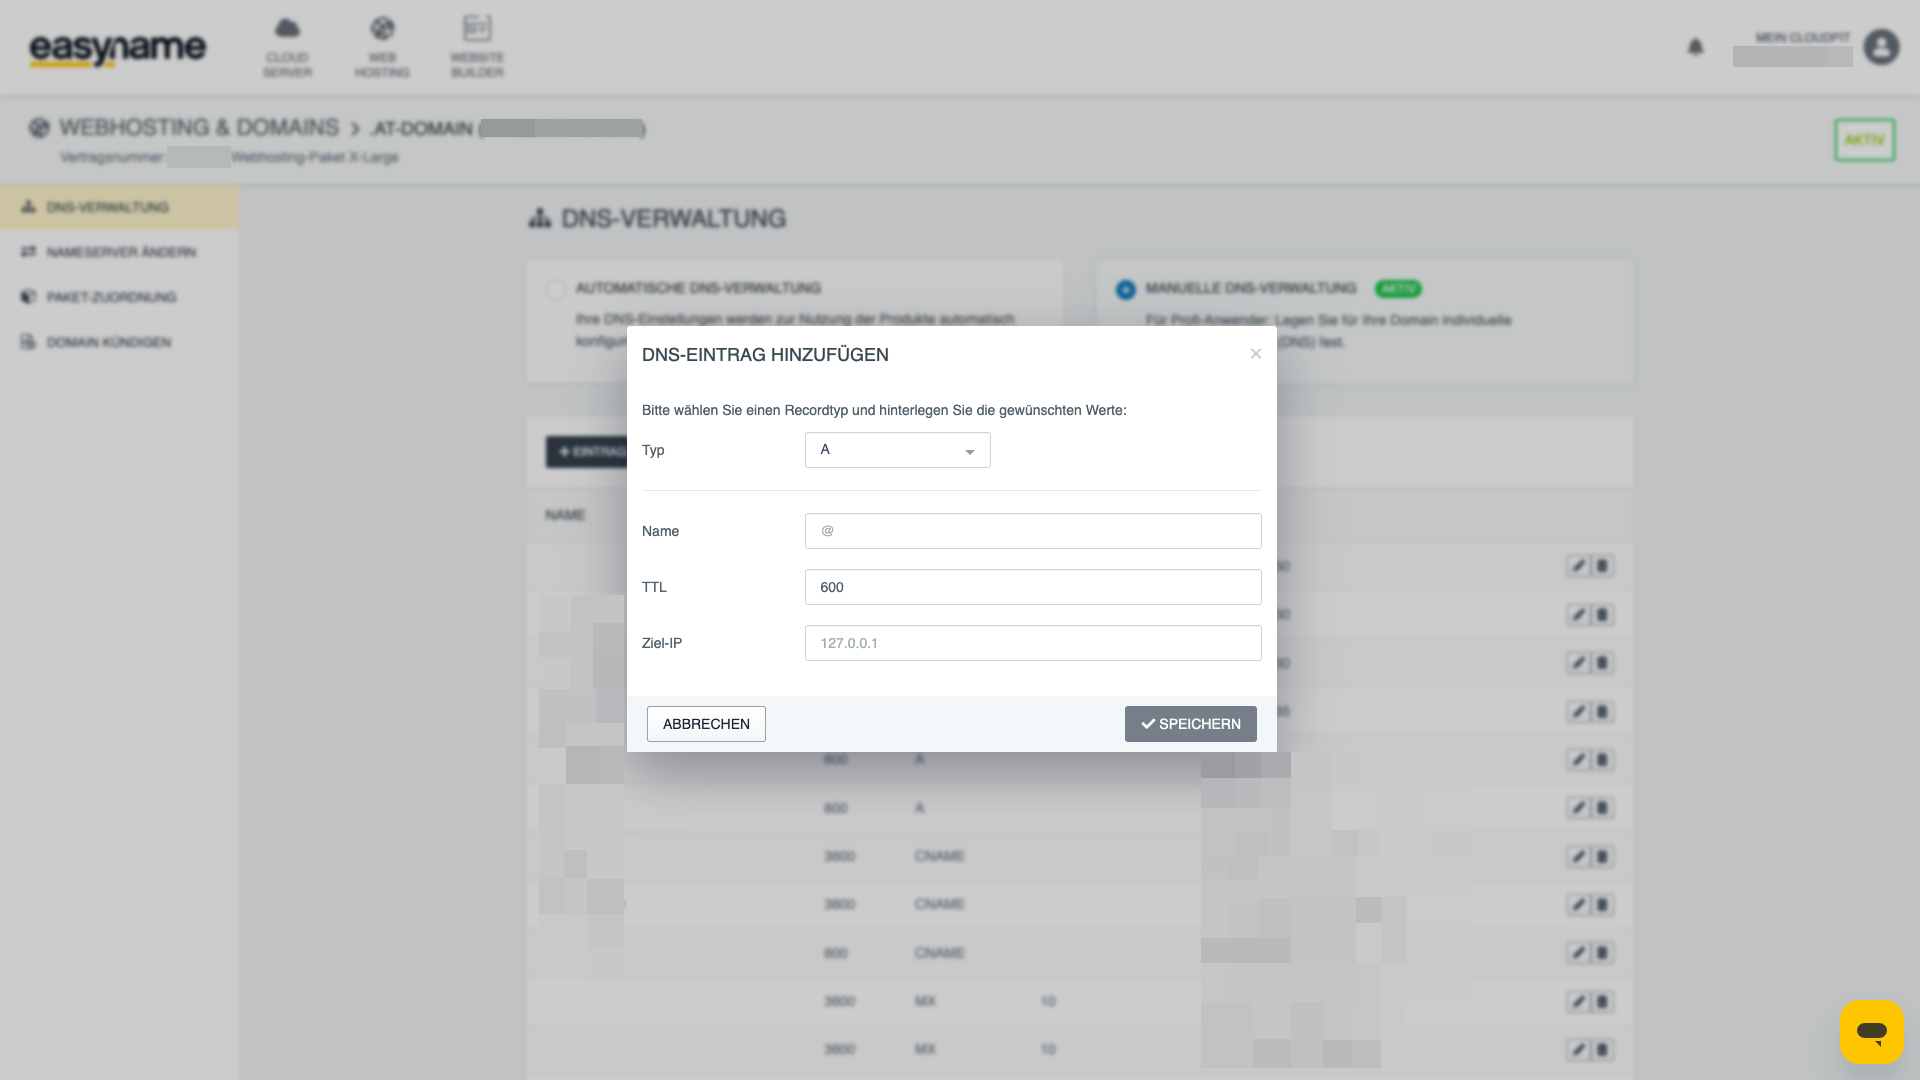
Special feature in CloudPit: "Name" field
Only the subdomain is entered in the Name field. The system automatically appends the main domain.
Example: If you want to create a record for www.easyname.at, enter only www in the Name field.
Do not enter the full domain. Otherwise, a technically incorrect record like www.easyname.at.easyname.at will be created.
If you want to set a record directly for the main domain, leave the Name field empty or use @.
Add a DNS record in the Control Panel
Log in to the Control Panel.
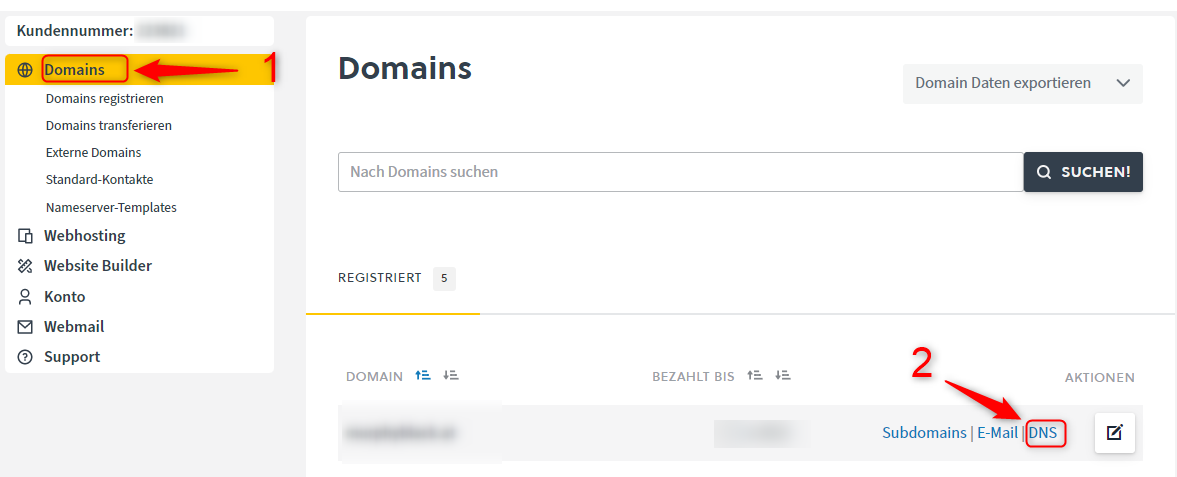
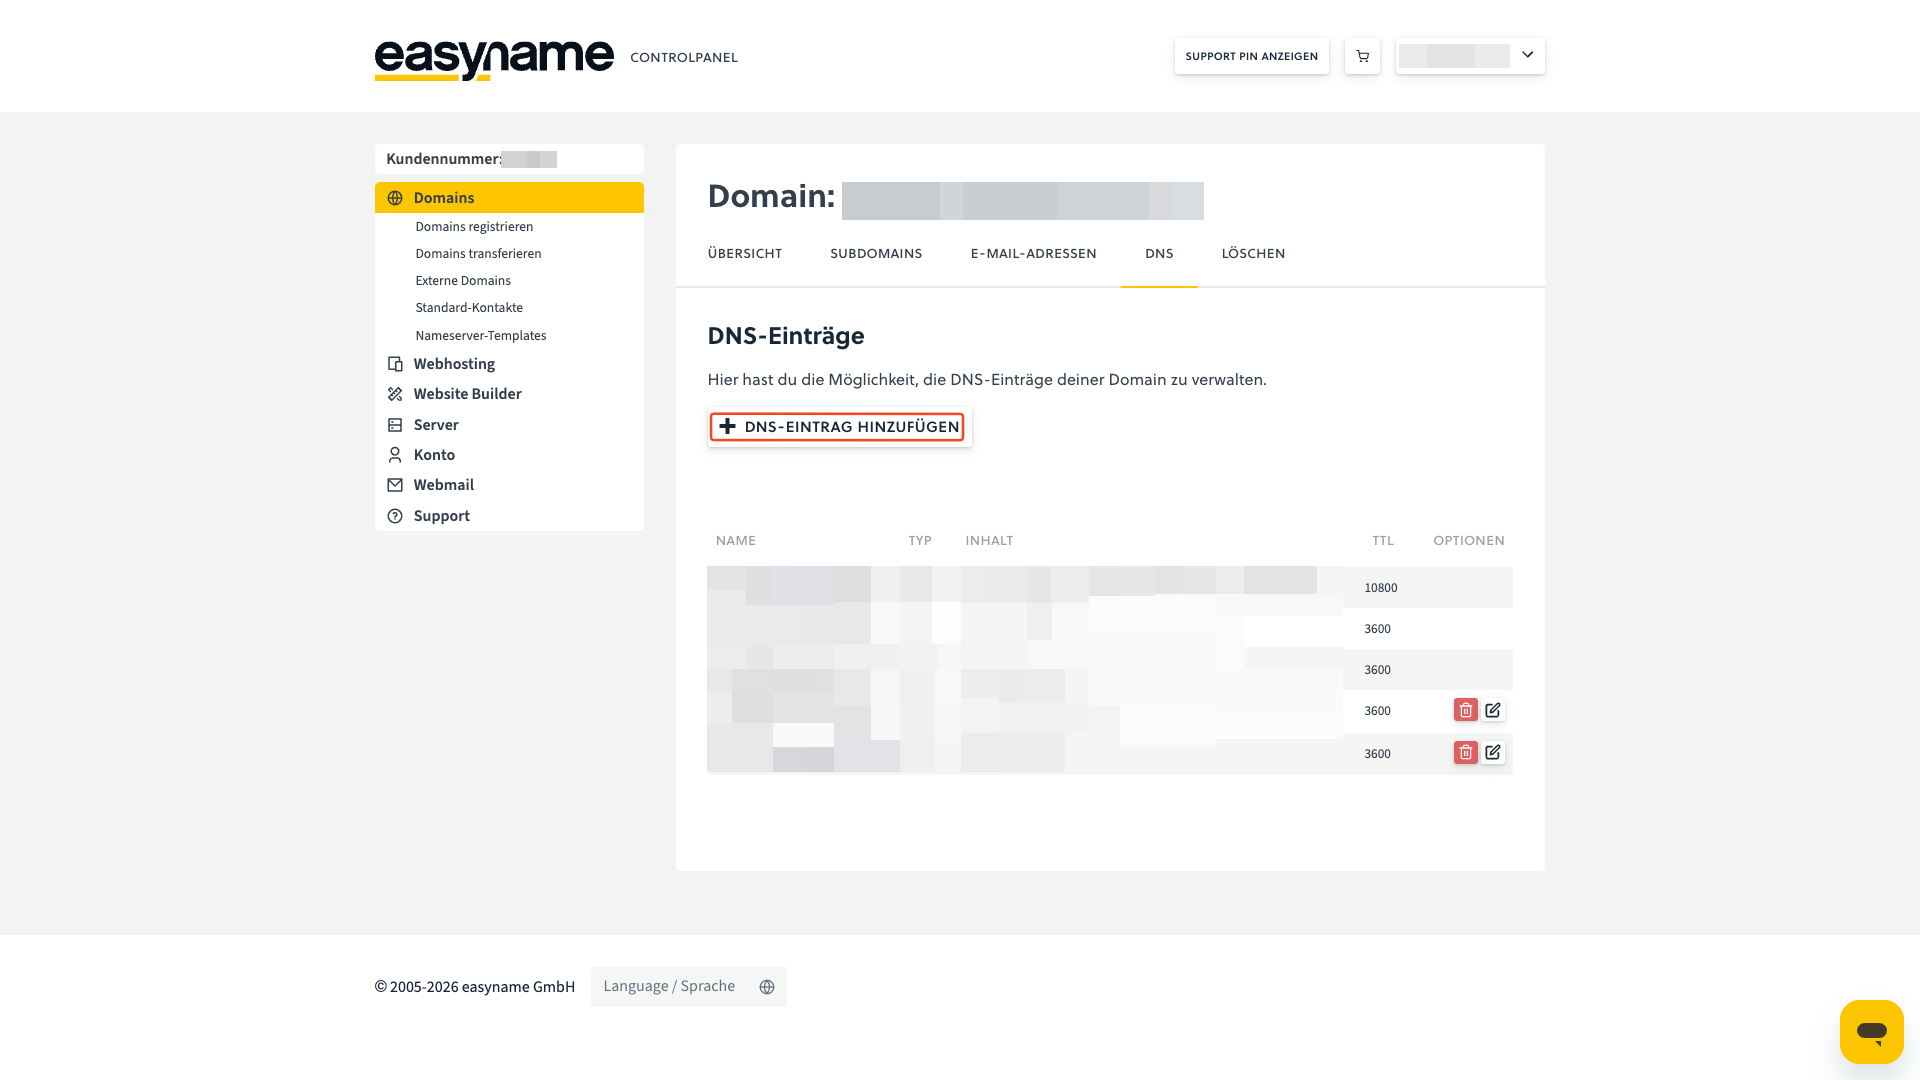
Open the Domains (1) menu.
Click DNS (2) next to the desired domain.
Click + Add DNS record.
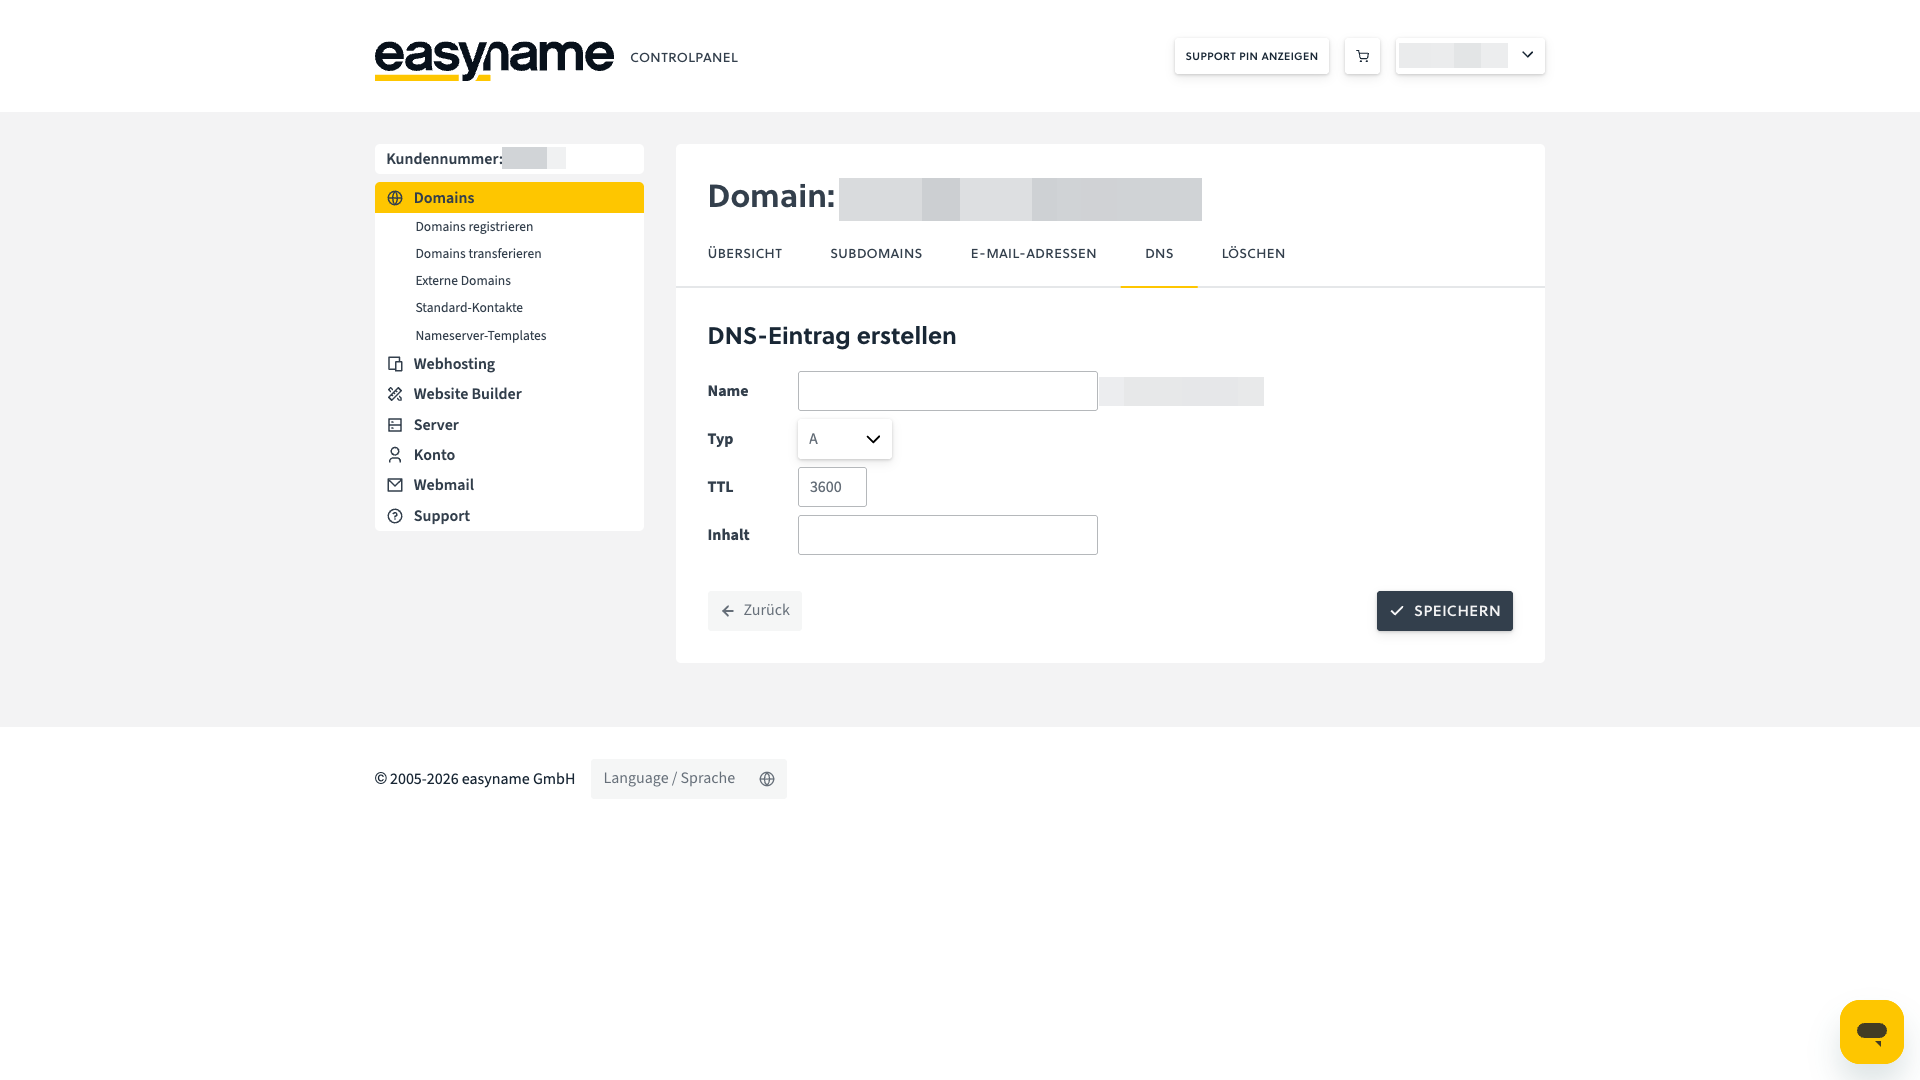
Select the desired record type, enter the required values, and save the changes.
Common use cases
Set up an A record
Use an A record if your domain or subdomain should point to the IP address of a server, for example, if your website is hosted on an external server.
Example for the main domain:
- Type: A
- Name: empty or @
- Value: IP address of the server, e.g., 203.0.113.10
Example for a subdomain:
- Type: A
- Name: www
- Value: IP address of the server
Set up an MX record
Use an MX record if emails should be delivered via an external mail server.
- Type: MX
- Name: empty or @
- Value: mail server address of the provider
- Priority: as specified by the provider
Check existing MX records and remove old entries if your provider requires it.
Set up a TXT record
Use a TXT record if an external provider needs to store a text value for your domain, for example, for domain verification.
- Type: TXT
- Name: as specified, e.g., @ or _acme-challenge
- Value: code or text value provided by the provider
Set up a CNAME record
Use a CNAME record if a subdomain should point to another address.
- Type: CNAME
- Name: e.g., blog
- Value: target address, e.g., targetaddress.example.com
Common sources of errors
- The domain’s nameservers do not point to easyname.
- The full domain was entered in the Name field in CloudPit.
- The wrong record type was chosen.
- Old or conflicting records were not removed.
- The TTL or global DNS update has not yet completed.
- The MX priority was set incorrectly.
How long do DNS changes take?
DNS changes are usually visible in the system immediately. The global update can take up to 24 to 48 hours.