How do I upgrade my MySQL 5.7 database to MySQL 8?
A MySQL upgrade is done by exporting the existing database, creating a new MySQL 8 database, and importing the exported data into it. Then, adjust the database details in your application's configuration file.
If desired, we can perform the upgrade as part of our Premium Services.
Table of Contents
- Schematic Procedure
- Switch WordPress Database to MySQL 8 in CloudPit
- Switch WordPress Database to MySQL 8 in Control Panel
Schematic Procedure
- Locate the configuration file of your application.
- Note the database name, database user, database password, and database server.
- Open the existing database in phpMyAdmin and export it as an SQL file.
- Create a new MySQL 8 database.
- Import the exported SQL file into the new database.
- Adjust the database details in your application's configuration file.
- Test the website.
For WordPress, the configuration file is located in the wp-config.php file.
Switch WordPress Database to MySQL 8 in CloudPit
Check WordPress Directory
In CloudPit, open the desired web hosting package via Manage.
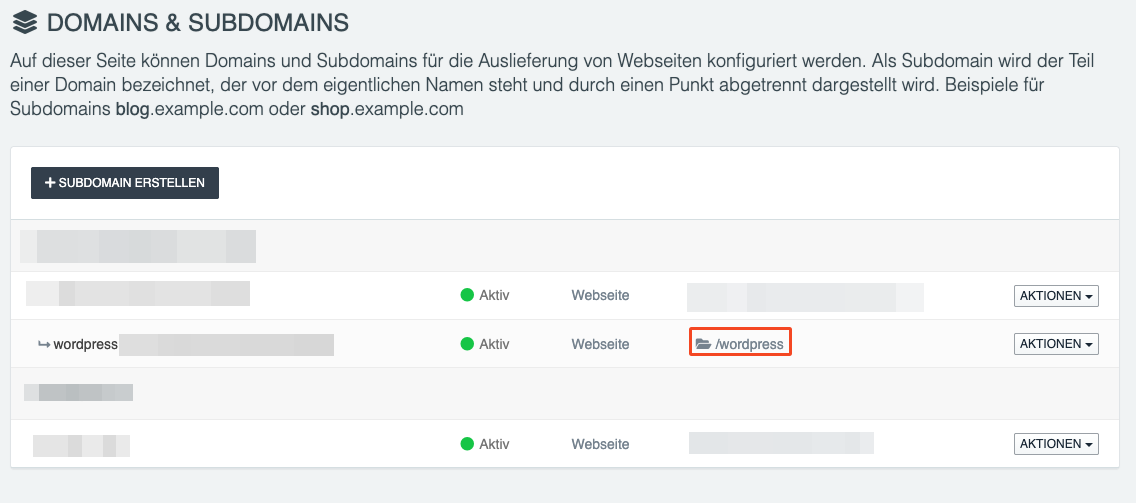
On the left, open the Domains section. For the affected domain, you will see the path to the WordPress installation.
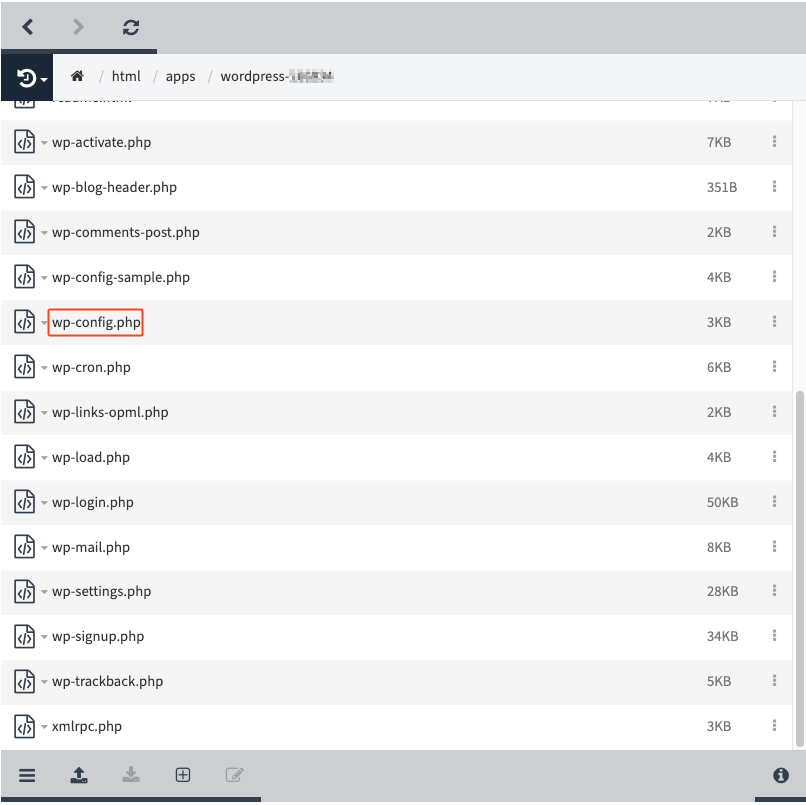
Open wp-config.php
Open FTP → Web FTP.
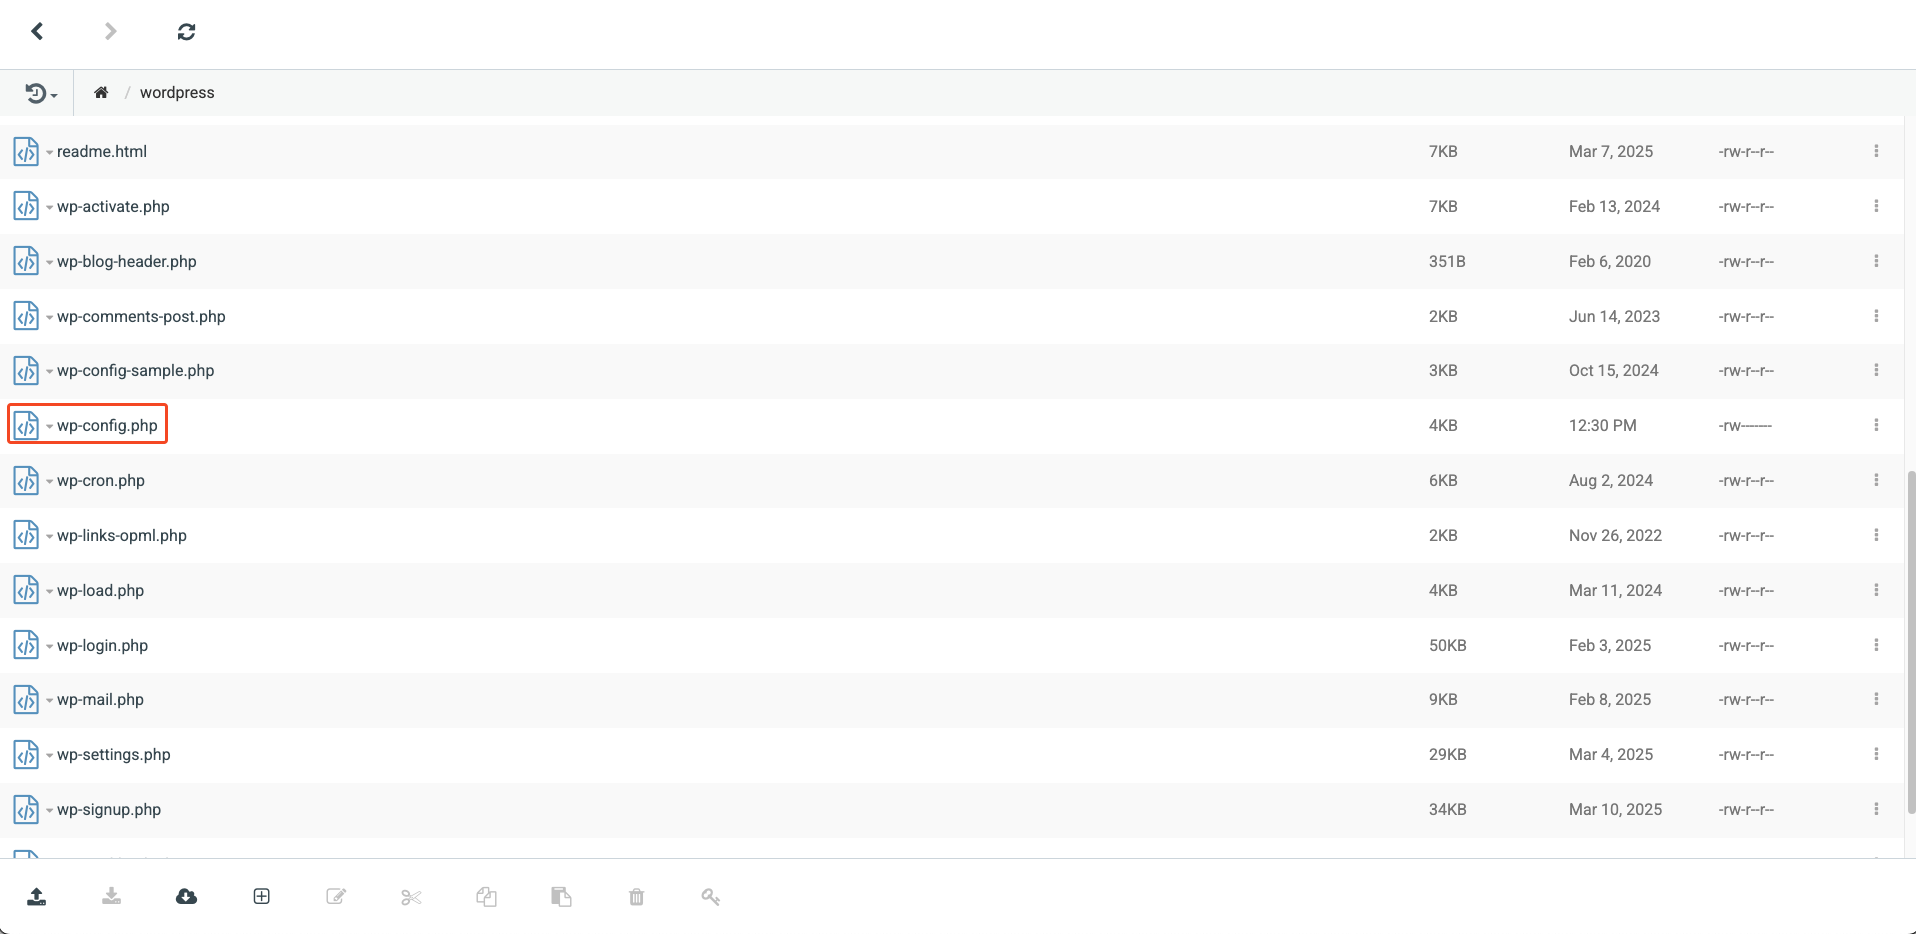
Navigate to the WordPress directory and open the wp-config.php file.
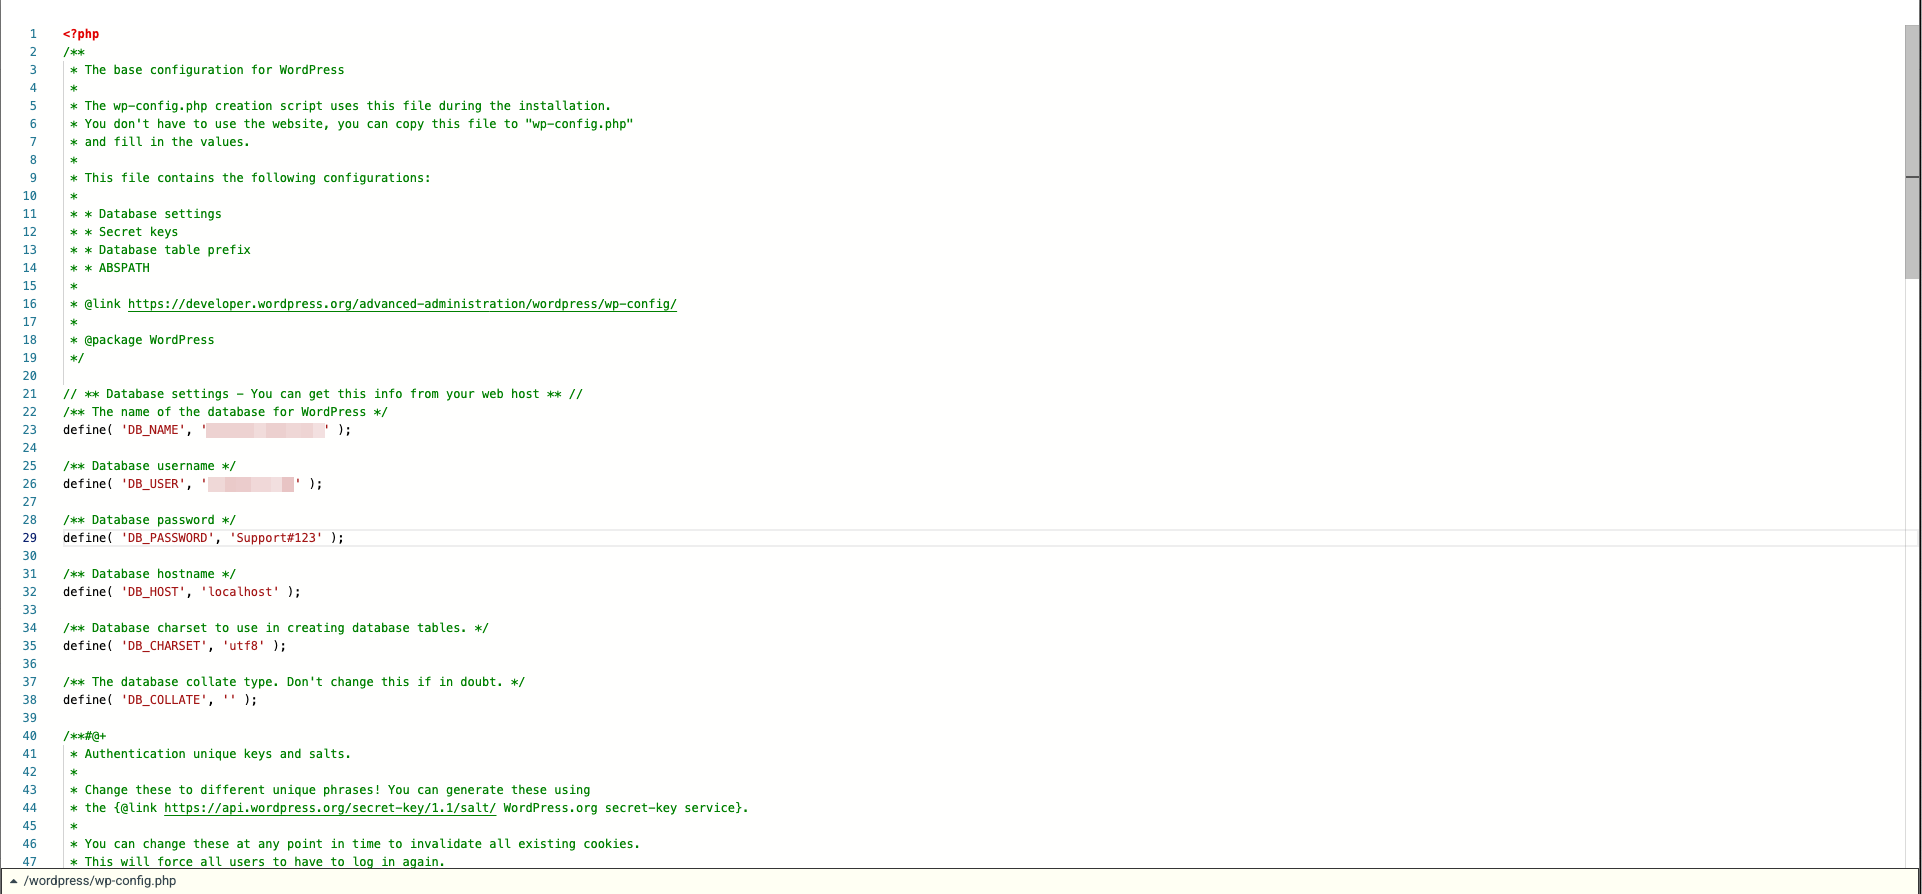
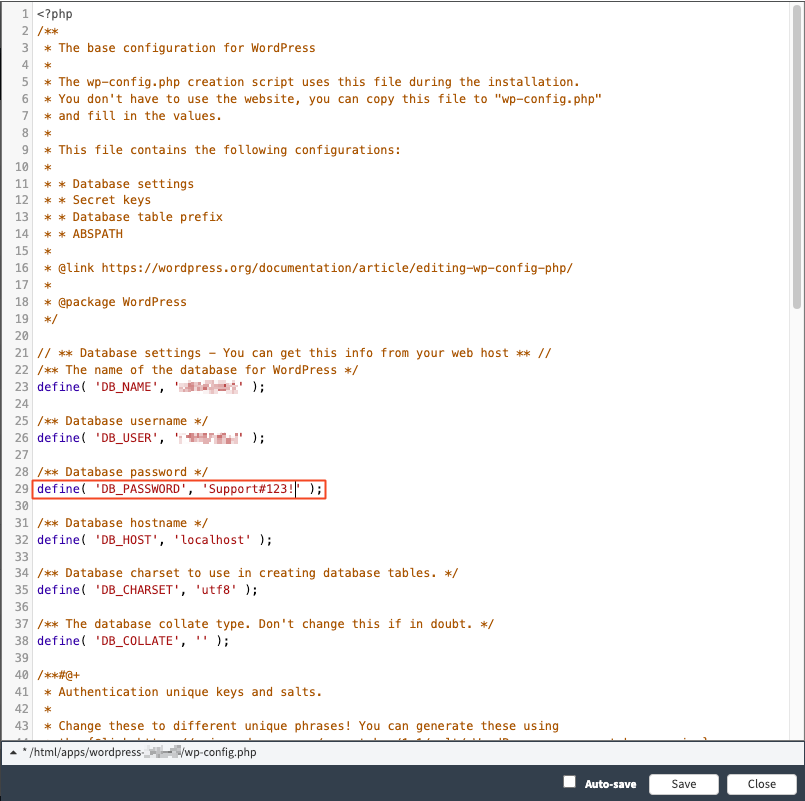
Note the following values:
- DB_NAME – database name
- DB_USER – database user
- DB_PASSWORD – database password
- DB_HOST – database server
Export Existing Database
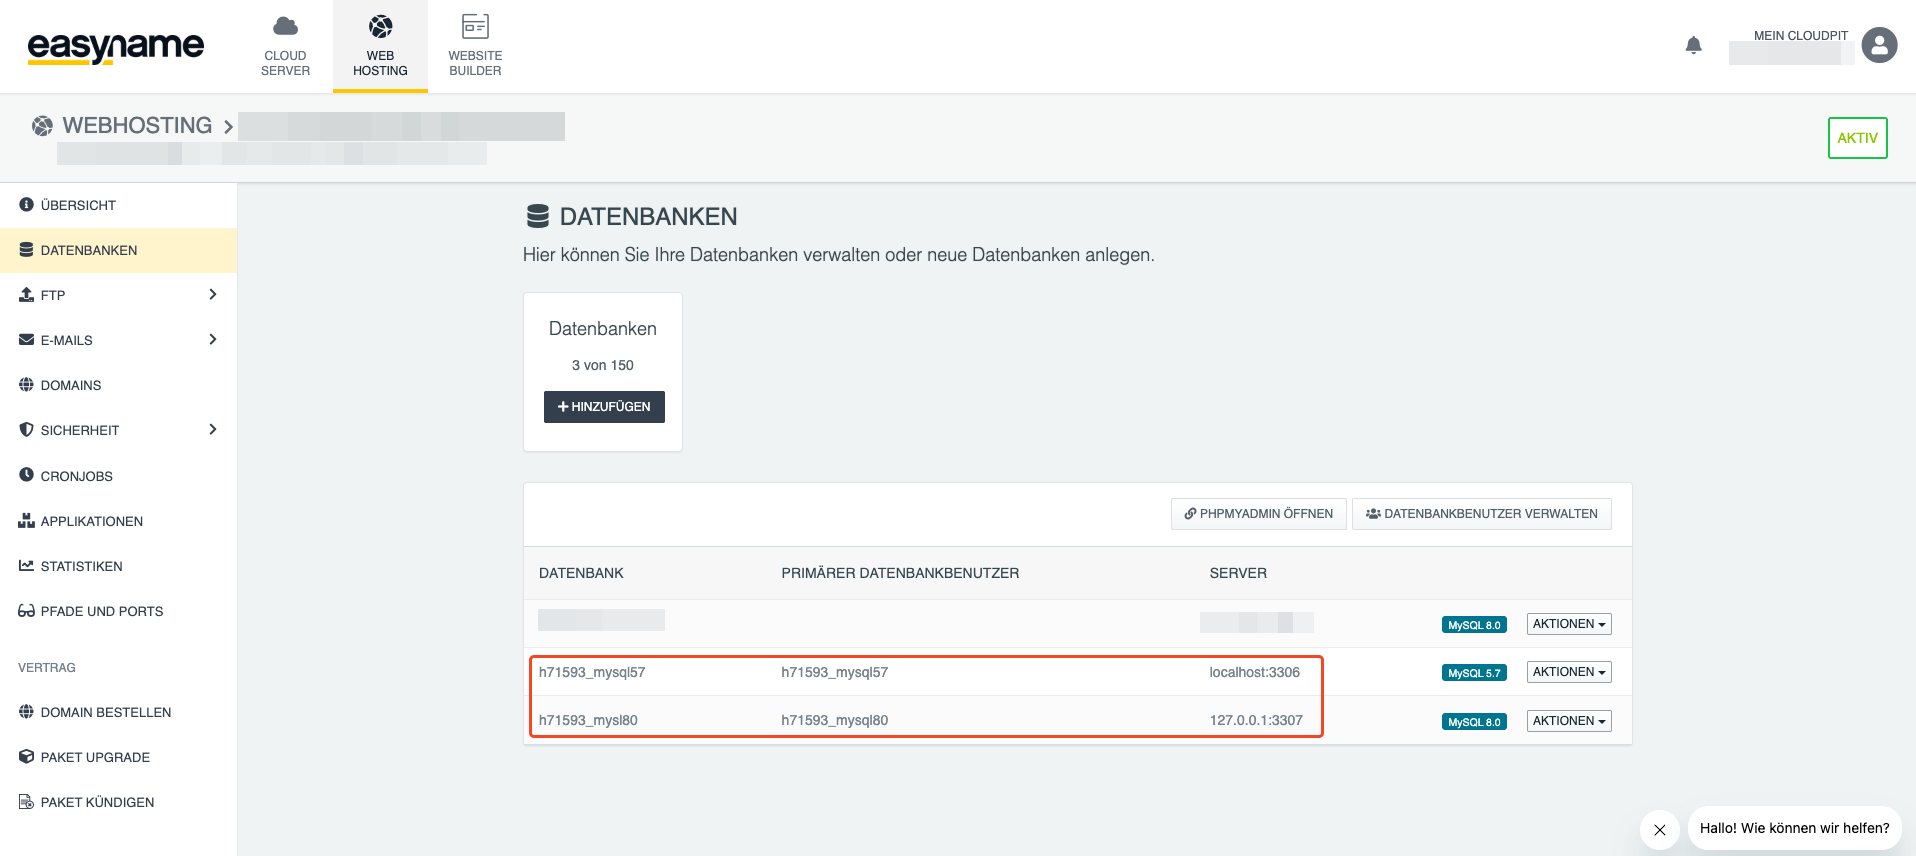
Open Databases.
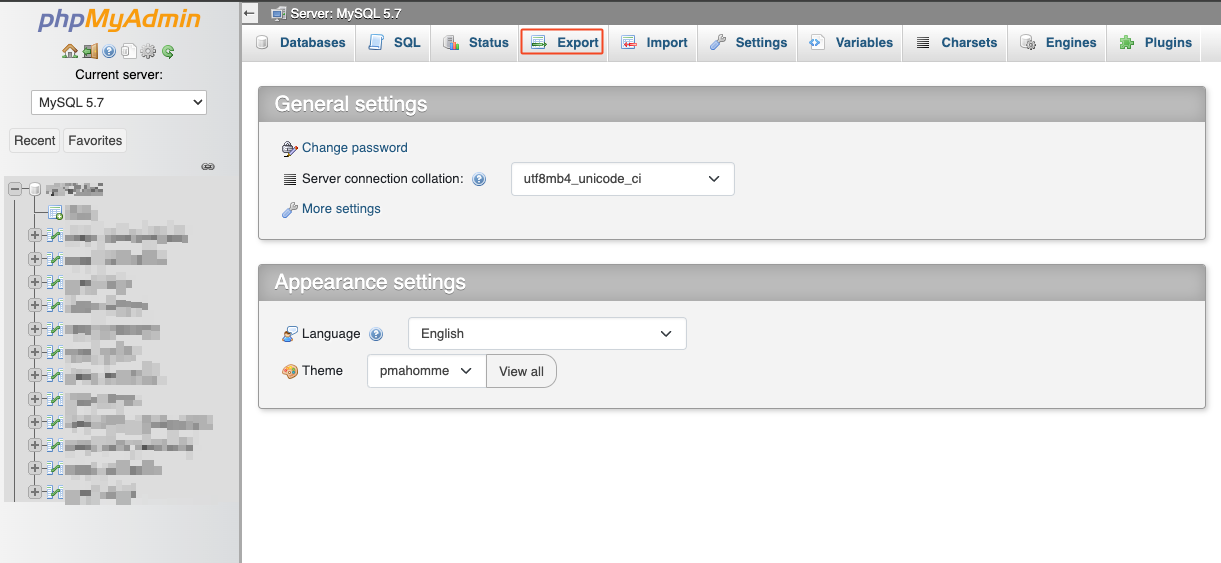
Click on Actions → Open phpMyAdmin for the existing database.

Export the database in phpMyAdmin as an SQL file.
Create New MySQL 8 Database
Create a new MySQL 8 database in CloudPit.
If possible, use the same password or securely note the new password.
Check SQL File
Open the exported SQL file in a text editor.
If the file contains lines like these, replace the old database name with the new database name:
-- Database: `XXXX`
--
CREATE DATABASE IF NOT EXISTS `XXXX` DEFAULT CHARACTER SET utf8 COLLATE utf8_unicode_ci;
USE `XXXX`;
Then save the SQL file.
Import Database
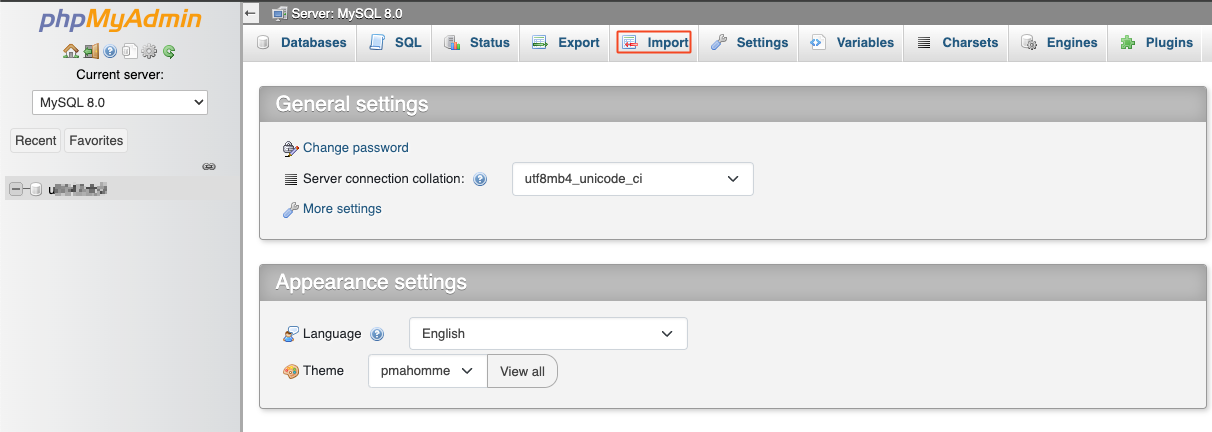
Open the new MySQL 8 database in phpMyAdmin.
Import the previously exported and adjusted SQL file.
Adjust wp-config.php
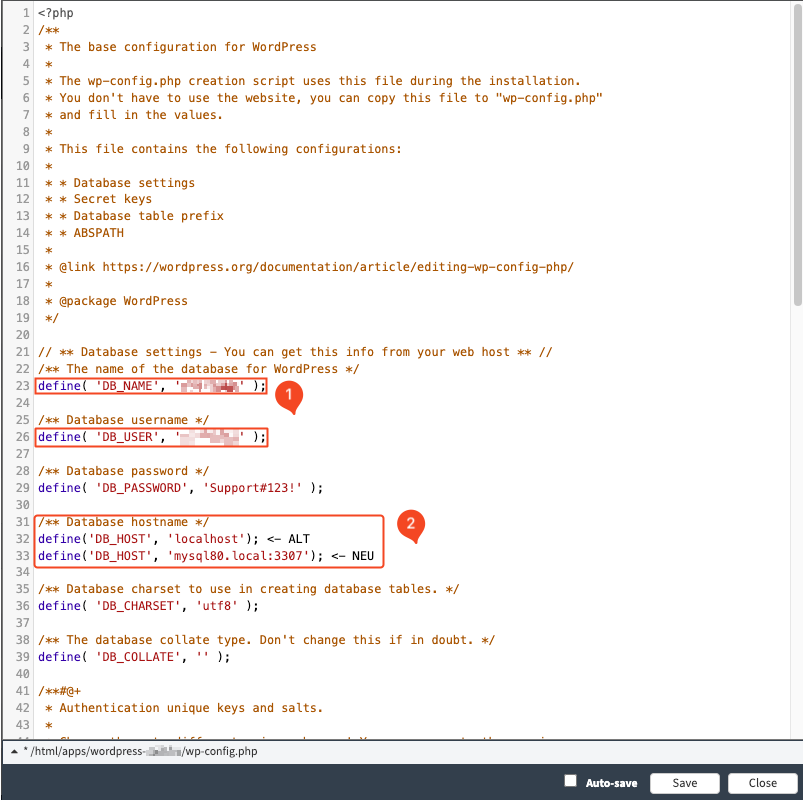
Open the wp-config.php file again.
Adjust the values for database name, database user, database password, and database server to the new MySQL 8 database.
In CloudPit, the database server for MySQL 8 is:
127.0.0.1:3307
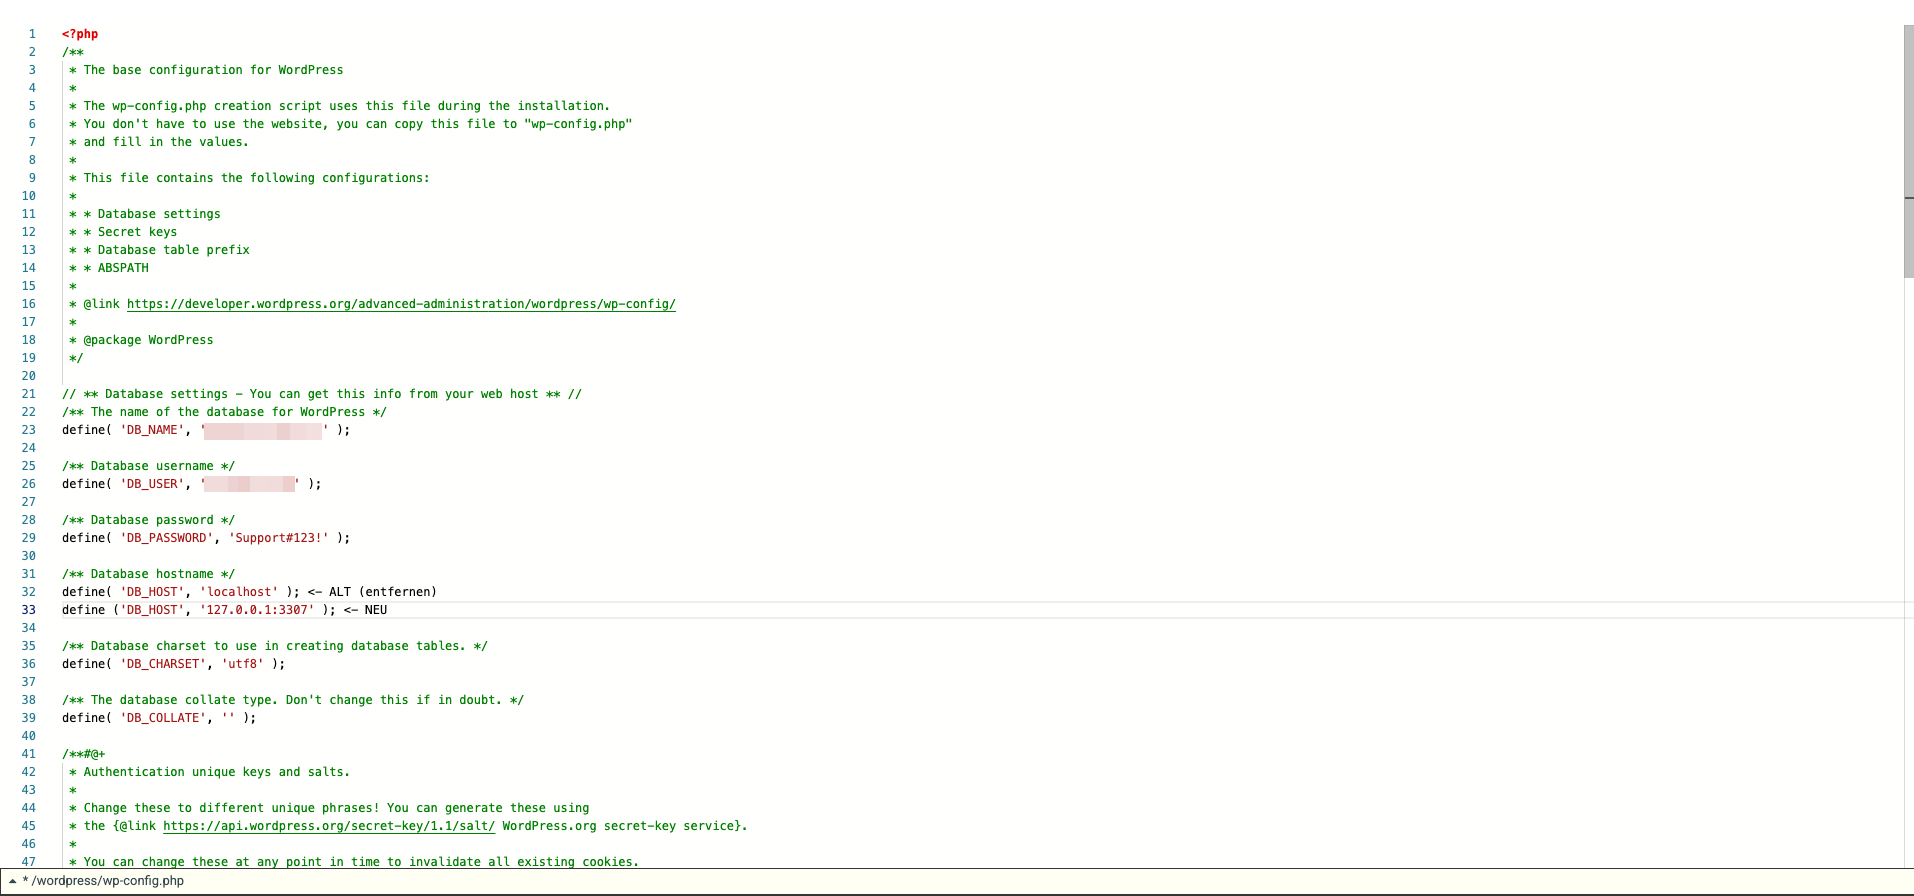
Save the file.
Then test whether your WordPress website works correctly.
Switch WordPress Database to MySQL 8 in Control Panel
Check WordPress Directory
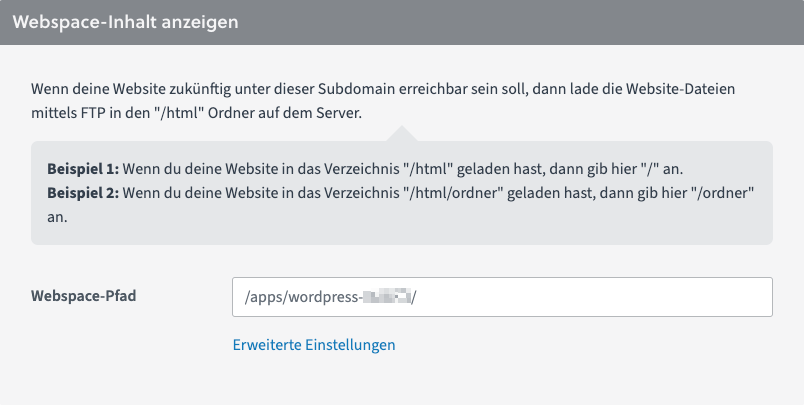
In the Control Panel, open Domains and then the affected domain.
Open Subdomains. There you will see the location of the WordPress installation under Webspace Content.
Open wp-config.php
Open Web Hosting → Web FTP.
Navigate to the WordPress directory and open the wp-config.php file.
Note the following values:
- DB_NAME – database name
- DB_USER – database user
- DB_PASSWORD – database password
- DB_HOST – database server
Export Existing Database
Open Web Hosting → Databases.
Click on Open phpMyAdmin for this database for the existing database.

Export the database in phpMyAdmin as an SQL file.
Create New MySQL 8 Database
Create a new MySQL 8 database in the Control Panel.
If possible, use the same password or securely note the new password.


Check SQL File
Open the exported SQL file in a text editor.
If the file contains lines like these, replace the old database name with the new database name:
-- Database: `XXXX`
--
CREATE DATABASE IF NOT EXISTS `XXXX` DEFAULT CHARACTER SET utf8 COLLATE utf8_unicode_ci;
USE `XXXX`;
Then save the SQL file.
Import Database
Open the new MySQL 8 database in phpMyAdmin.
Import the previously exported and adjusted SQL file.
Adjust wp-config.php
Open the wp-config.php file again.
Adjust the values for database name, database user, database password, and database server to the new MySQL 8 database.
In the Control Panel, the database server for MySQL 8 is:
mysql80.local:3307
Save the file.
Then test whether your WordPress website works correctly.