How do I install WordPress at easyname?
You can automatically install WordPress through your web hosting package. For this, you need a paid hosting product with PHP and databases.
Table of Contents
Install WordPress in CloudPit
Log in to the CloudPit and open the desired web hosting package.
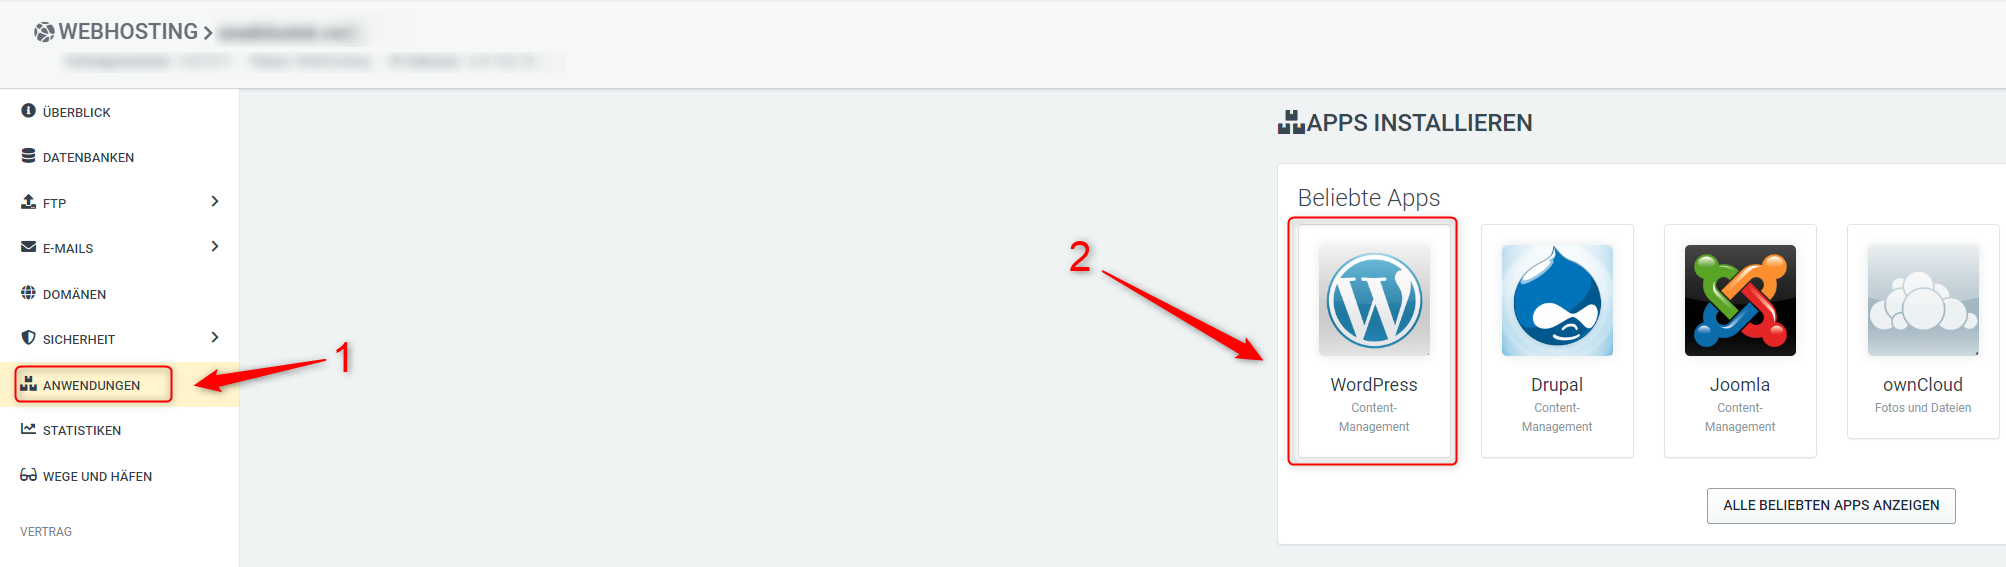
Open the Applications section on the left.
Select WordPress.
Enter the required information for the installation.
Select the desired domain and provide the admin email address.
The target directory is optional. Use it only if WordPress should be installed in a specific folder.
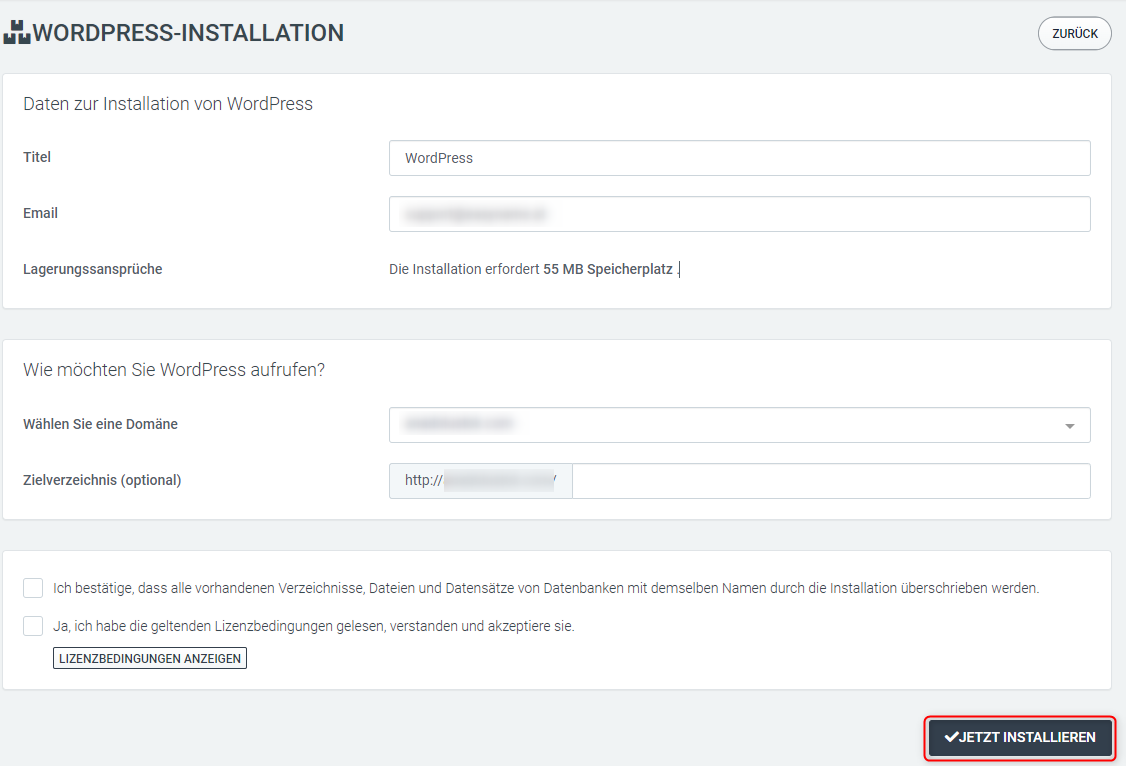
Start the installation.
The installation can take about 10 to 15 minutes.
After completion, the access data for your WordPress installation will be displayed. Save this data securely.
You can then access the WordPress backend via:
yourdomain.at/wp-admin
Install WordPress in Controlpanel
Log in to the Controlpanel.
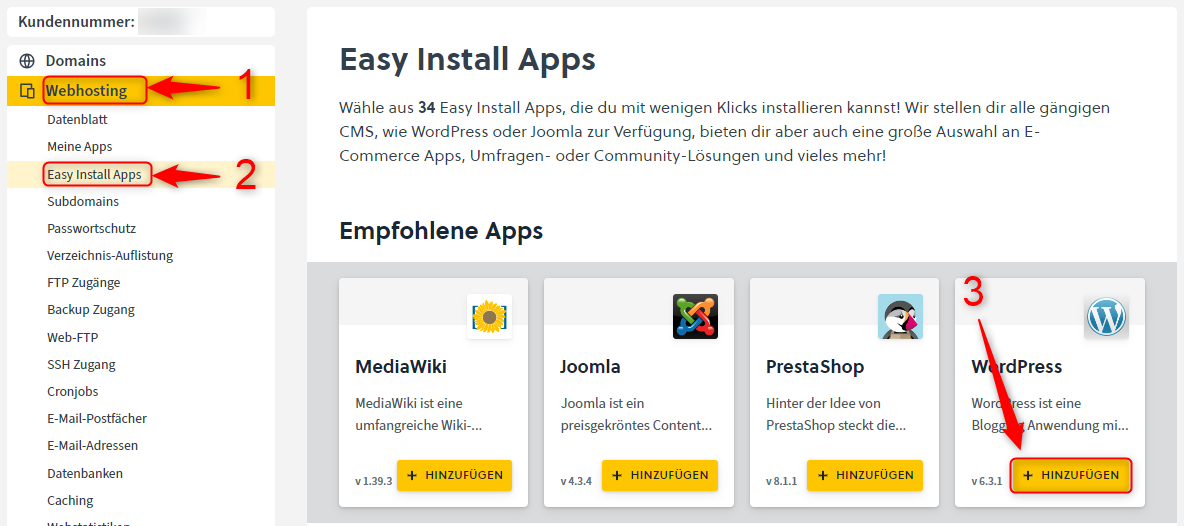
Open Webhosting → Easy Install Apps.
Click on + Add next to WordPress.
In the first step, select an existing subdomain or create a new subdomain directly.
In the second step, enter the settings for your WordPress installation.
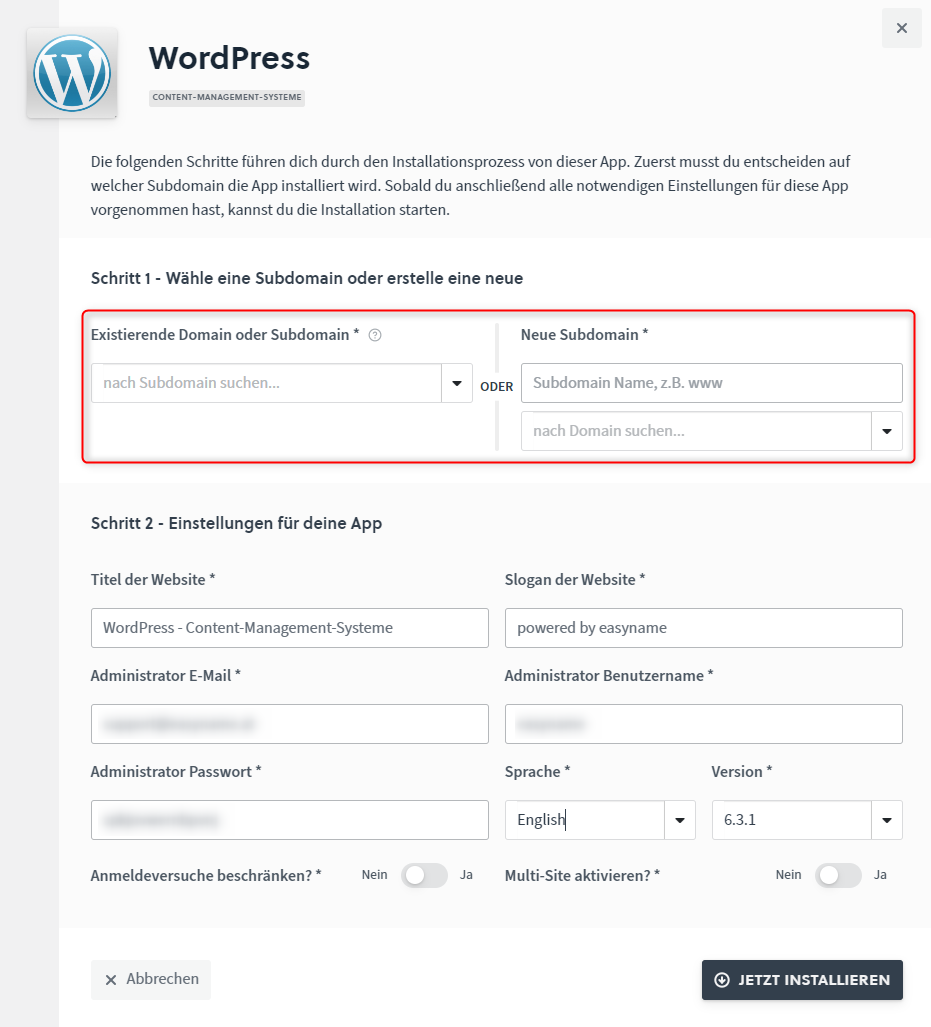
Click Install now to start the installation.
The installation can take about 10 to 15 minutes. You will be notified by email as soon as the installation is complete.
You can then access the WordPress backend via:
yourdomain.at/wp-admin
Alternative: manual installation
You can also install WordPress manually. For this, download the official WordPress package from wordpress.org, extract the files, and upload them to your web space.
The automatic installation is usually the simpler and faster option in most cases.